Role: Lead industrial designer responsible for usability research, ideation, ergonomic validation, mechanical interface form development, and final housing design in collaboration with mechanical and electrical engineering teams.
Focus: Re-engineered CIT/EM/CU, Human-factors redesign, usability workflow, ideation, prototyping
Contributions: Led ideation, prototyping, testing, and final housing design
Focus: Re-engineered CIT/EM/CU, Human-factors redesign, usability workflow, ideation, prototyping
Contributions: Led ideation, prototyping, testing, and final housing design
Background
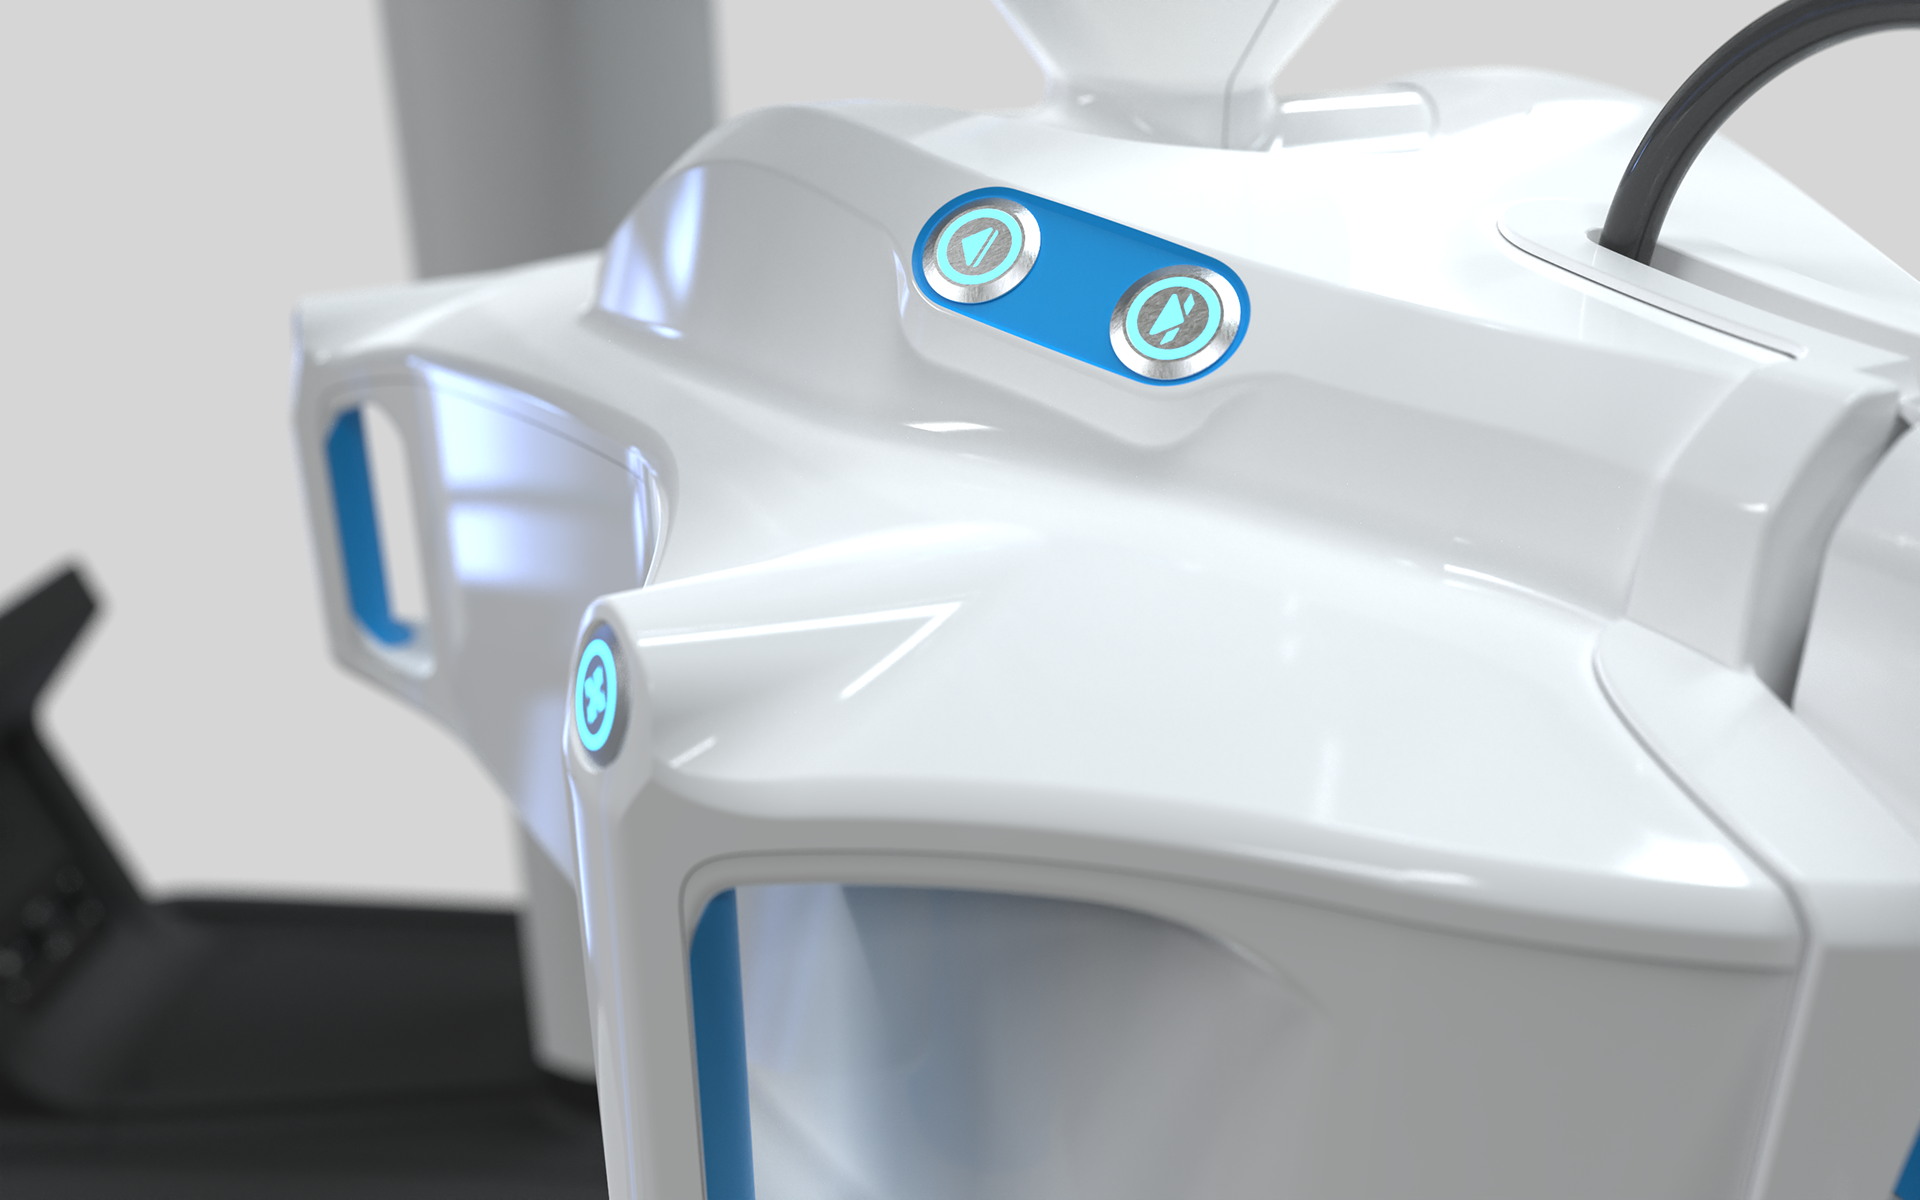
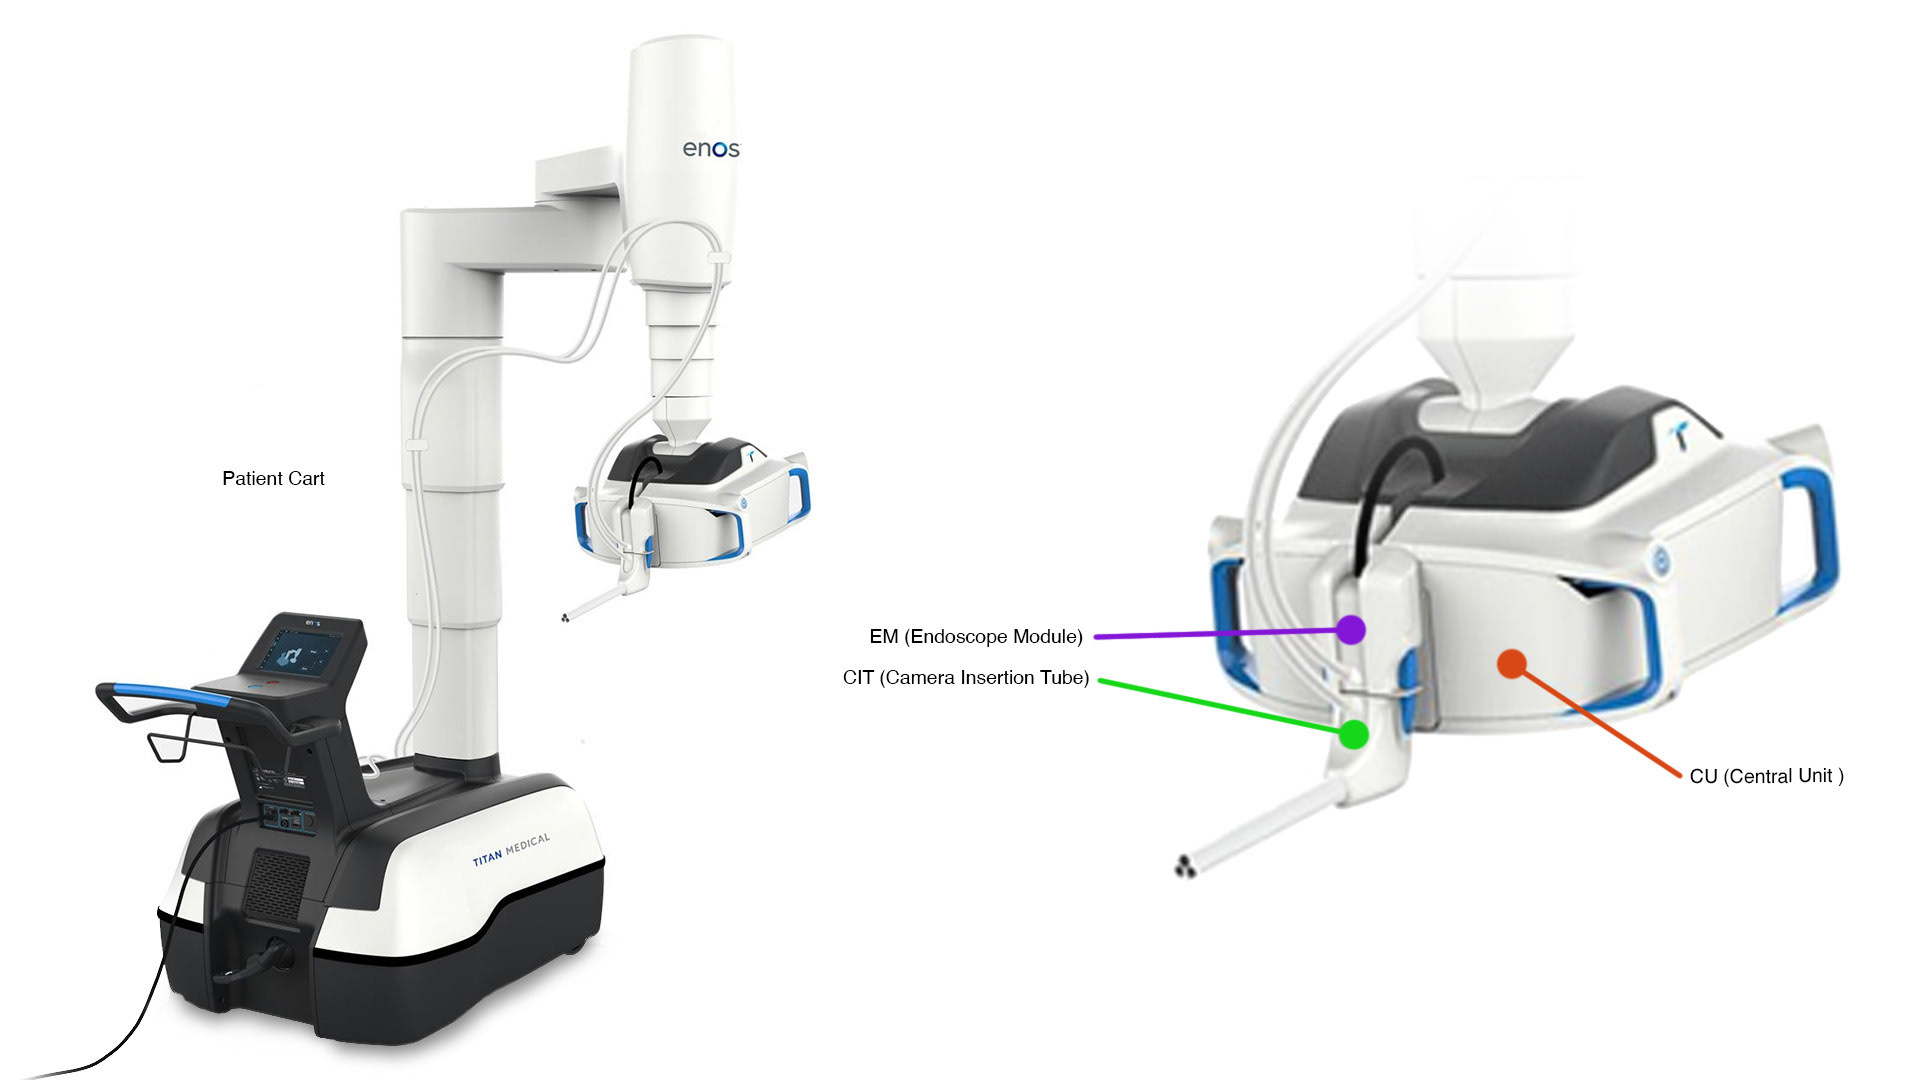
We partnered with Titan medical in 2020 and were tasked with re-envisioning the usability and ergonomics around Titan's flagship robotic surgery system. Testing of the original design revealed mechanical, ergonomic, and sterility issues within the system. These issues where particularly troublesome around the critical components; the EM (Endoscope Module) and CIT (Camera Insertion Tube). These components interface with the CU (Central Unit) which houses the mechanical components that hold and drive the endoscope and instruments.
System Overview
We started by helping Titan (and us) wrap their head around the entire system. To do this we staged a simulated case, or surgery, on a patient simulator set up in a sim lab. We ran through every step of the process from initial setup and pre-patient prep to clean-up and emergency scenarios.
After learning the process we distilled the steps into a flow chart and storyboard to better understand what was critical to the process and what wasn't.


Sim Lab Findings:
Docking and Connection - hard to attach CIT while inside the patient and the connection is loose and unreliable
Contamination risk - hard to drape and keep sterile brier's integrity while balancing packaging restraints
CU Reskin - the drastic changes needed to address the docking and contamination issues required a complete redesign of the CU housings
docking and connection
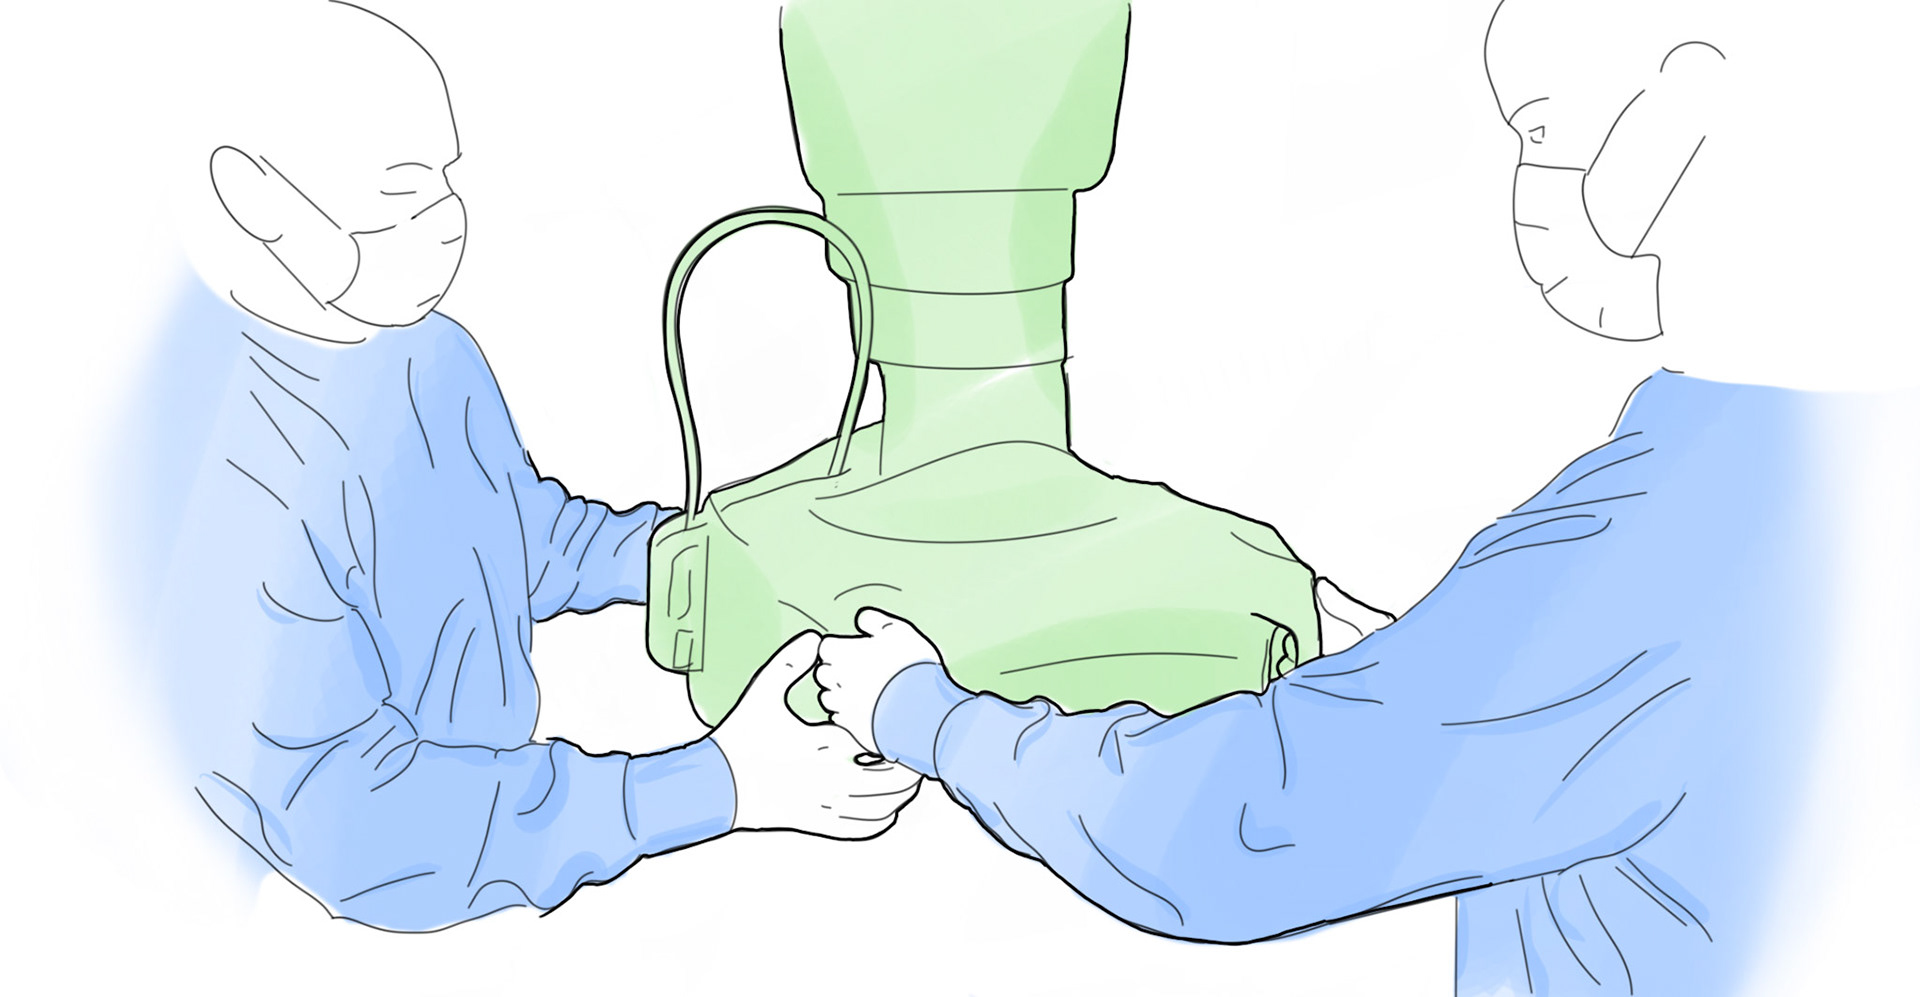
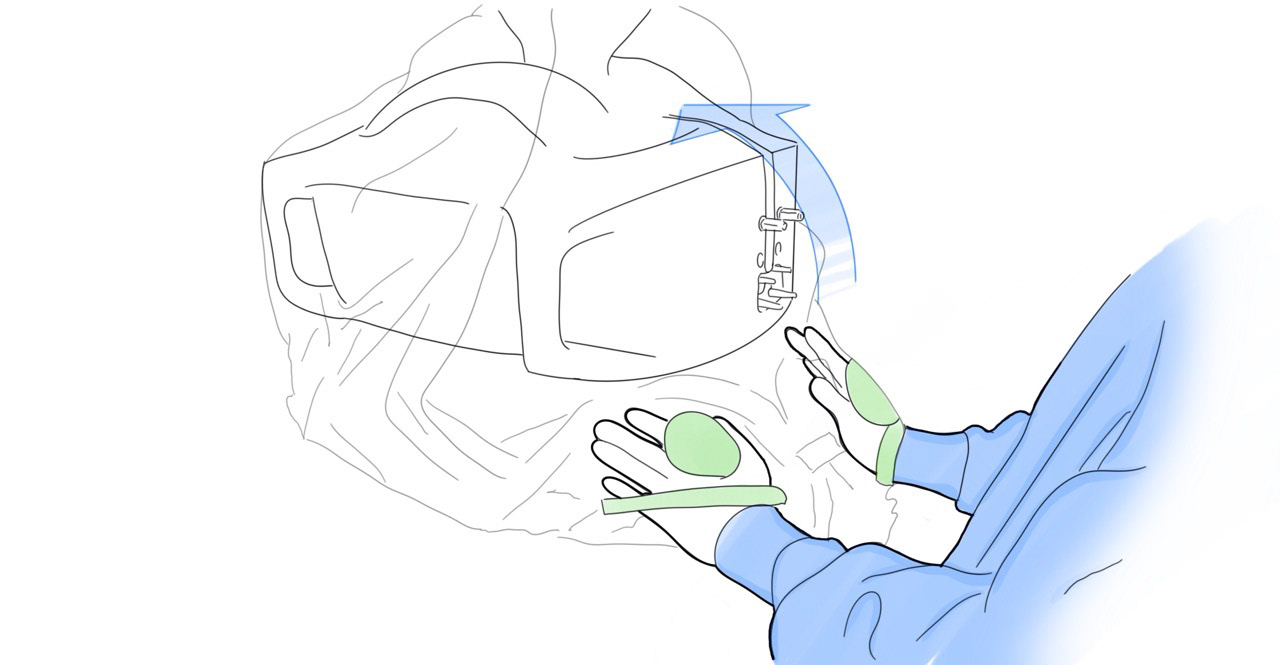
The biggest issue is with the CIT. Docking the CIT is done while it's installed in the patent and has been positioned by the surgeon to point directly at the target anatomy. Once in position, the CIT should not be moved. The CU and patient cart arm must be positioned to meet the CIT's location. This requires two people, The surgeon holds the CIT in place and guides while the assistant maneuvers the CU for docking.

Once docked and attached, the CIT and EM connection is loose and unreliable - the previous design relied on small posts to both locate and attach the CIT and EM. During use, both units are under considerable stress and would flex and shift during a case. Not to mention the latching mechanisms had little to no positive feedback
Solution:
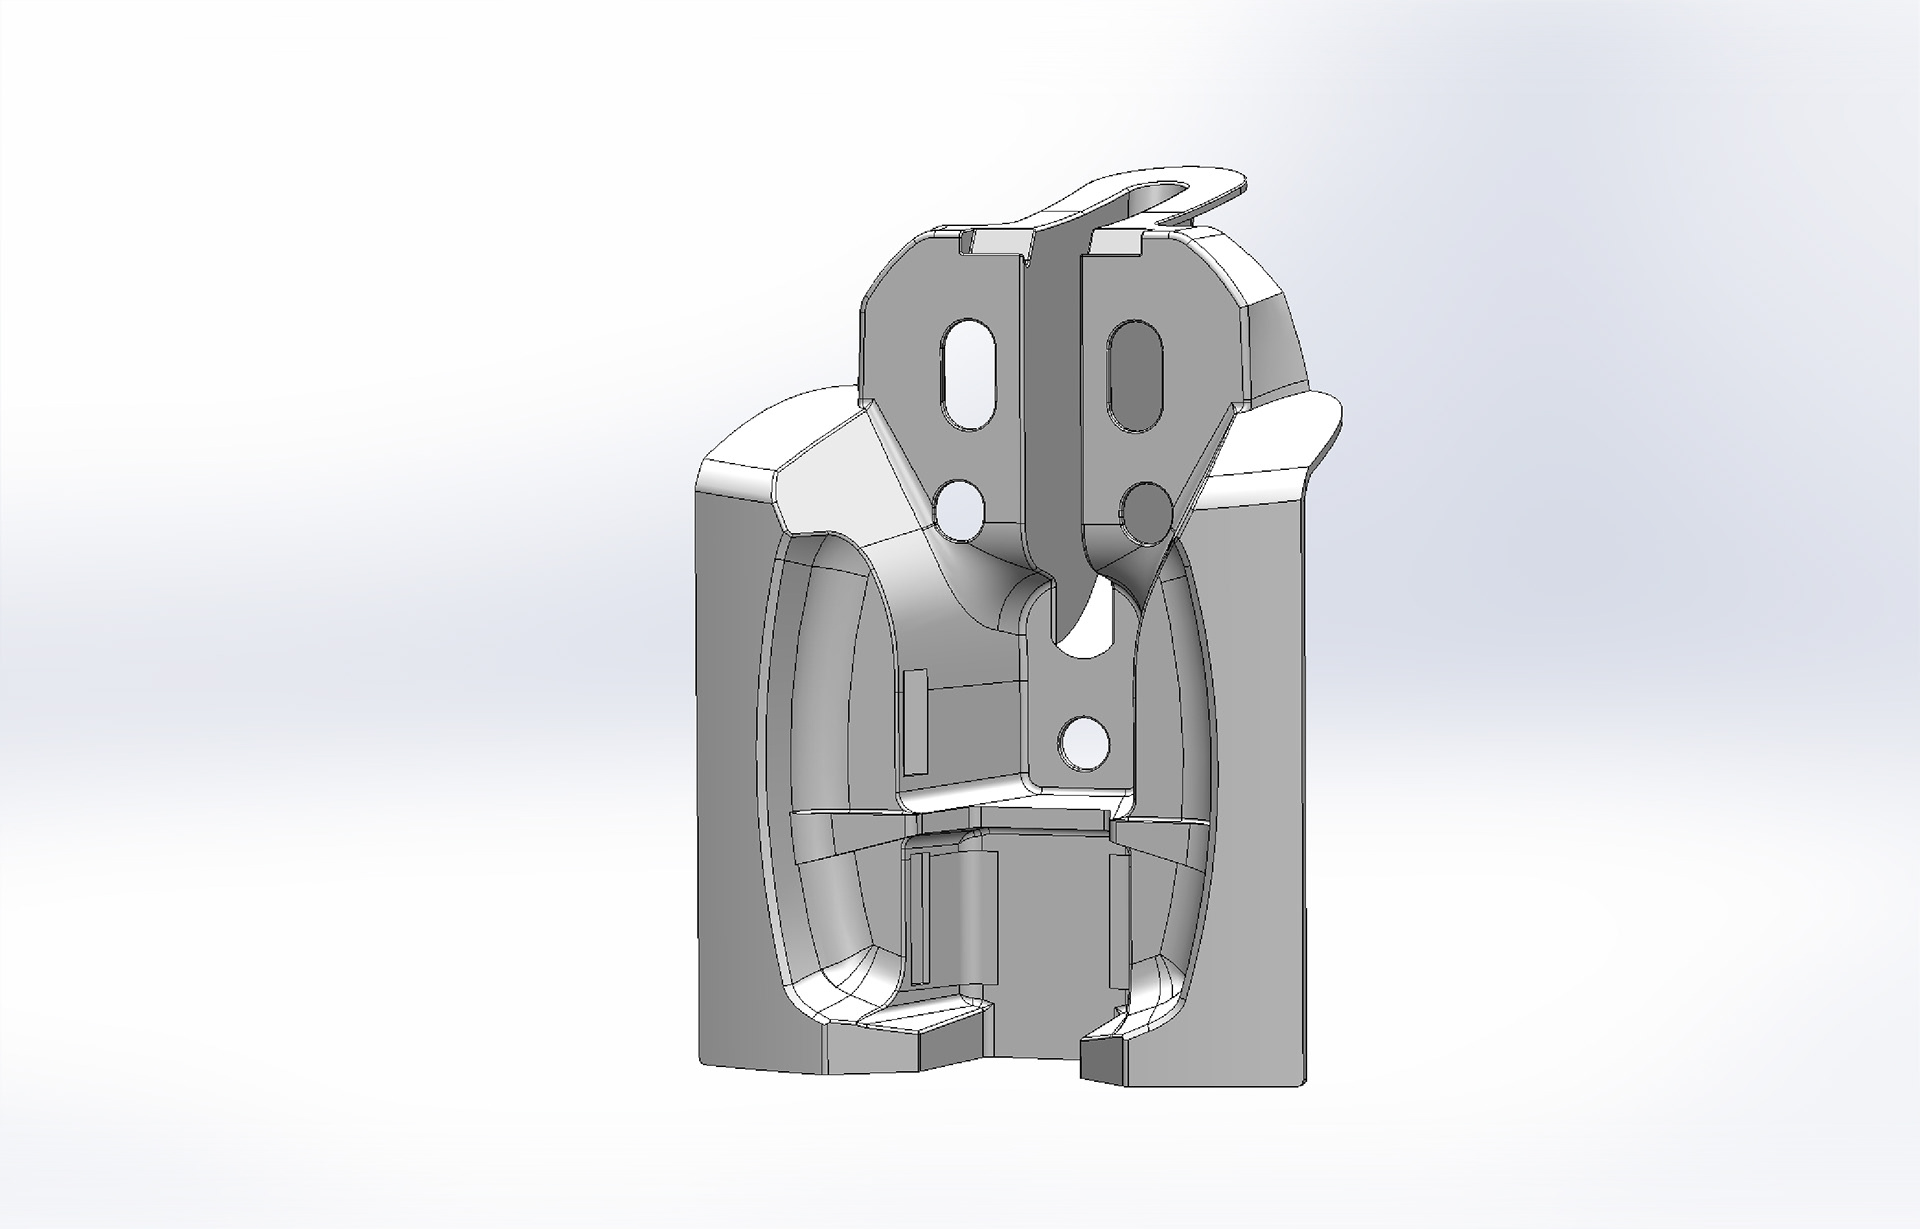
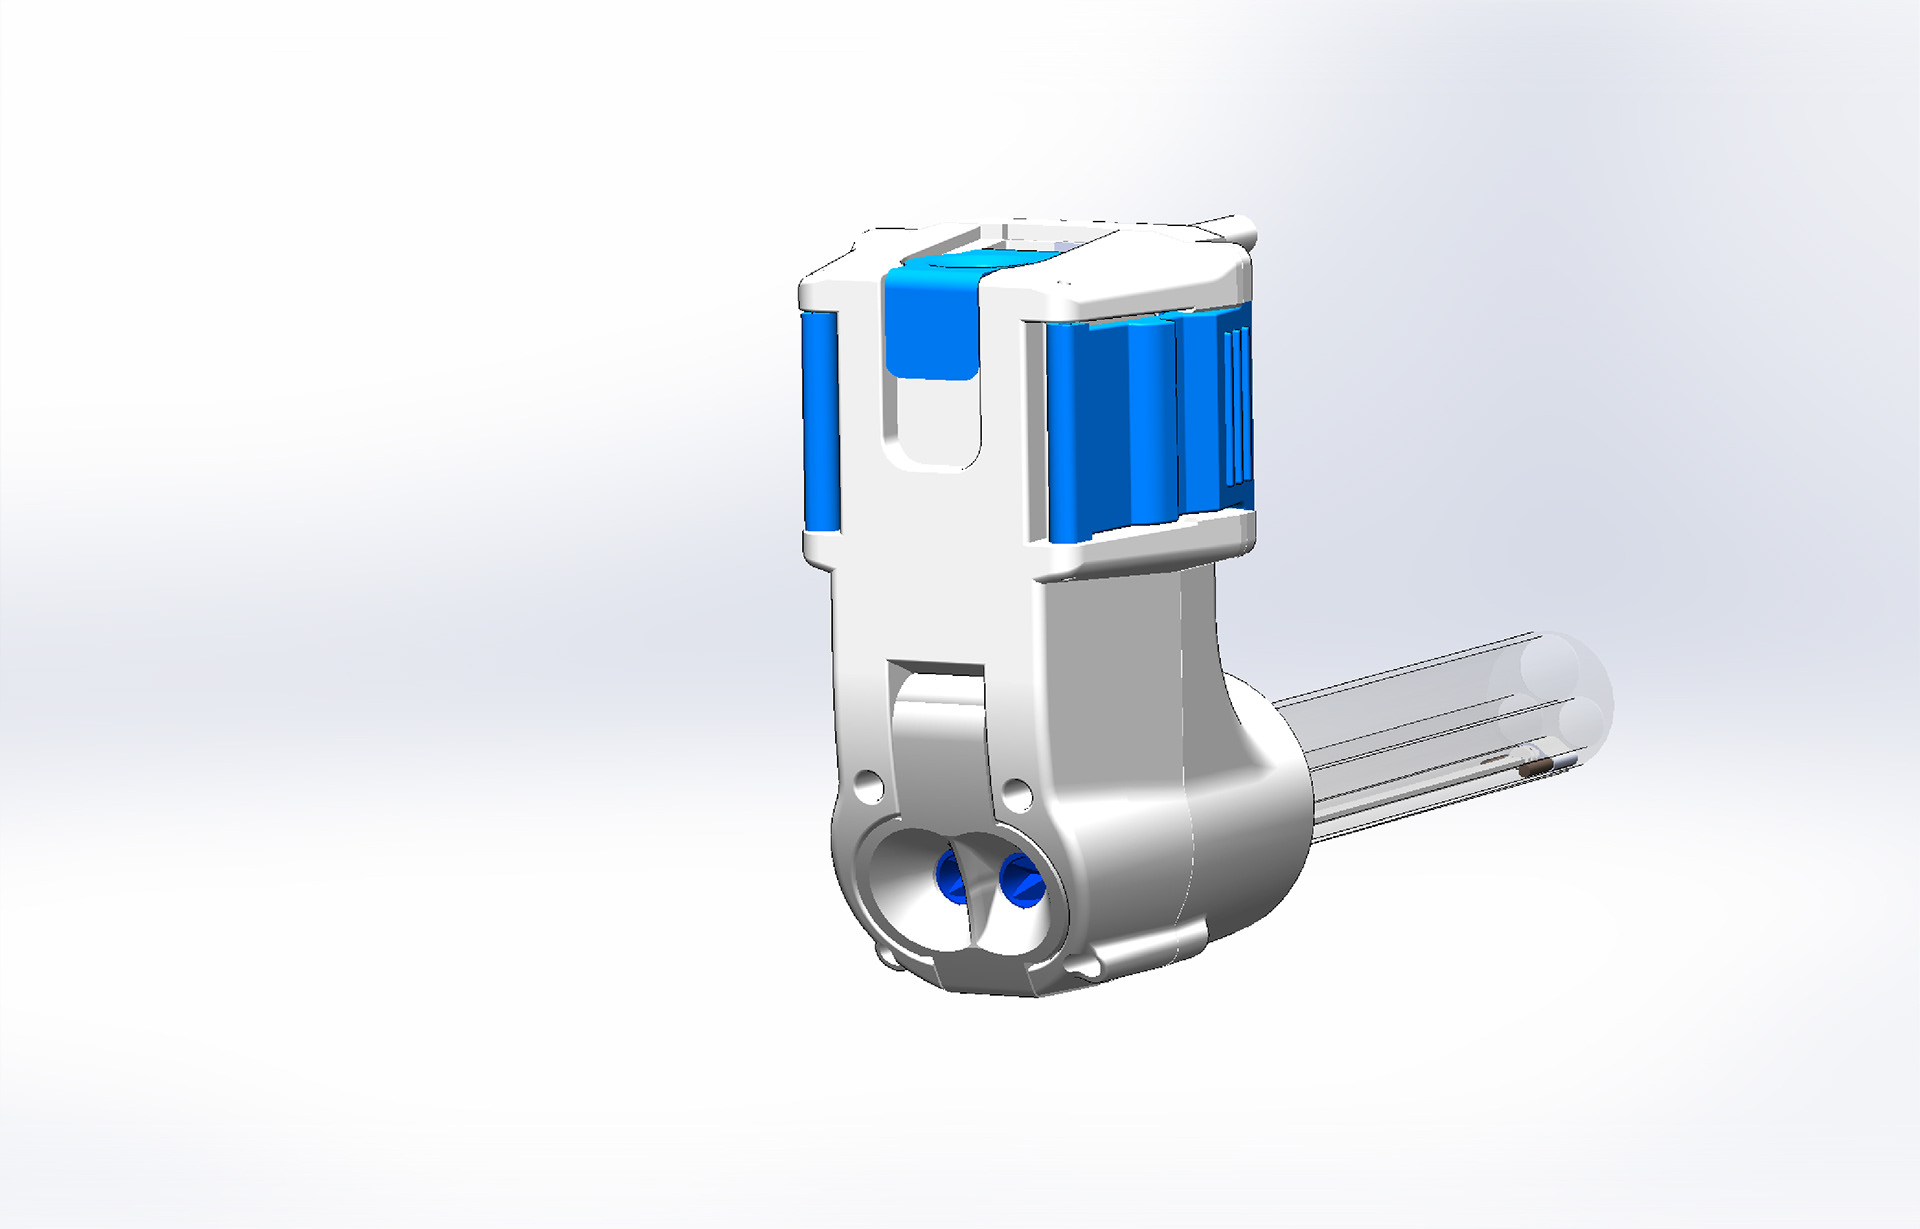
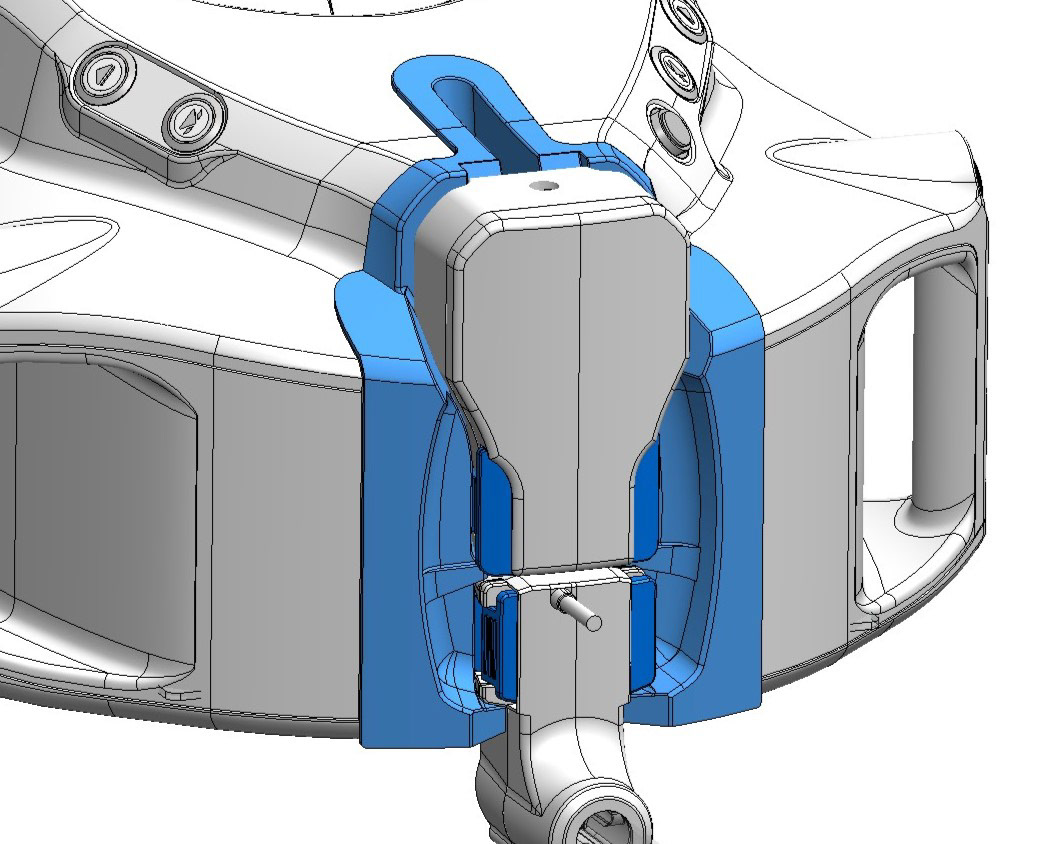
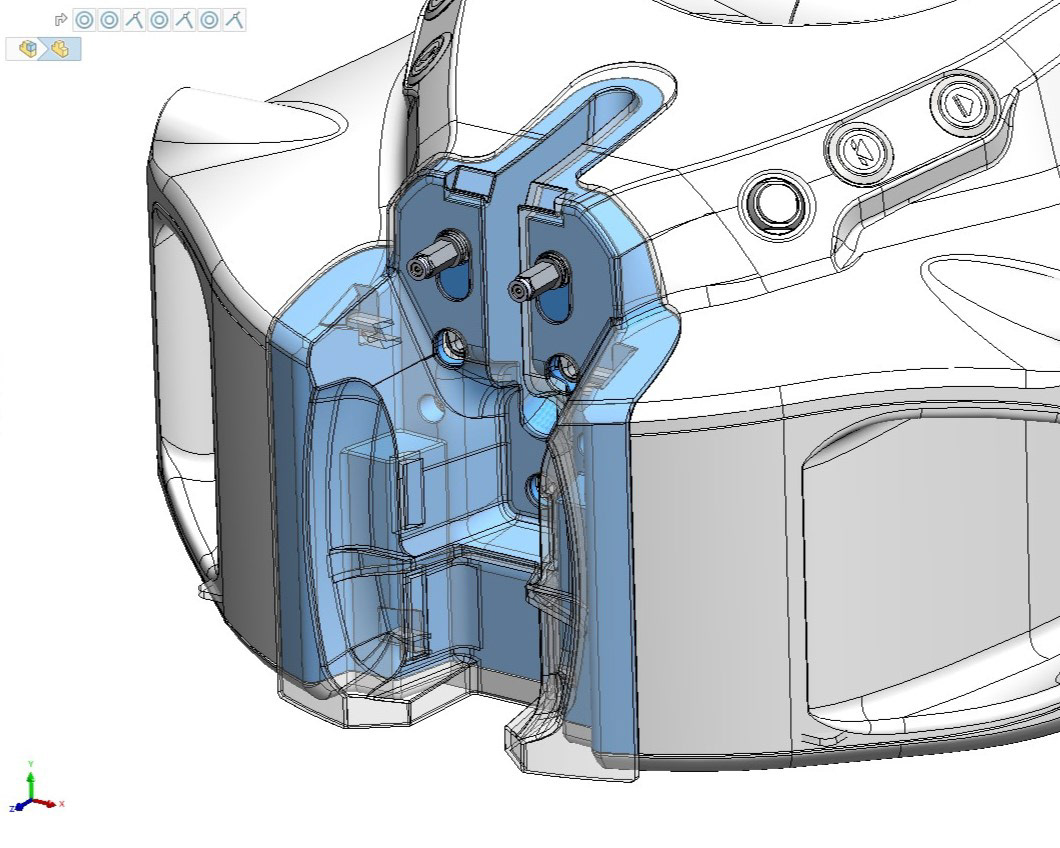
It became apparent that we would need to redesign the entire CIT/EM/CU interface. To achieve the level of ease and speed needed when attaching the CIT and EM we designed robust lead-ins into the form so the parts self-align and clip into place with minimal effort while making a secure connection.
To test this theory we CNC machined a mock-up of the CY front volume and bolted on a myriad of designs for the interface until we finally found the right balance of ease and secure connection.
Contamination risk
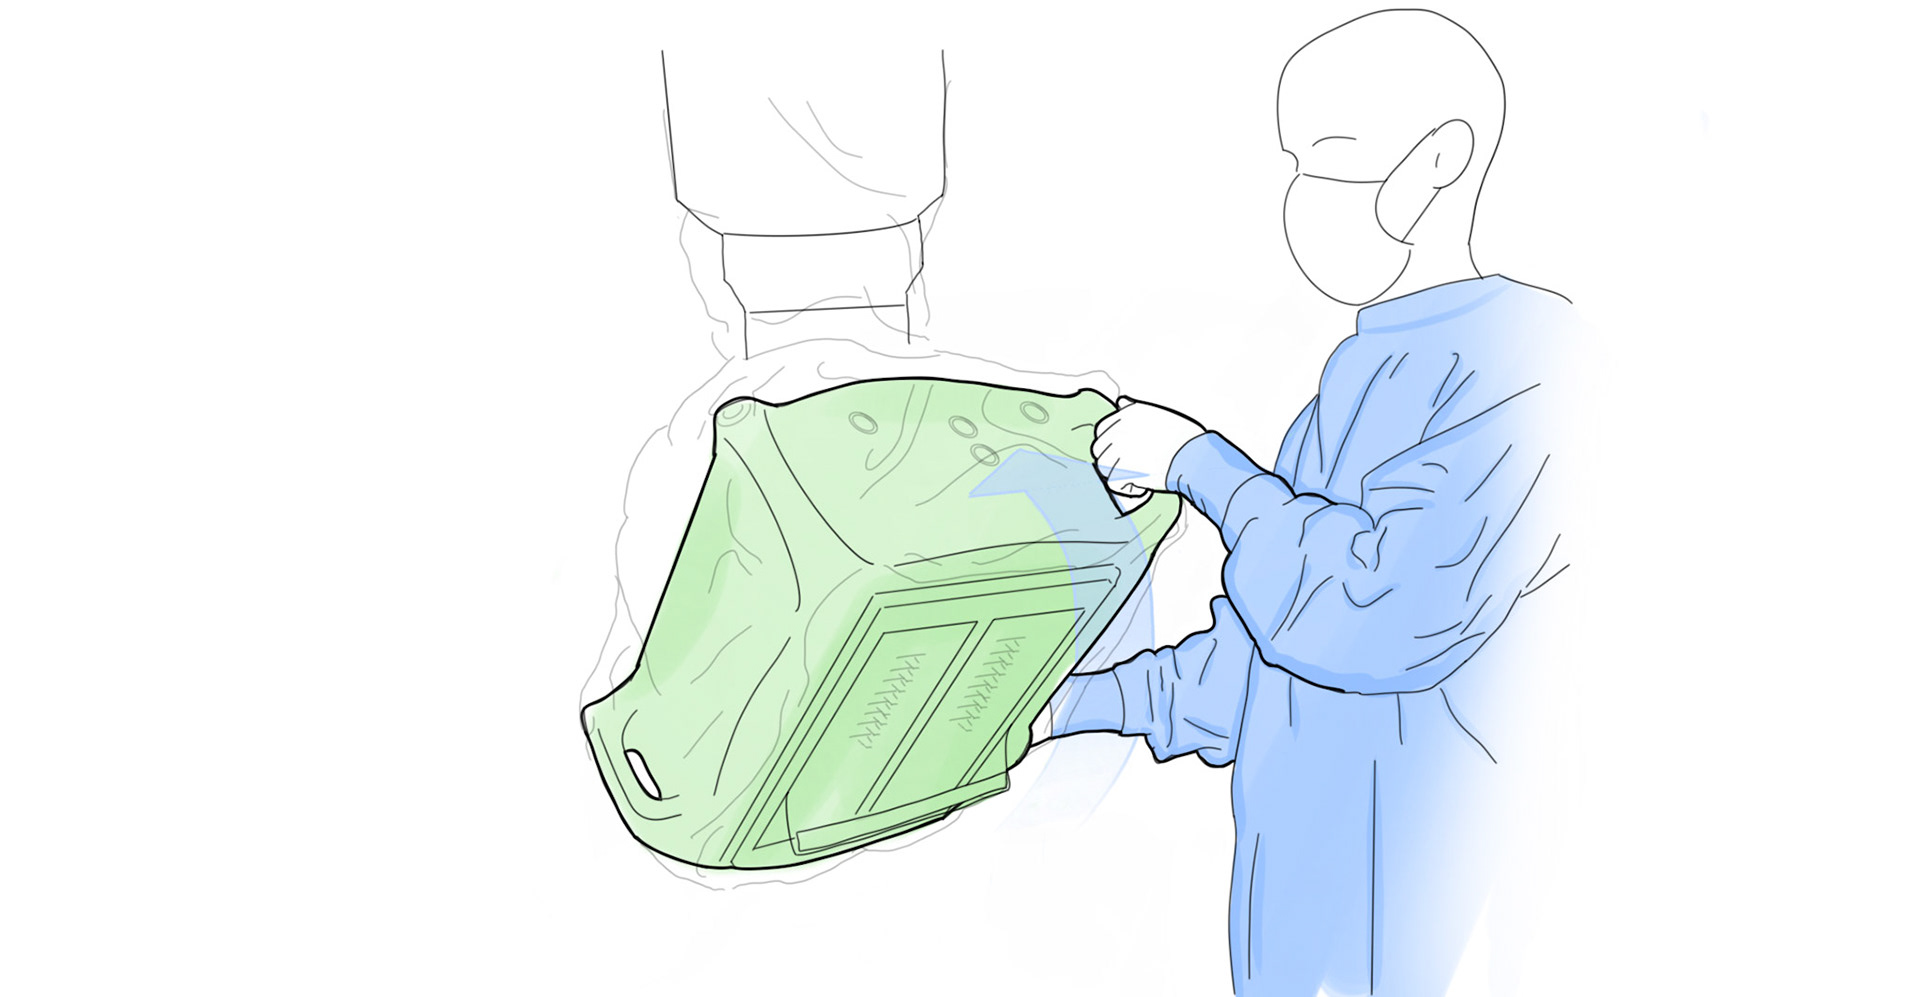
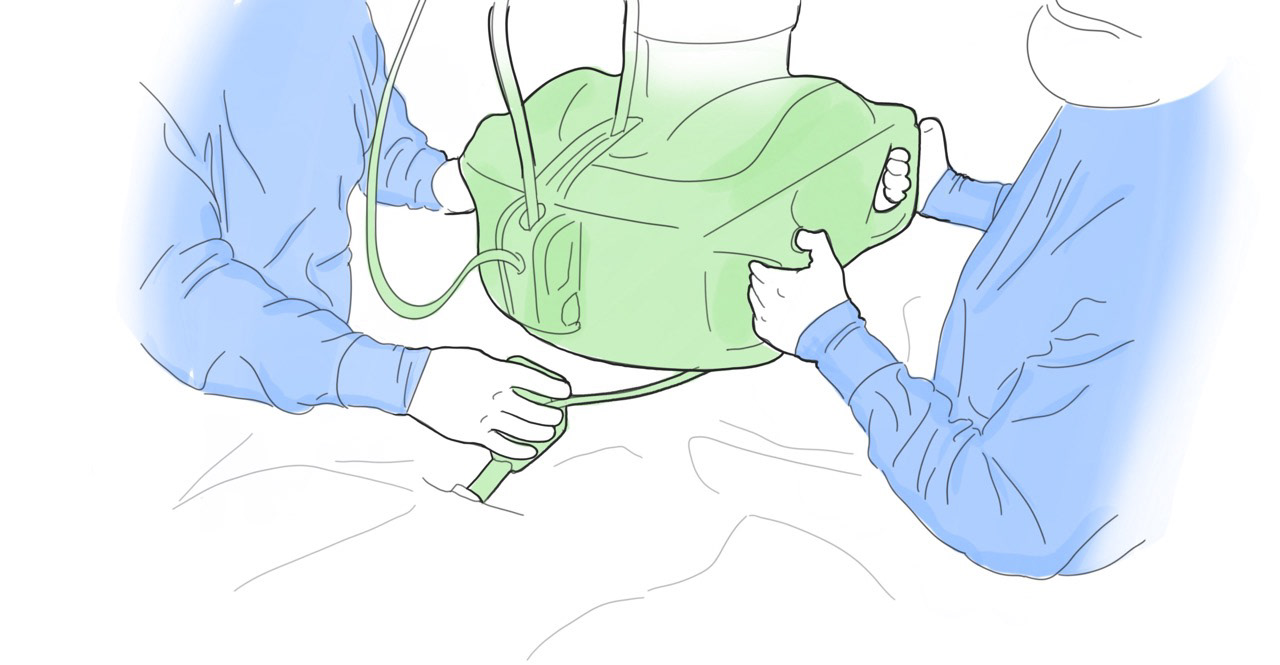
Another challenge we faced was maintaining a sterile barrier around the connections for the CIT and EM. The current design was hard to drape and keep the sterile brier's integrity while balancing packaging restraints. We found that there was a significant risk of contamination when installing the CIT and EM using a flexible sterile barrier.
Users were likely to brush the wrong side of the plastic sheeting on an unsterilized component or another user while installing it around the CU.
Pull drape over front of CU
Install endoscope sleeve
Remove roller and mount post covers
Solution:
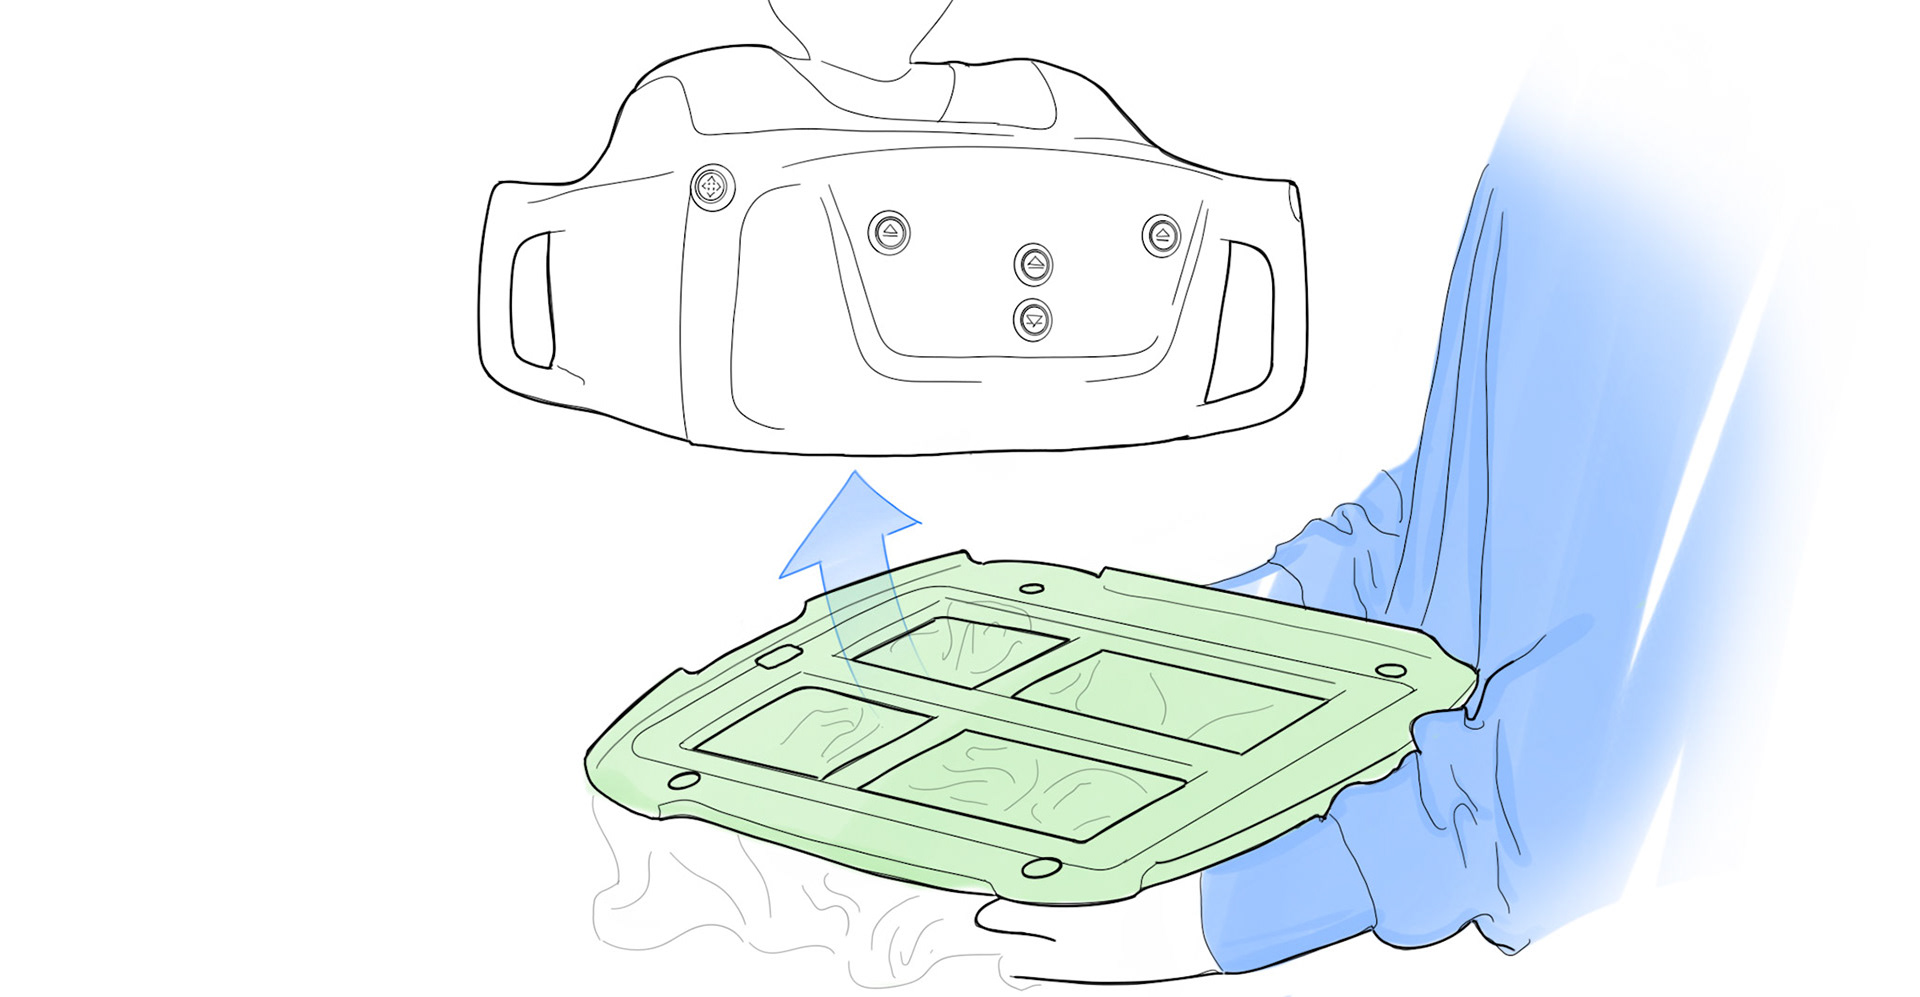
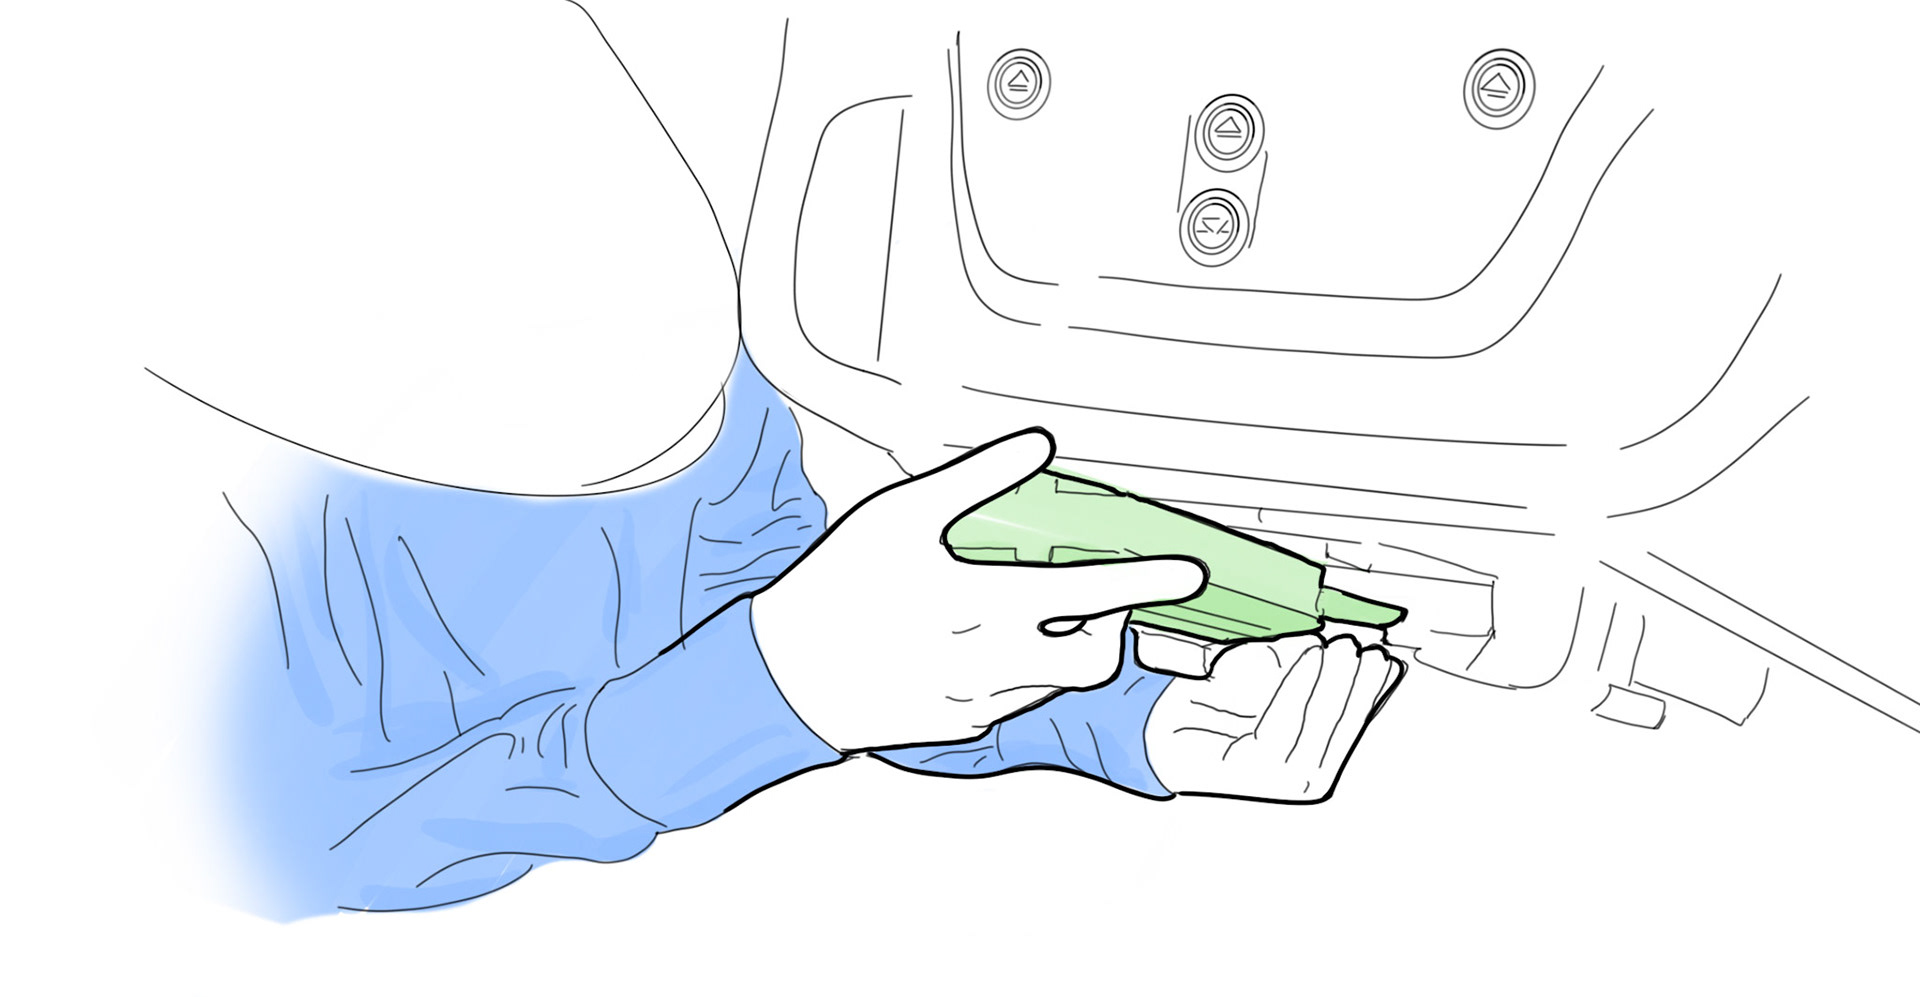
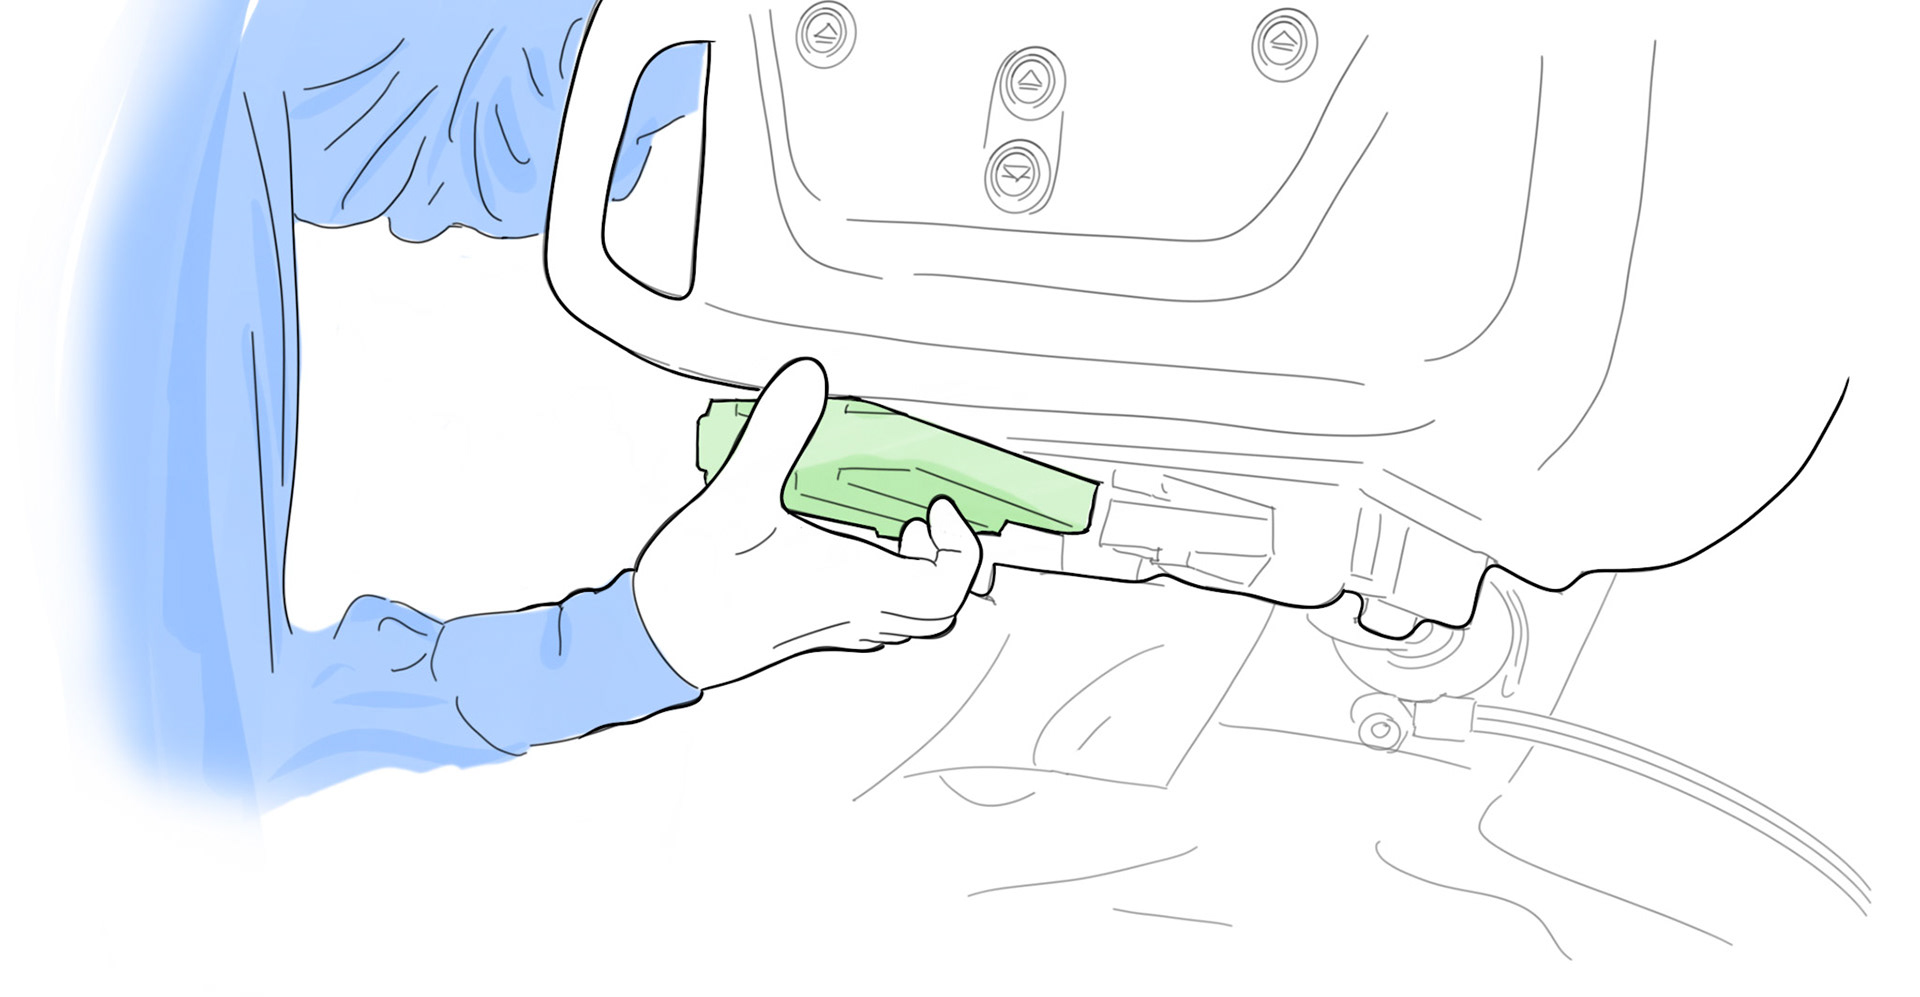
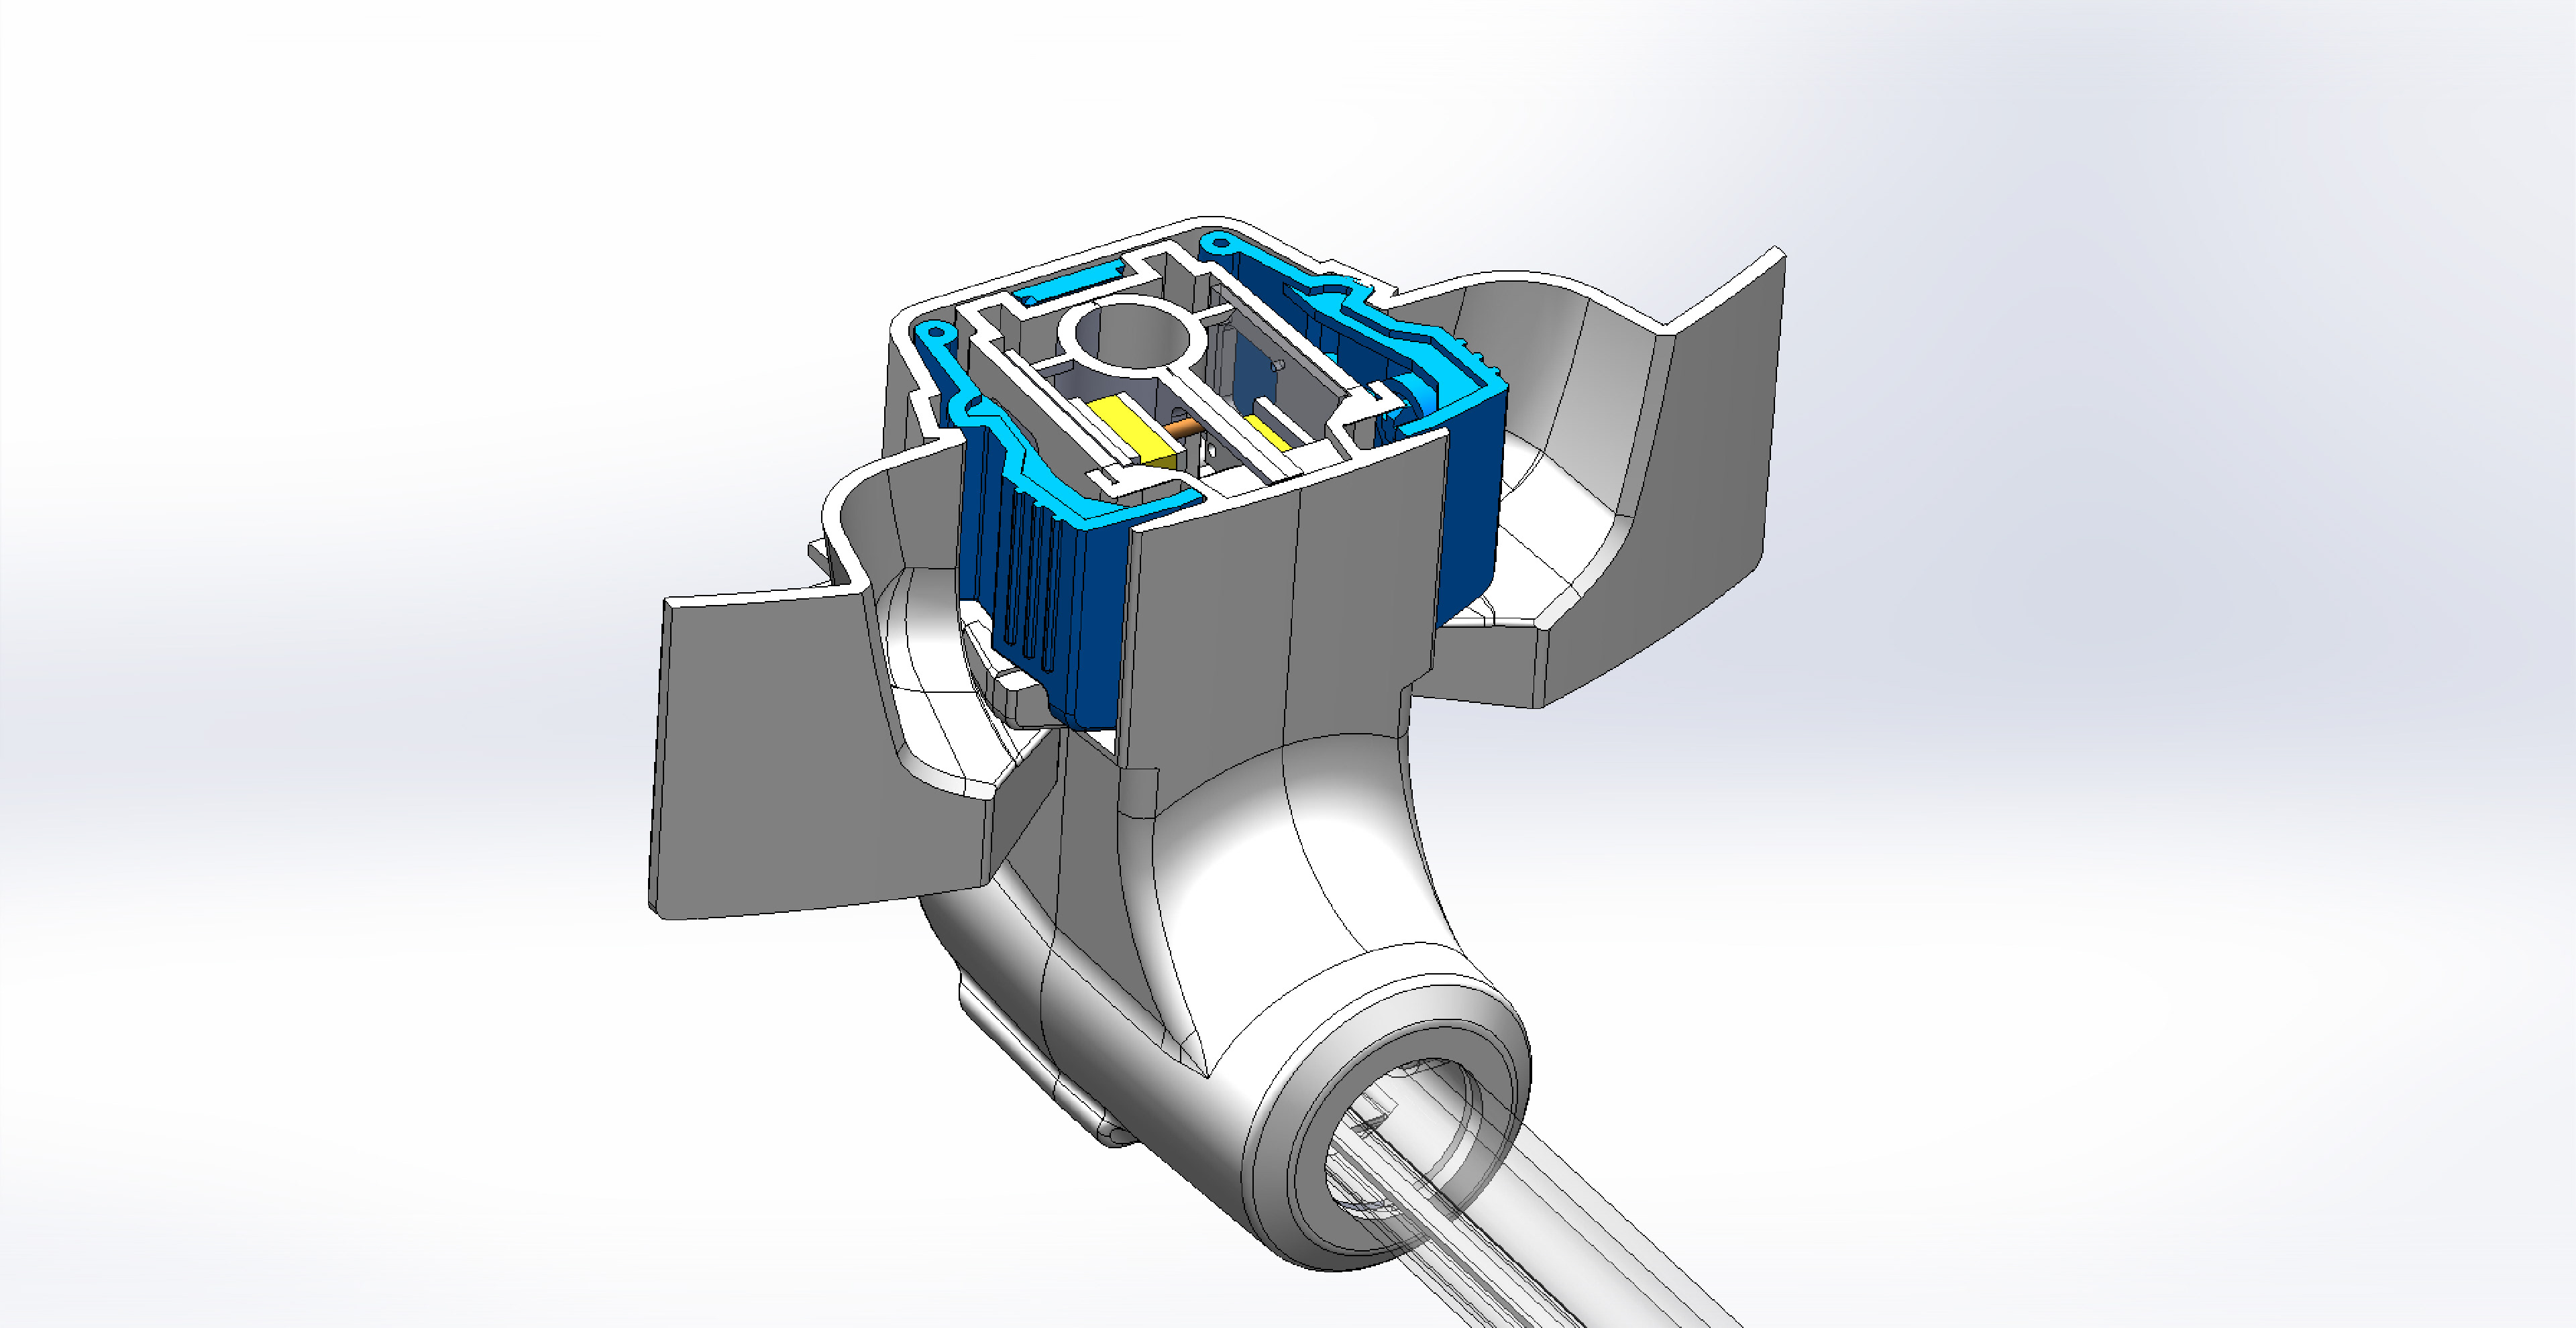
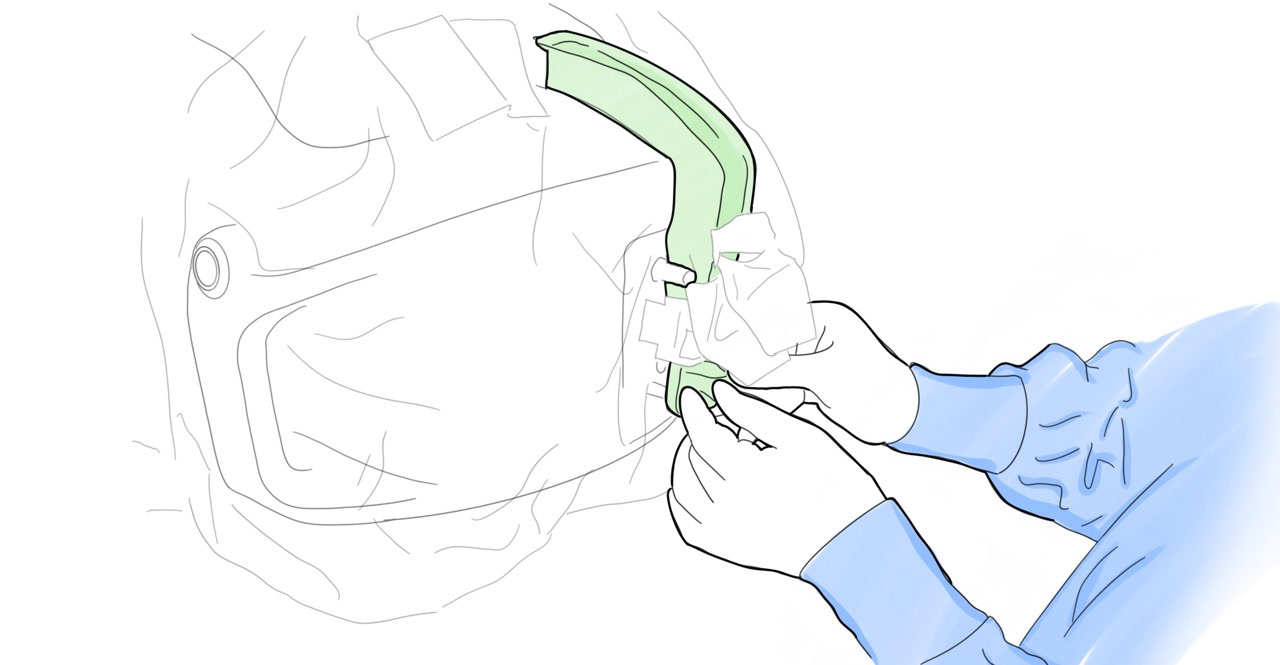
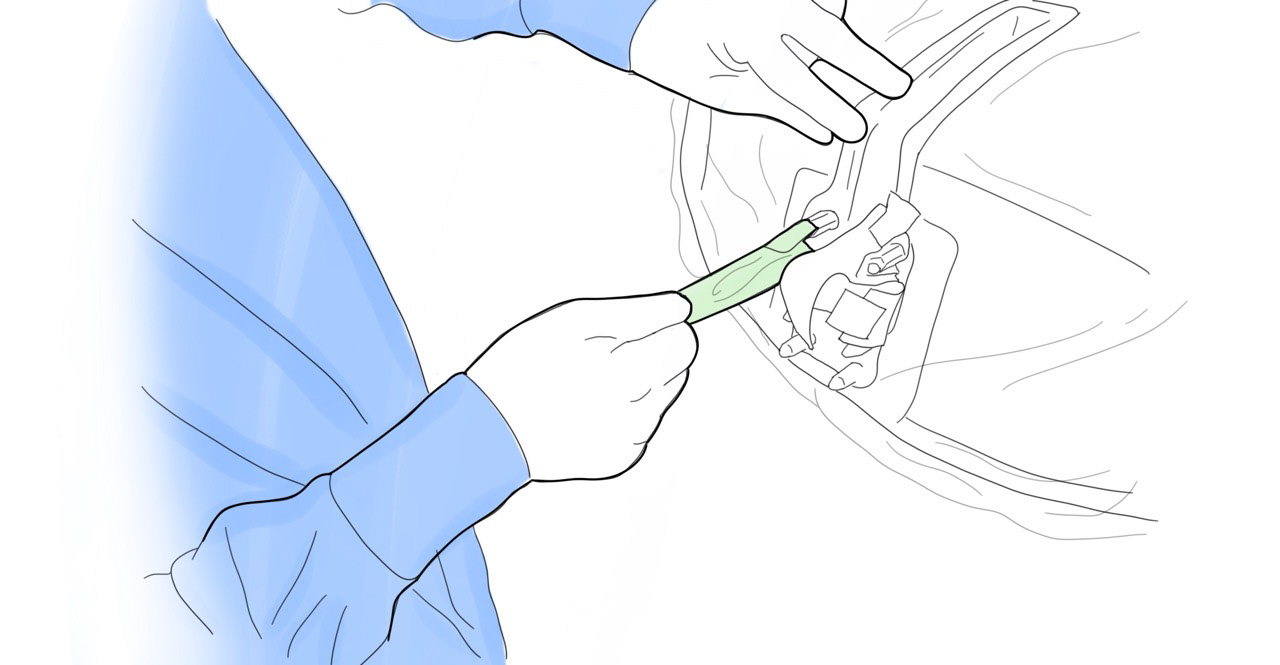
The most elegant way to avoid this risk was to build the improvements from the docking and connection into a rigid disposable part built into the sterile barrier that robustly attaches to the CU skin.
This part would be both a means to seal the complex geometry between the components and a functional part of their attachment rendering the devices useless without it.
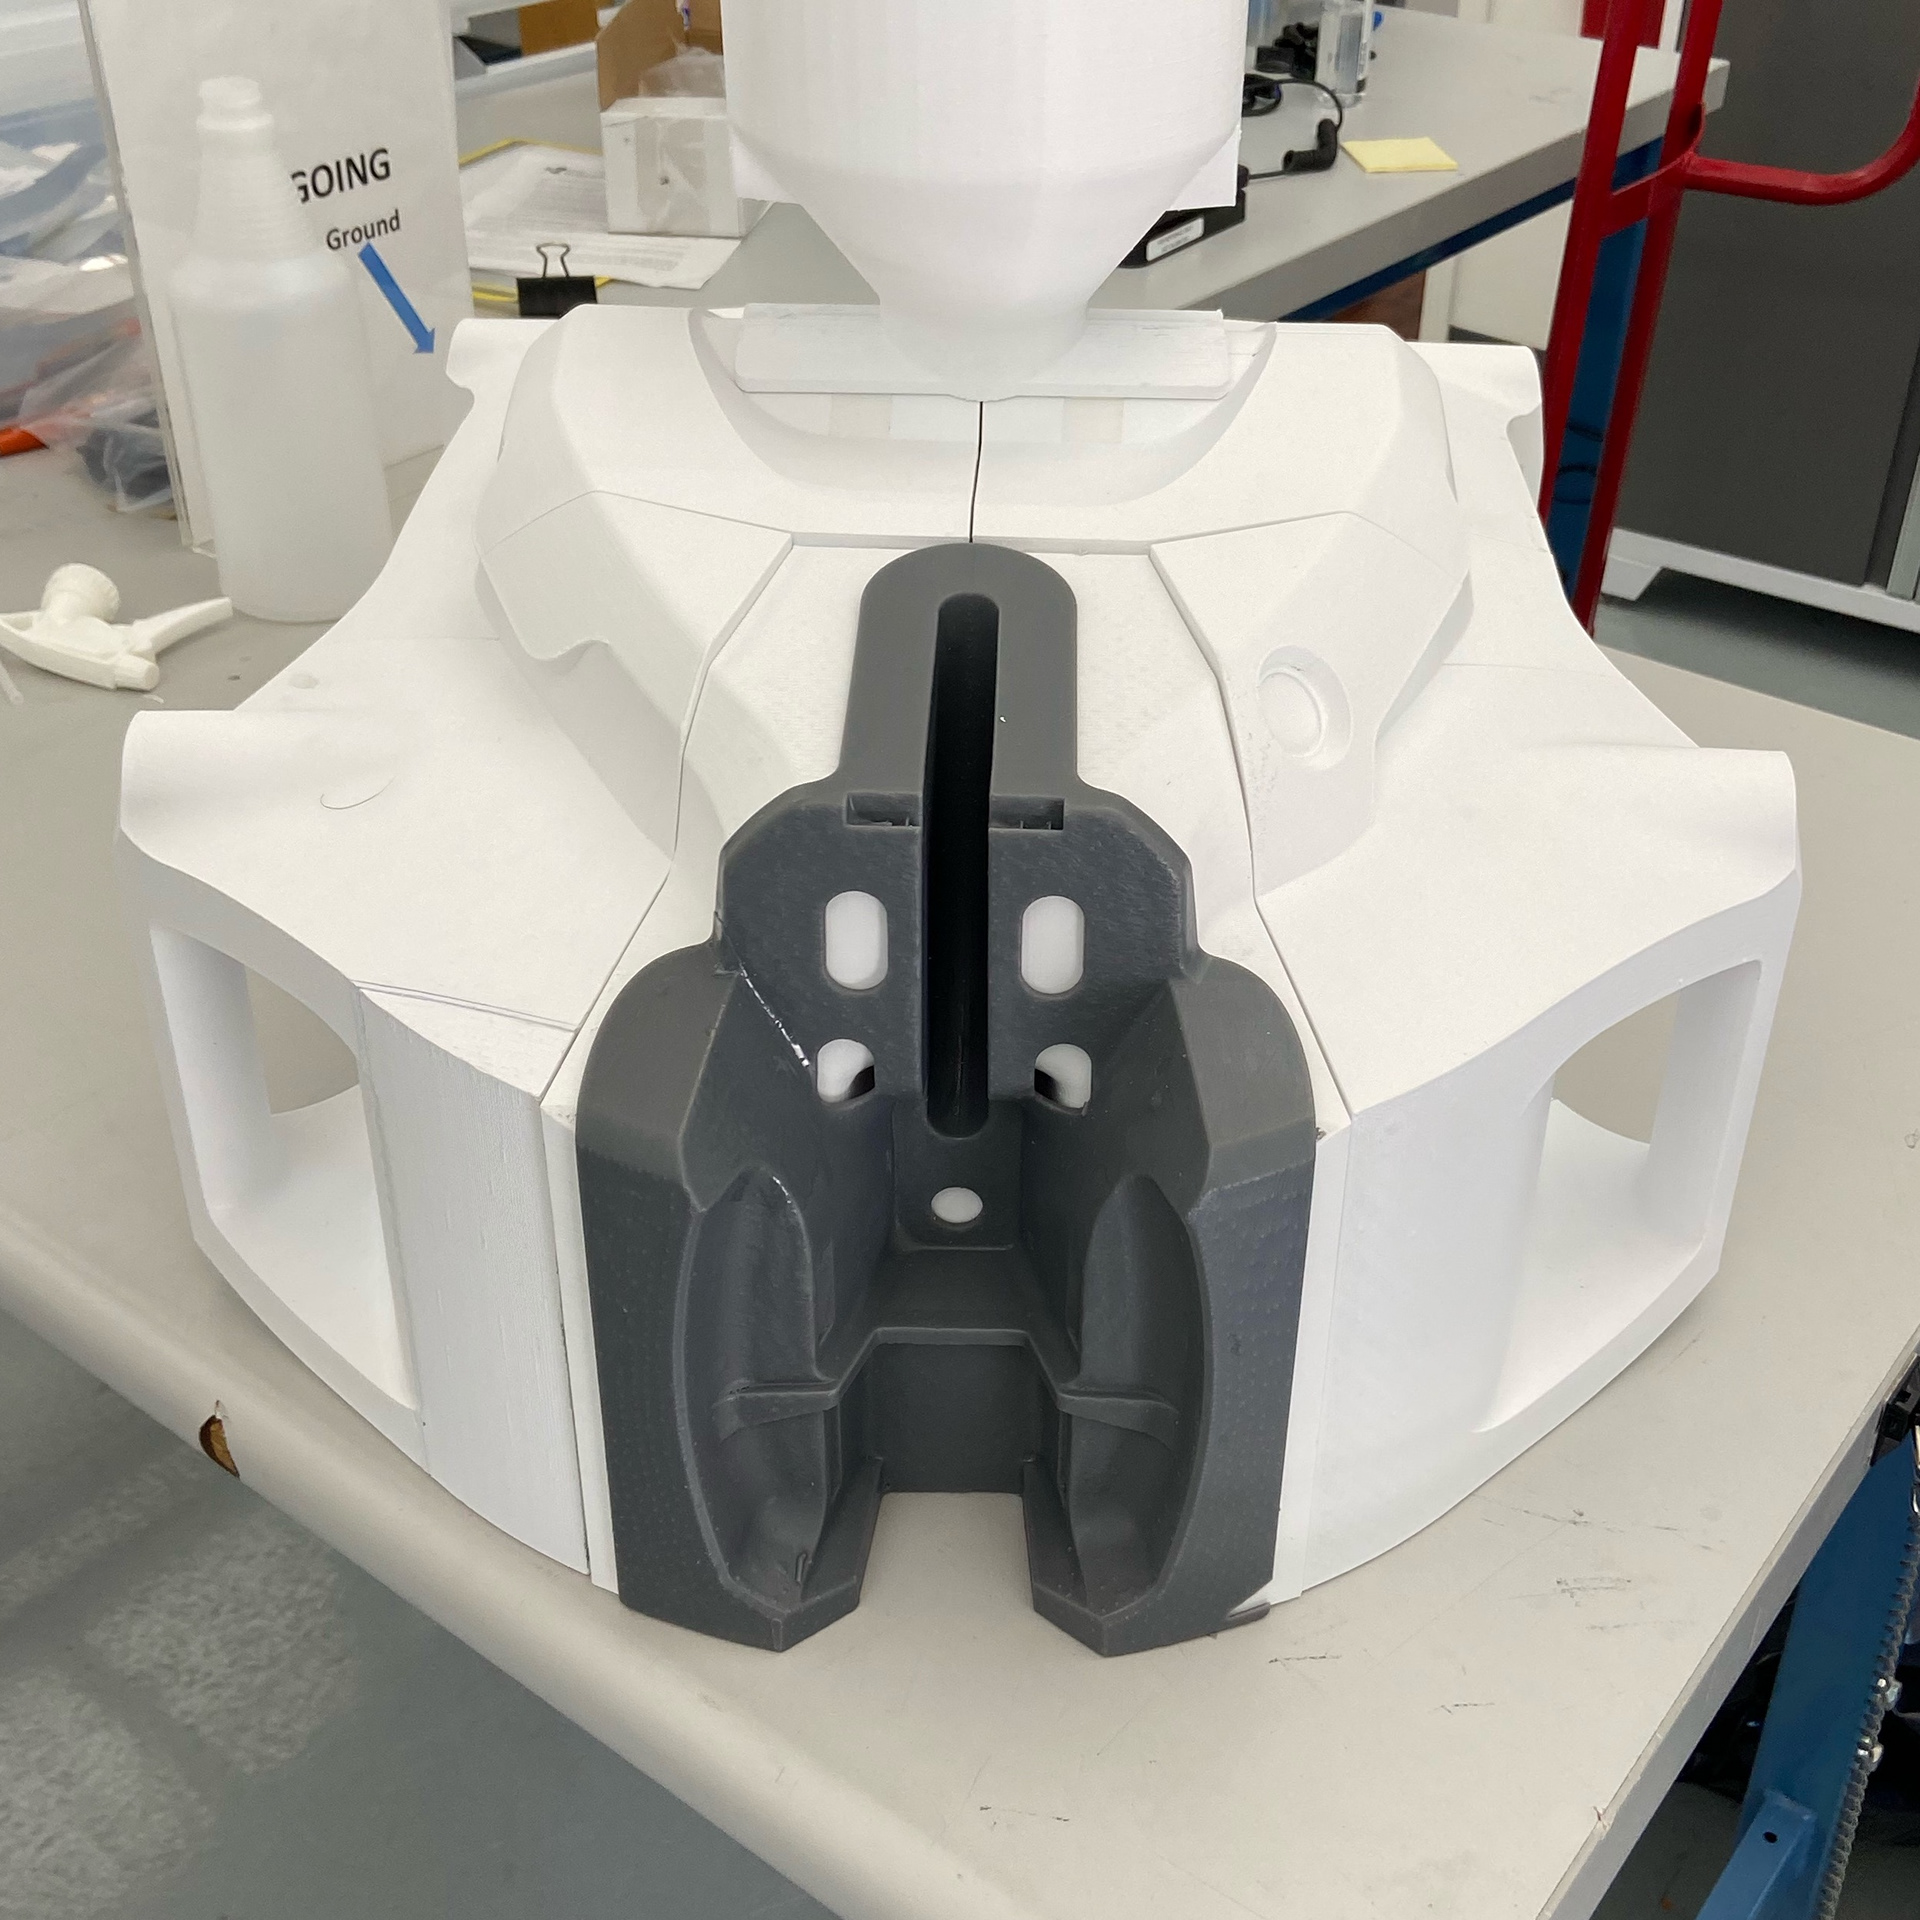
CU VOlume study with sterile barrier prototype attached
CU Re-skin
Since we were overhauling the most critical parts o the system it made sense to reassess the housings and make other improvements. The instruments were too short, making it difficult to achieve all the necessary articulations. The only way to fix this was to add 100mm to the length of the instruments. This necessitated adding length to the frame and housings as well.
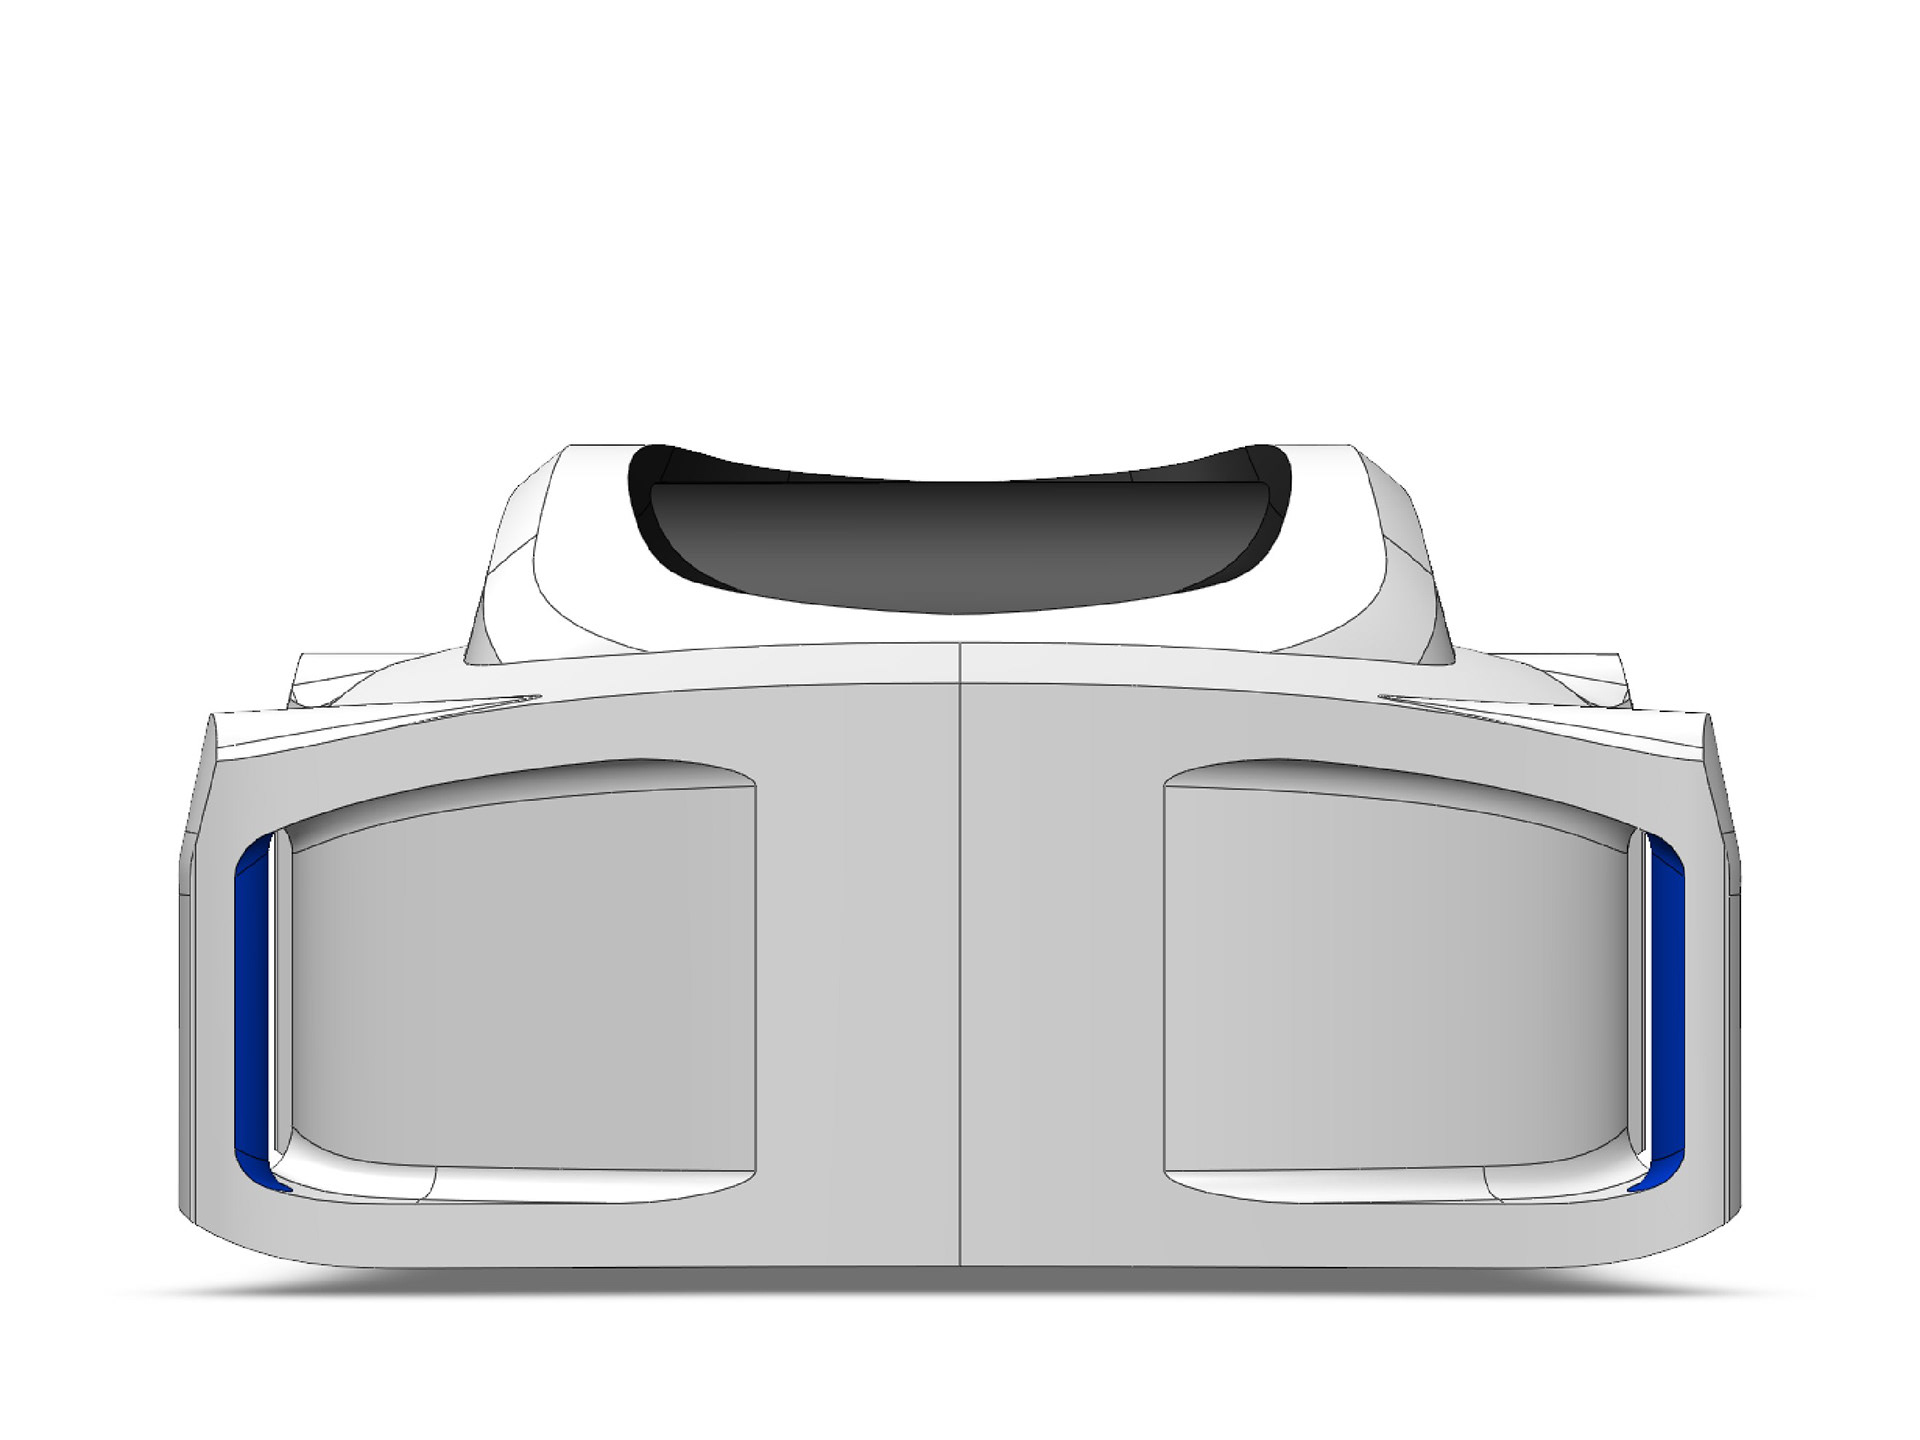
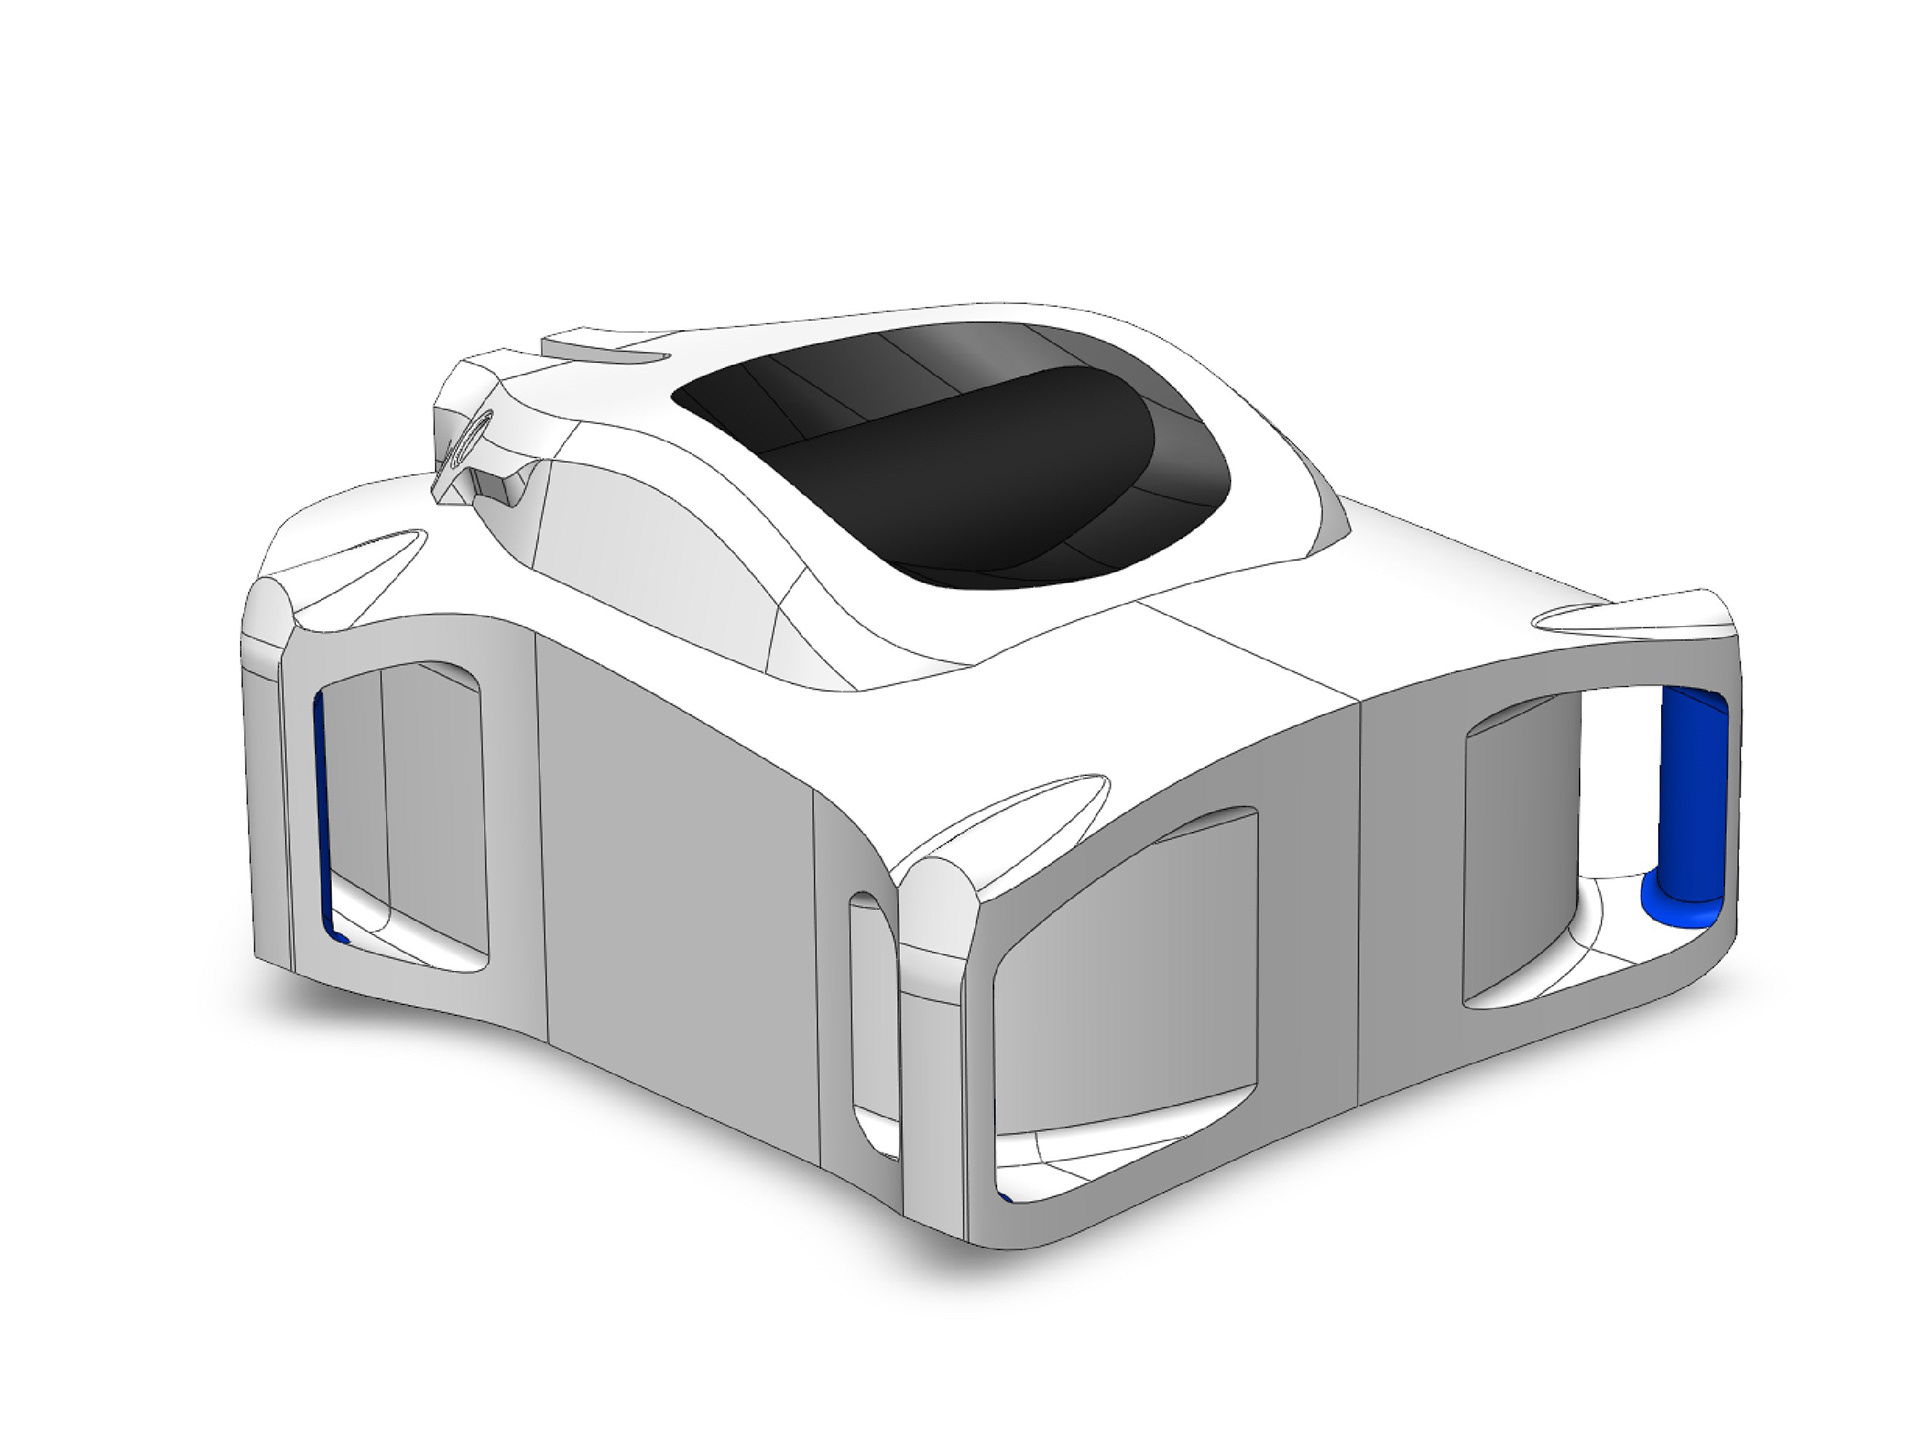
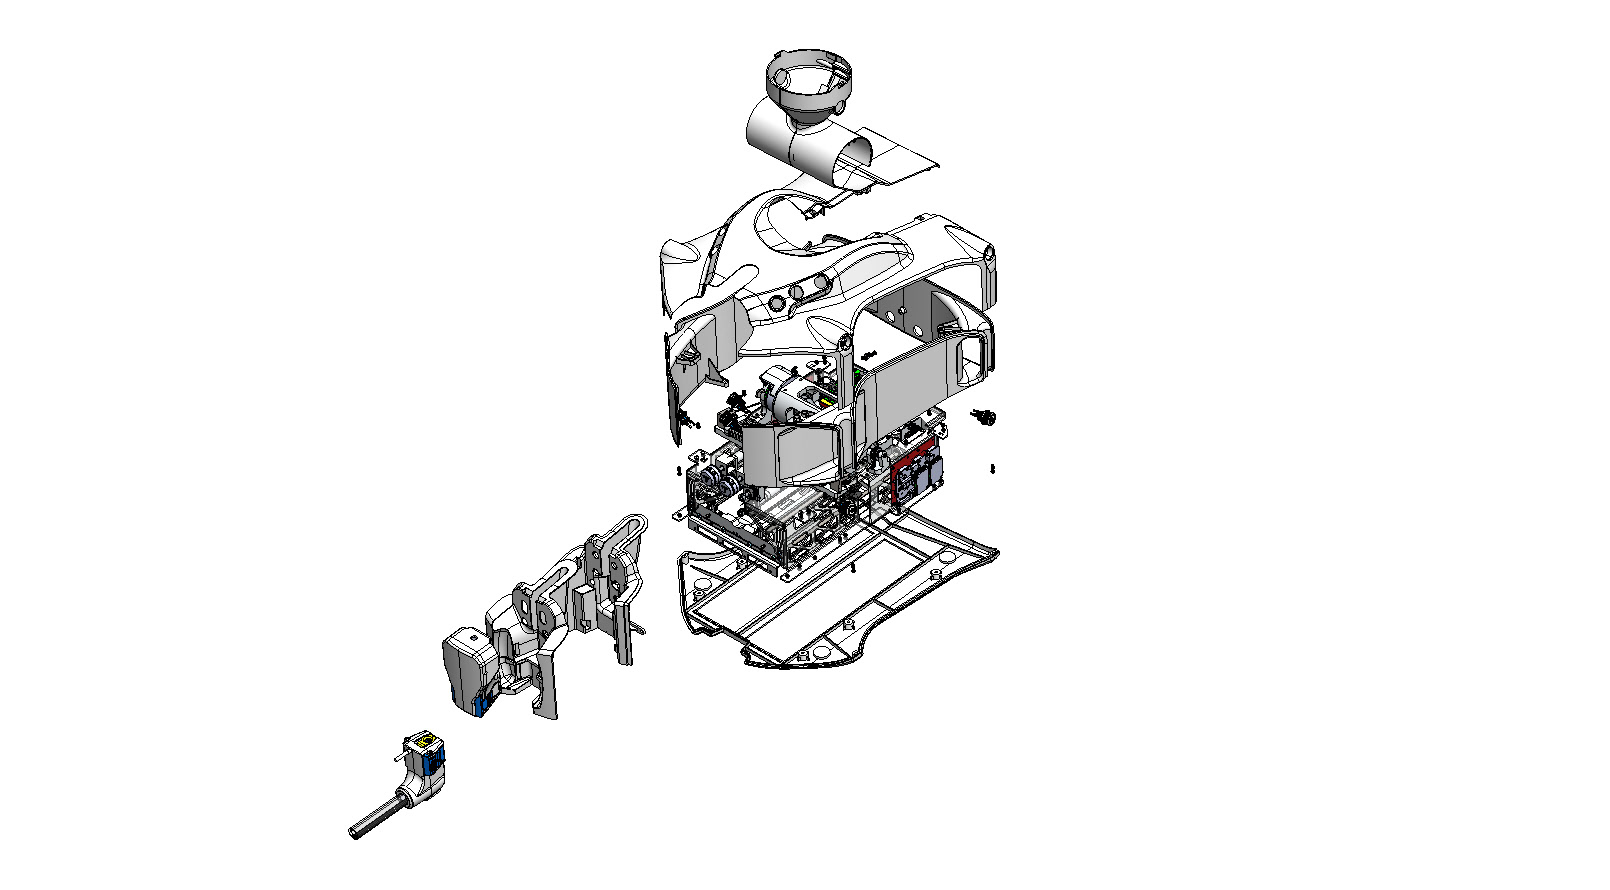
We began by lengthening the frame to provide the new volume, then added in the new CIT and EM interfaces. I used this basic geometry to ideate around the skin forms that integrate all of the new changes and handhold placements.
ideation
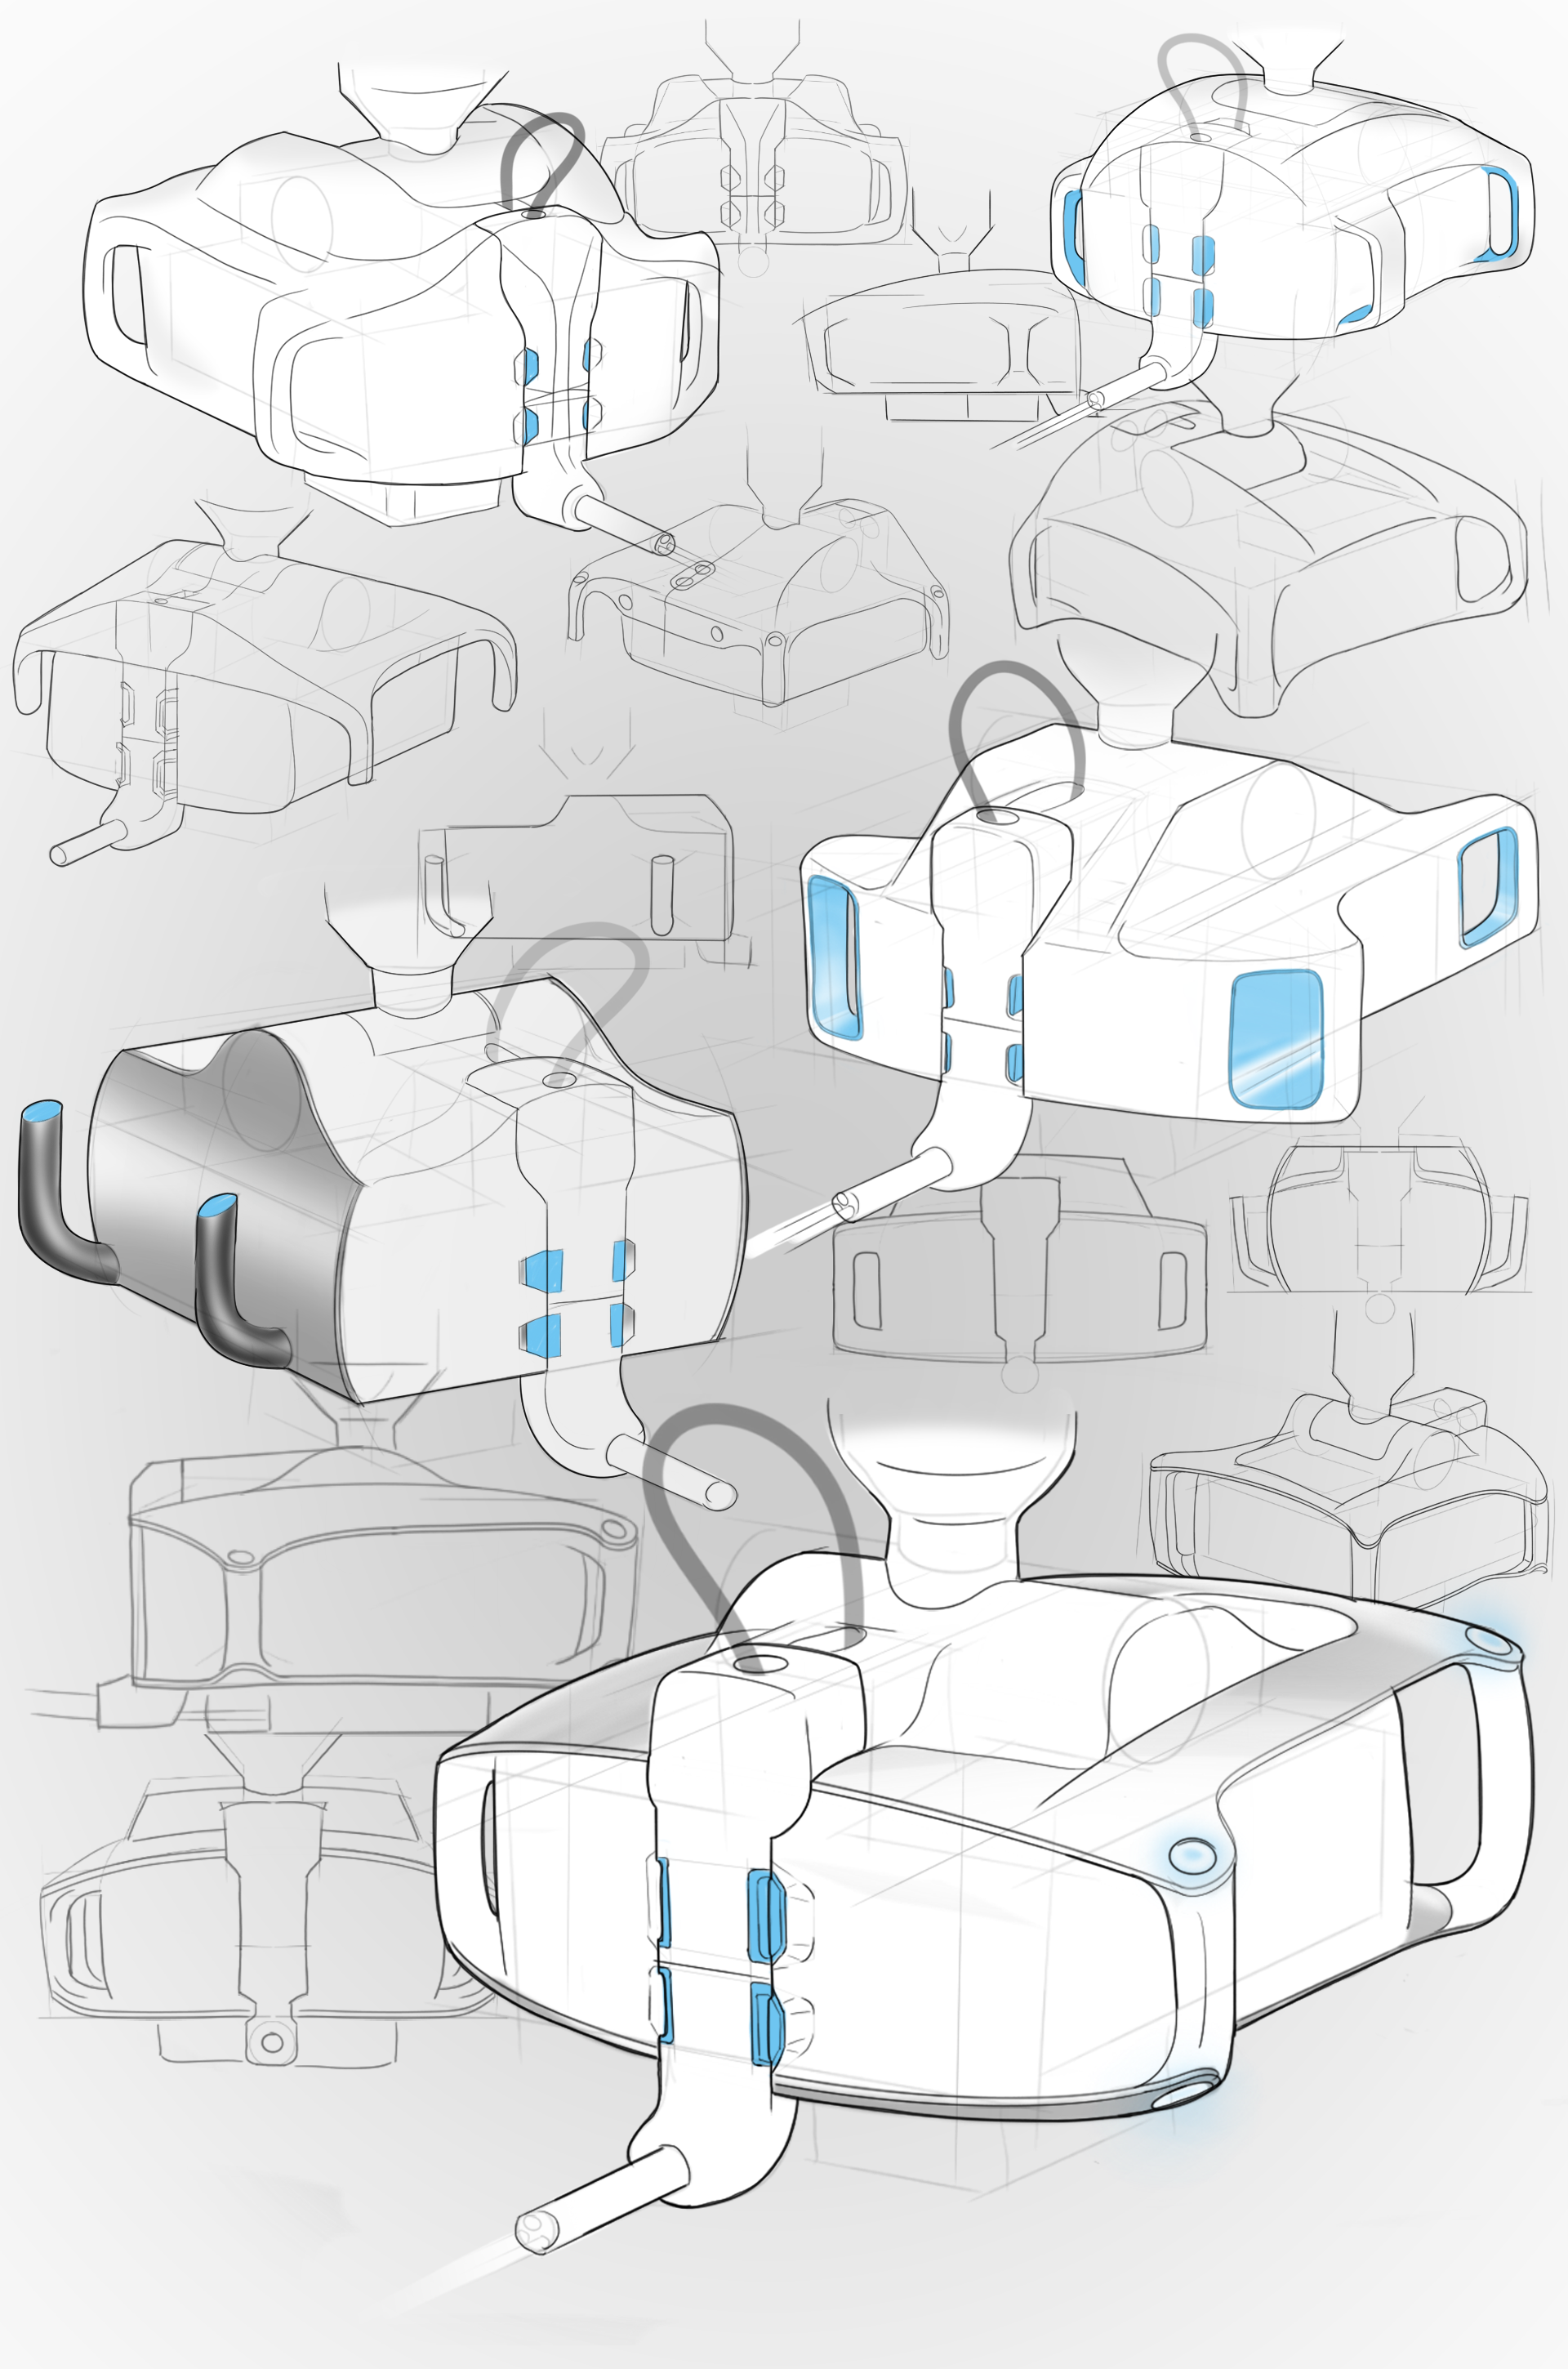
Early Ideation and form explorations
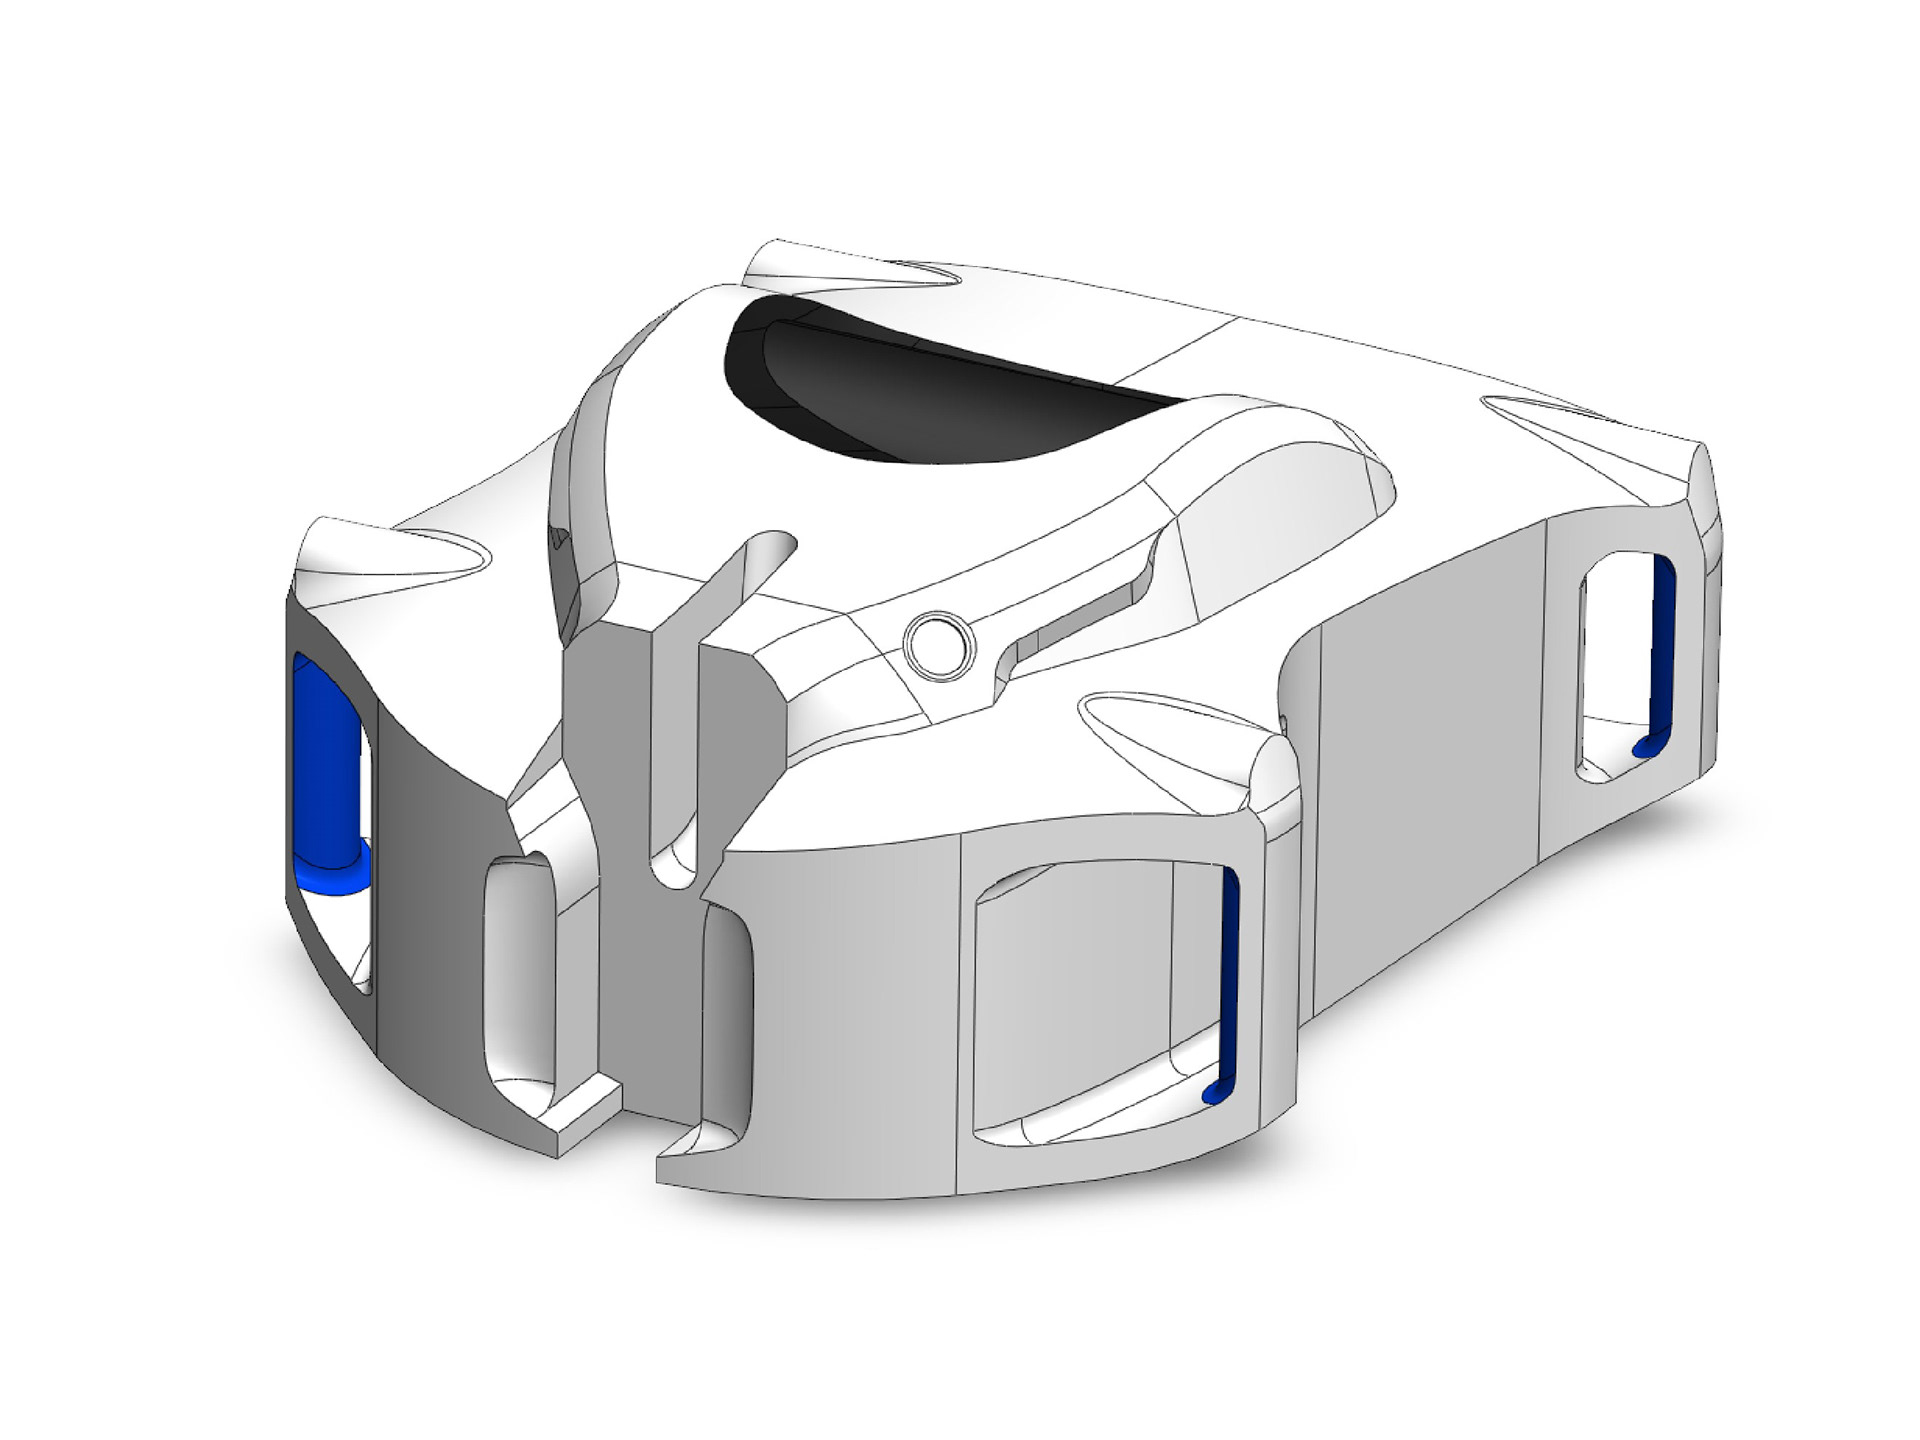
refinement
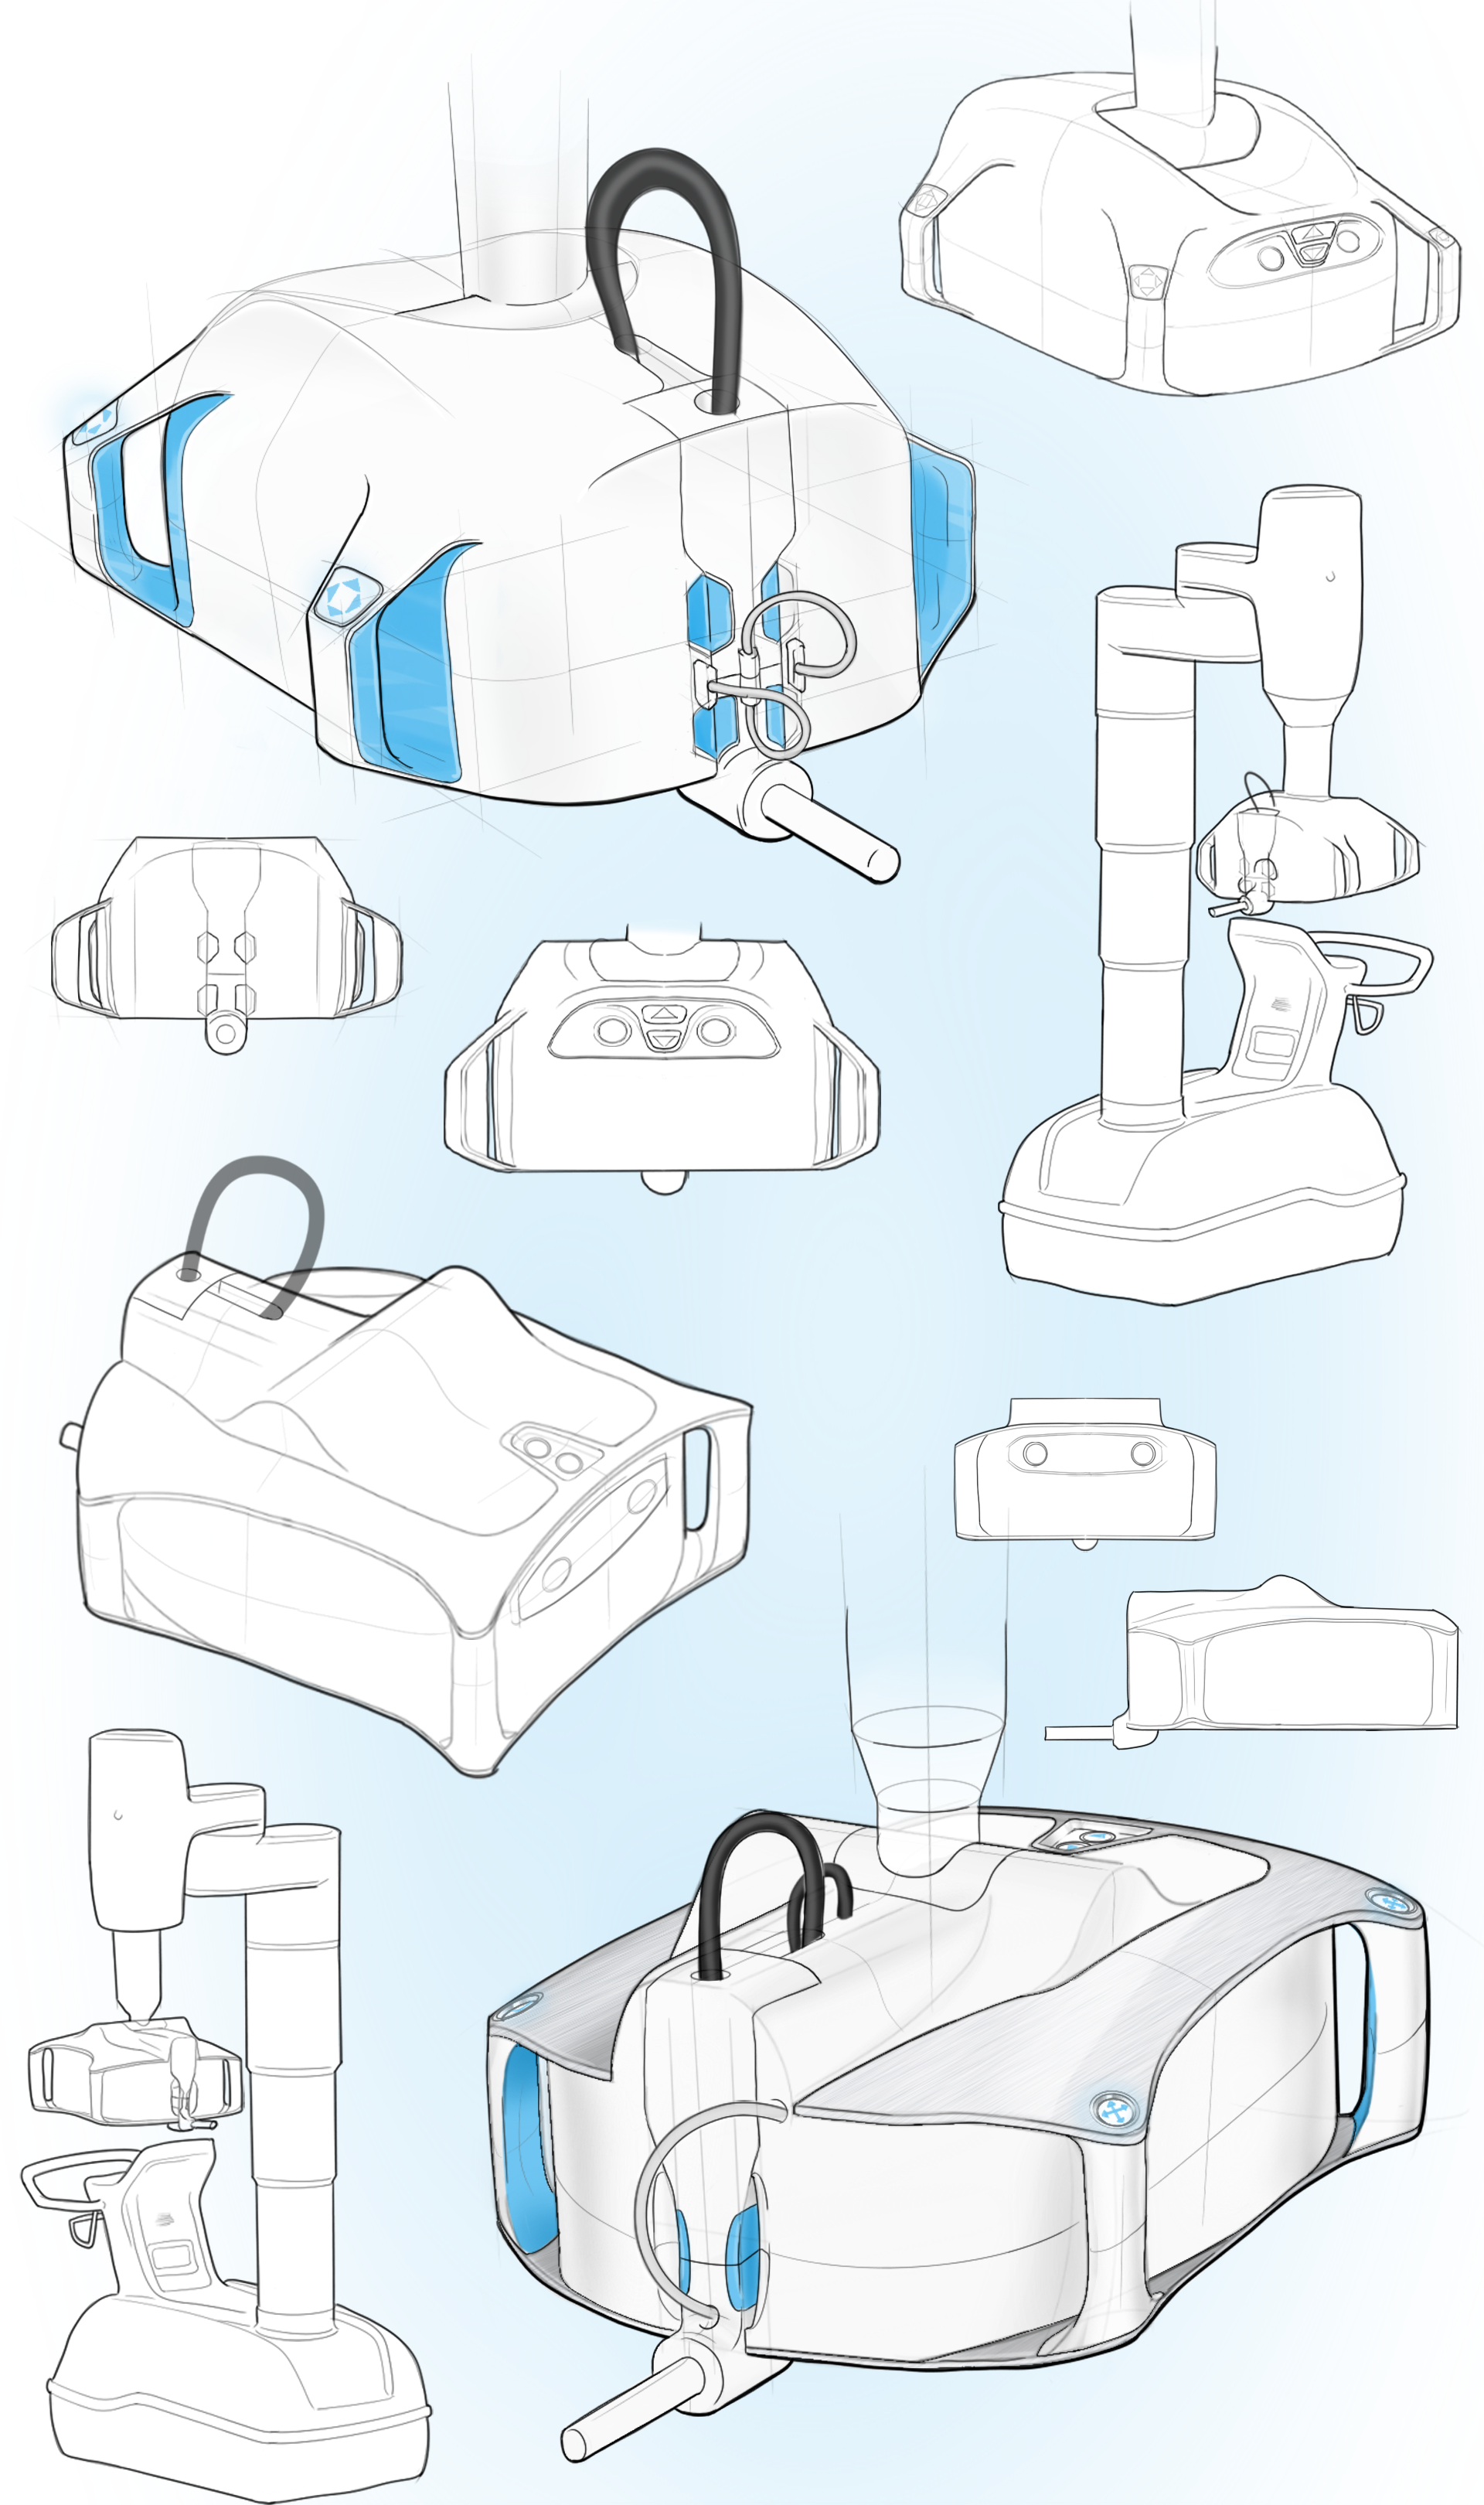
refinements of two chosen directions
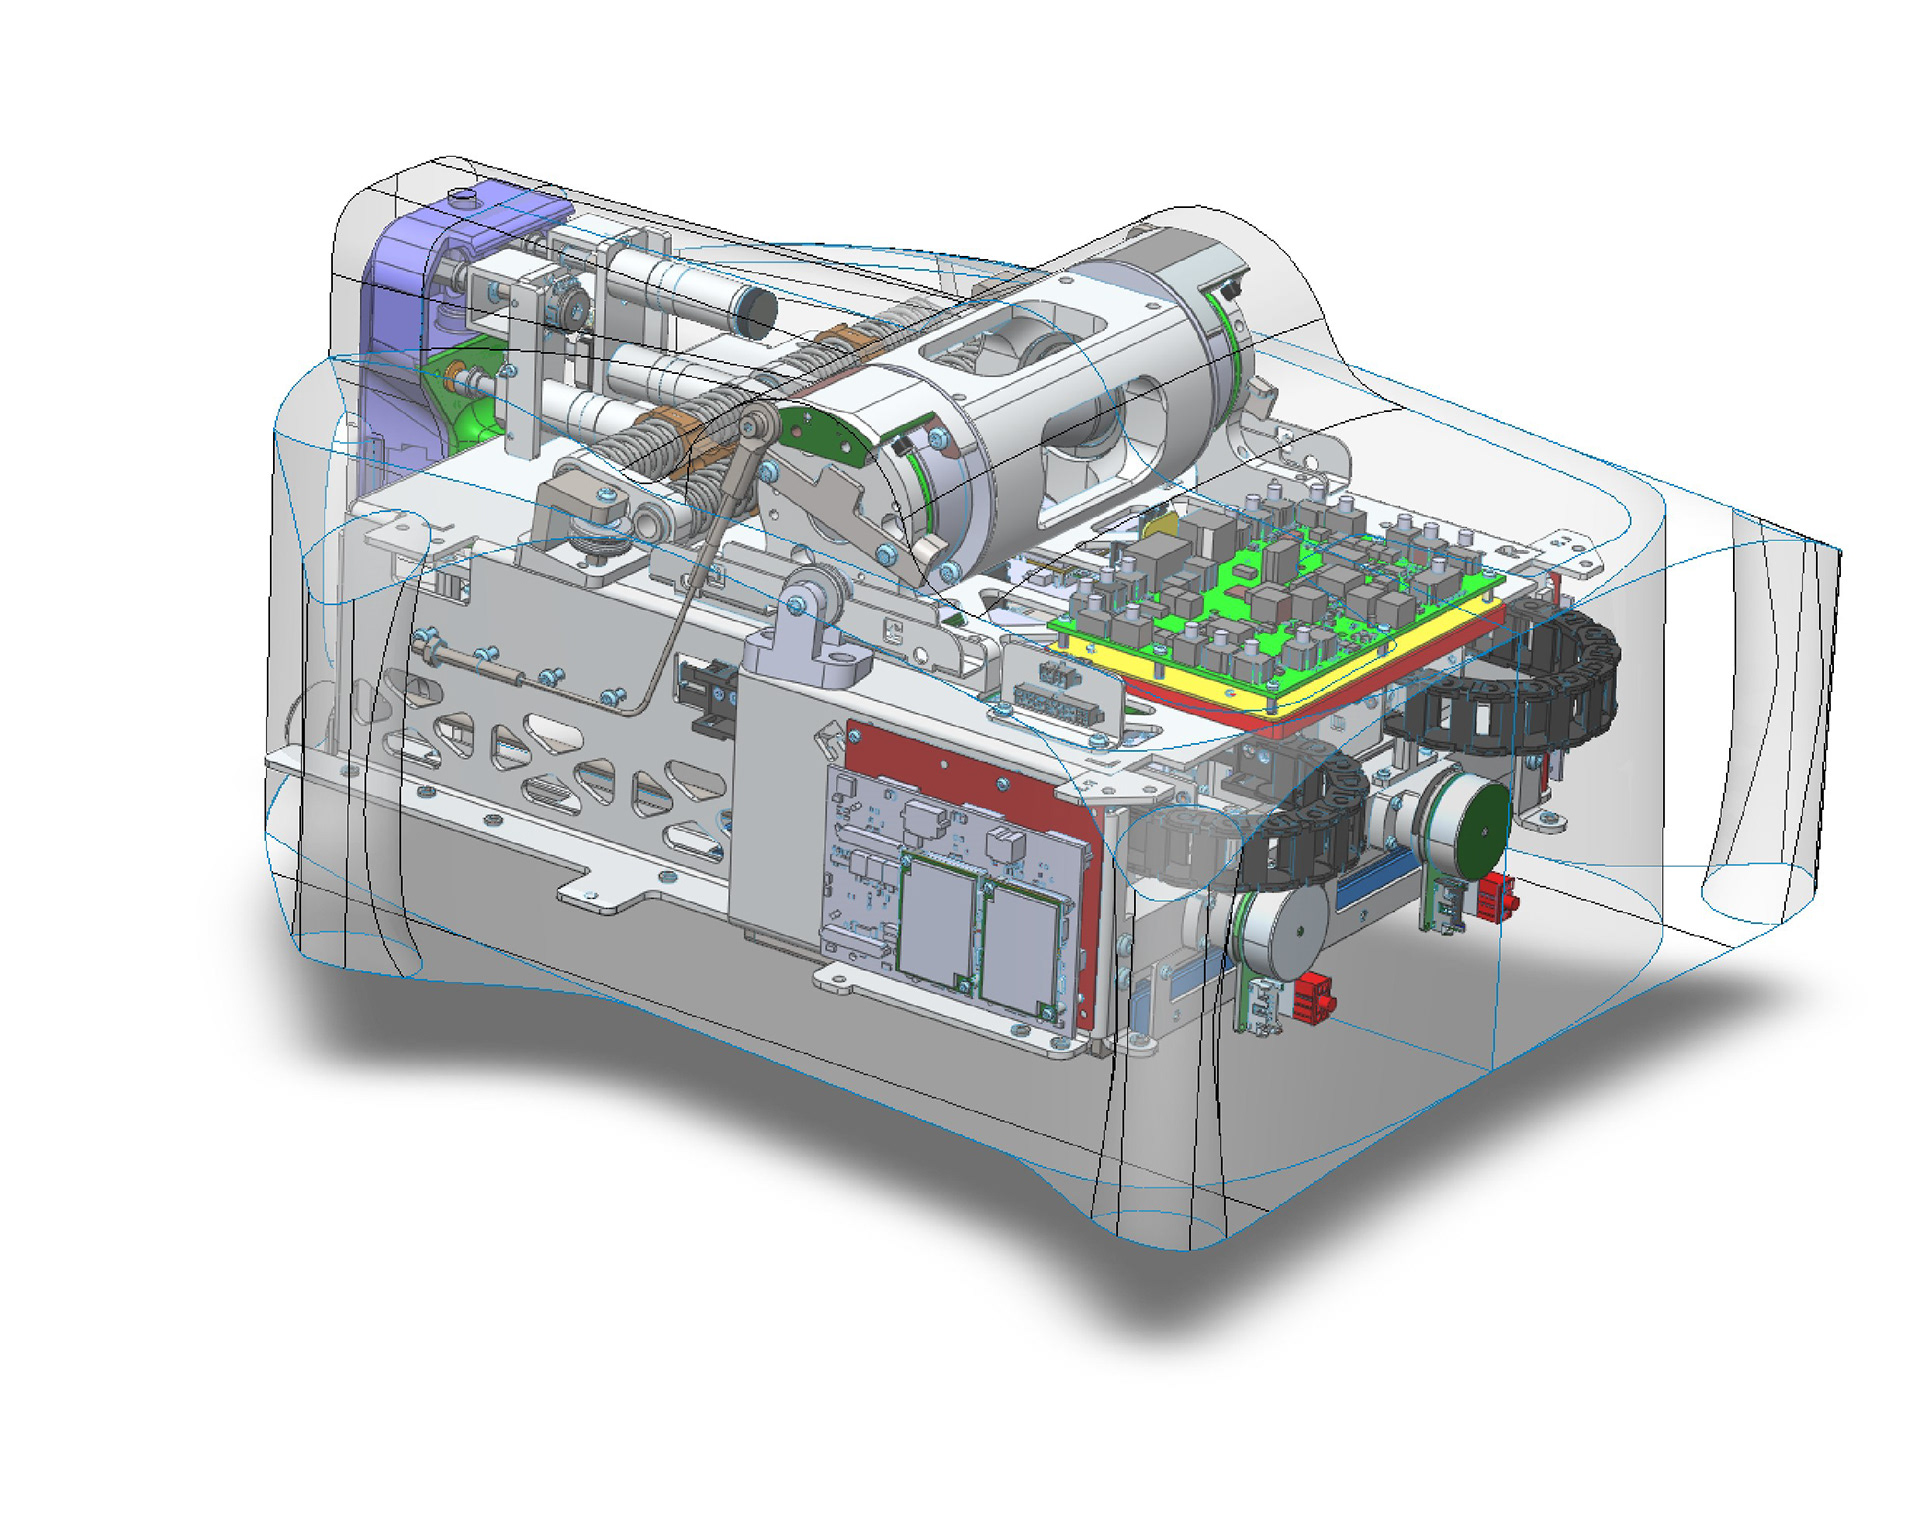
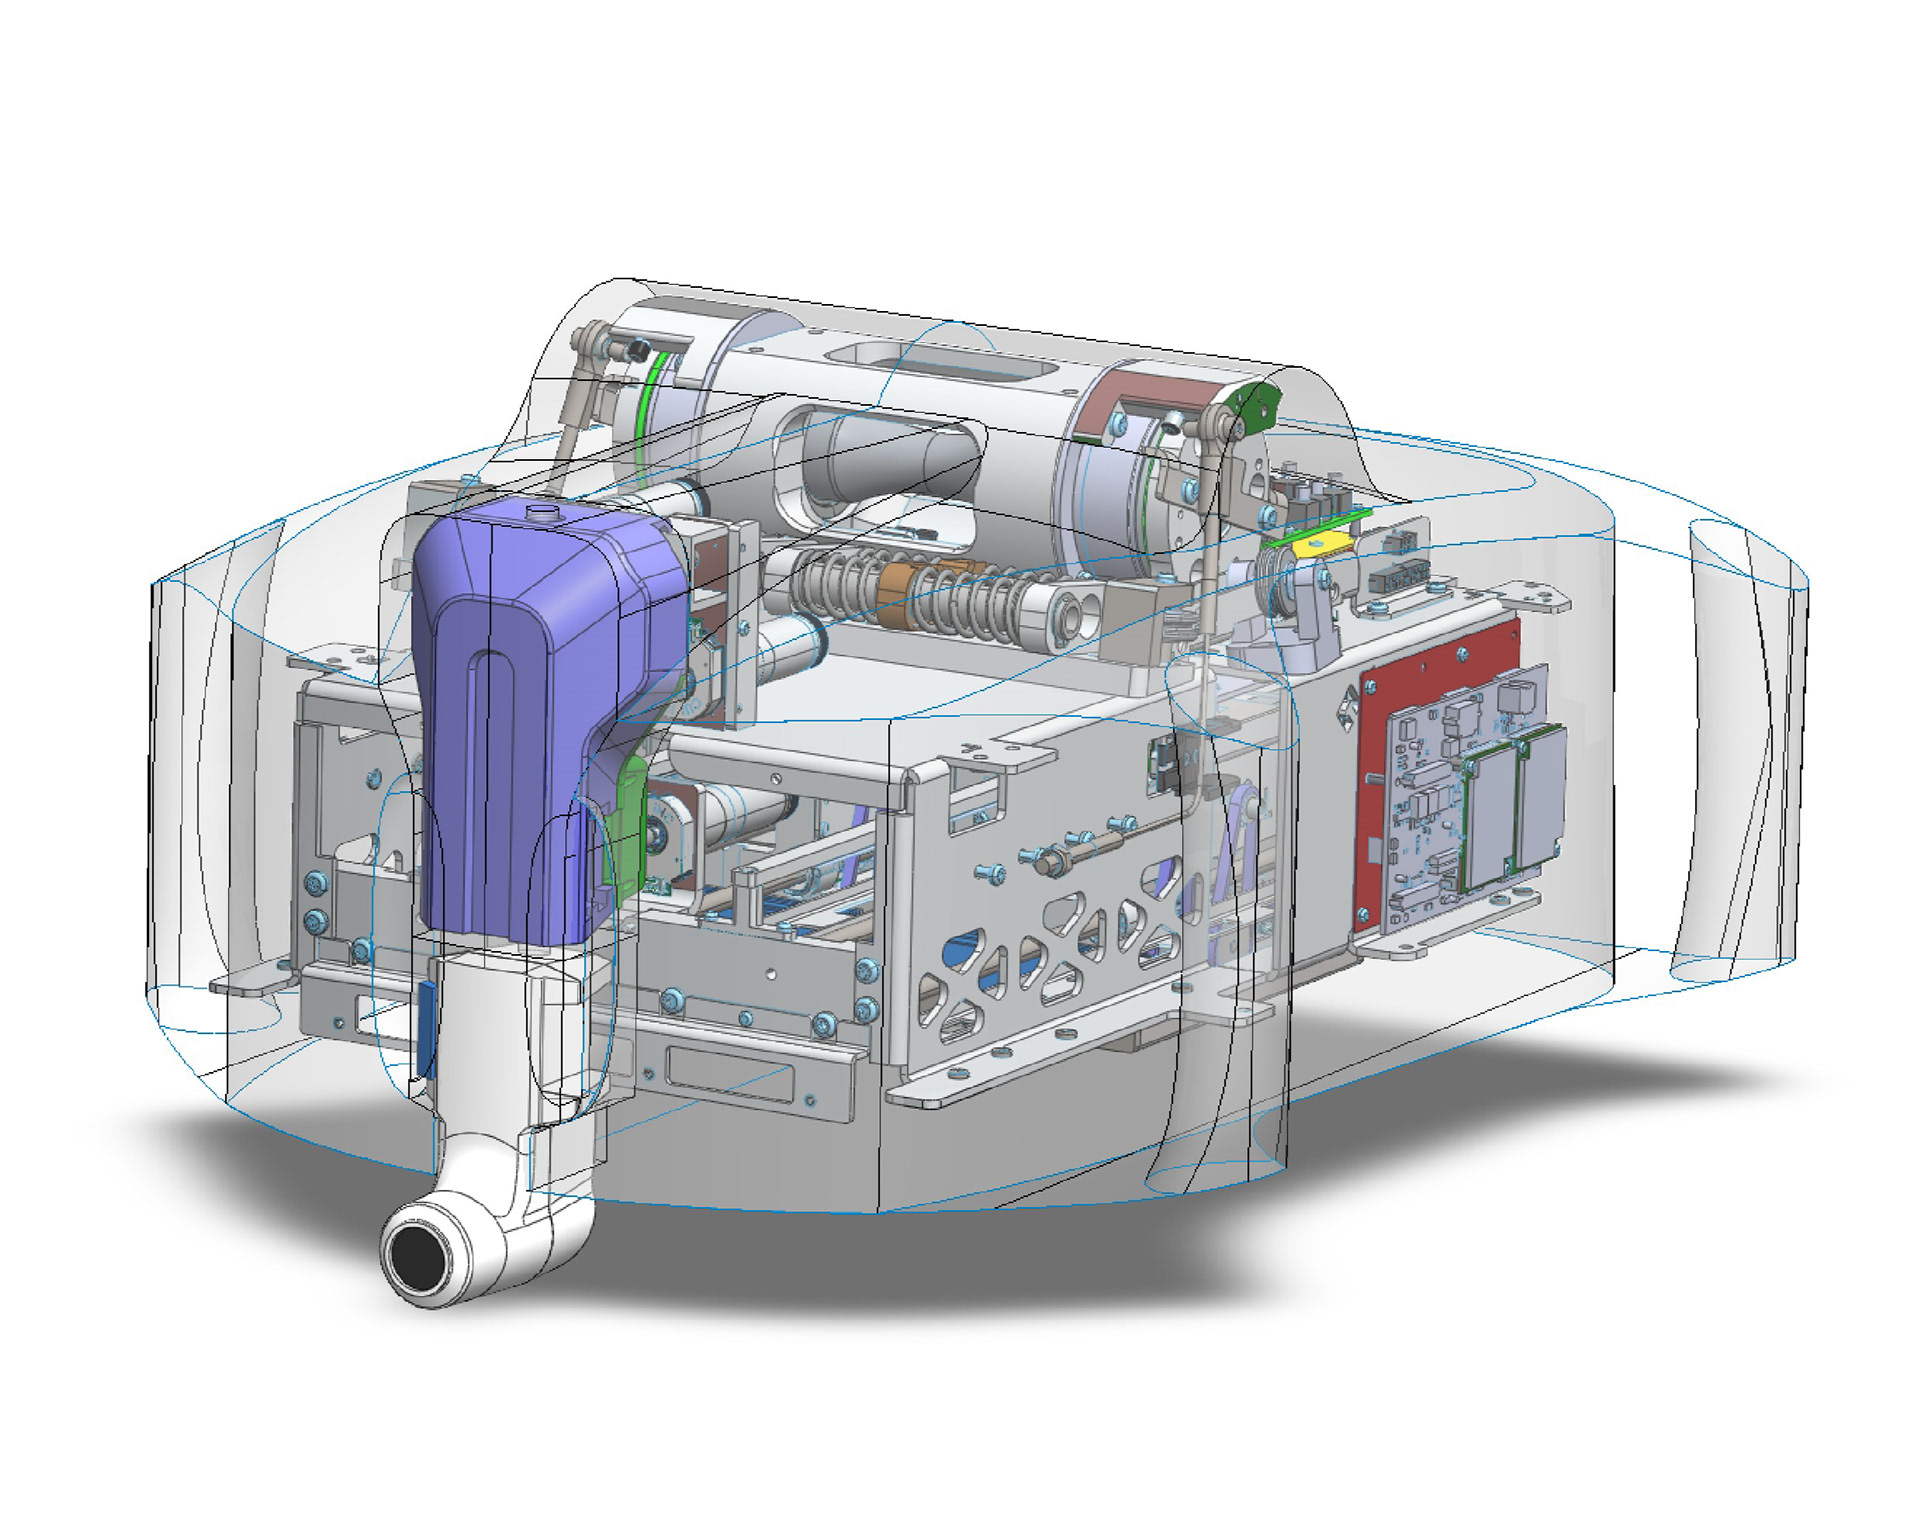
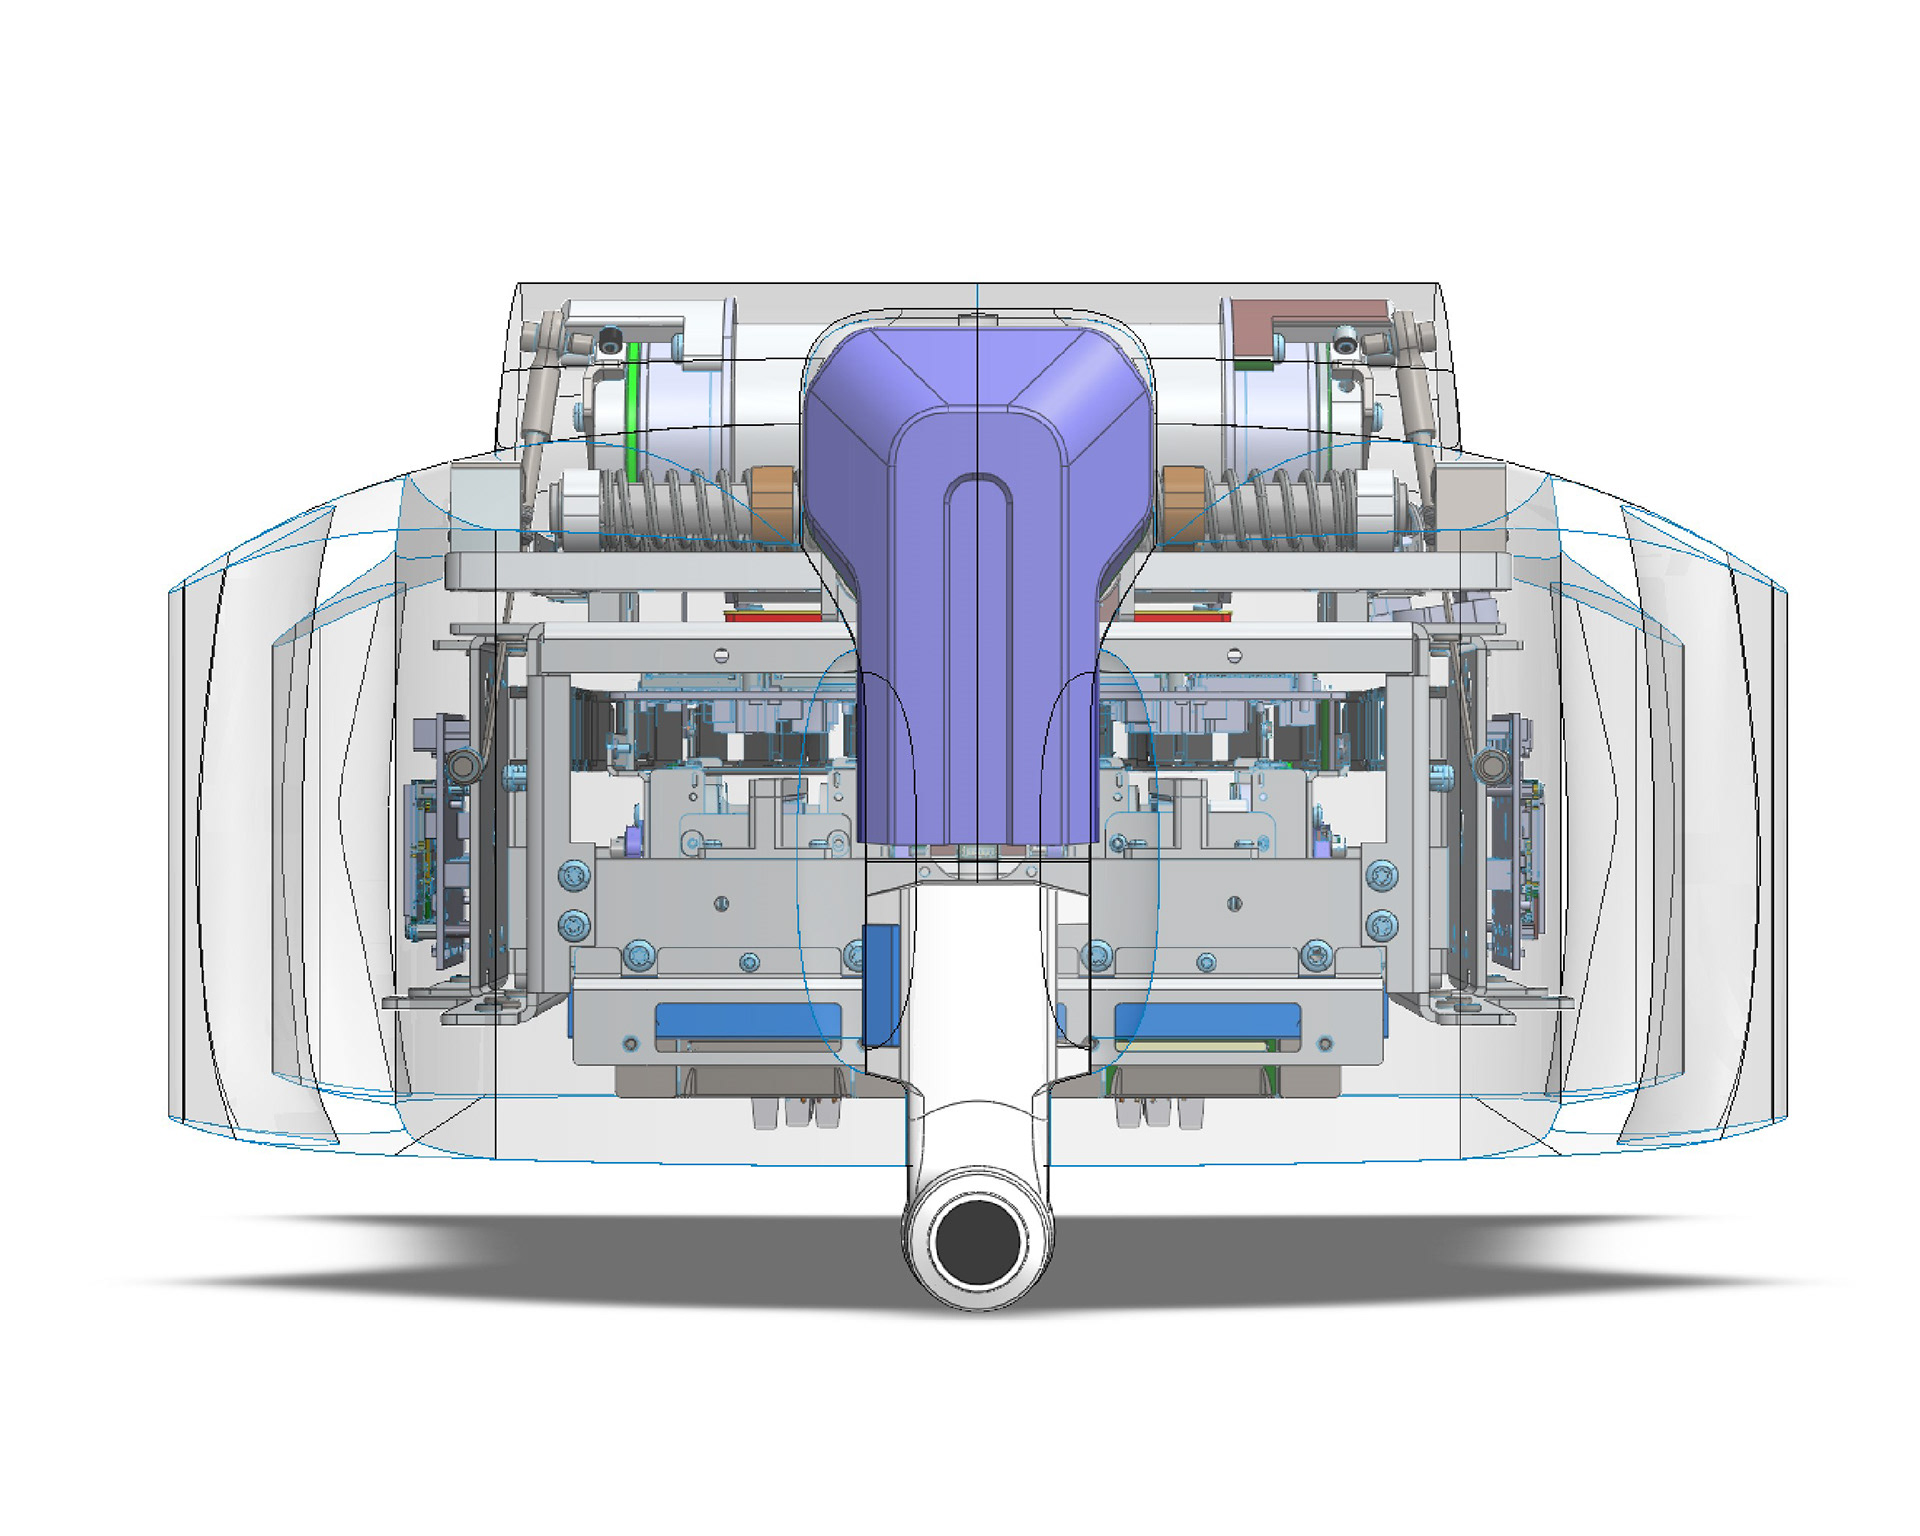
CAD Modeling
The selected design featured plastic injection molded housing sandwiched between two stamped stainless steel plates. This design would make the housing parts smaller and easier to manufacture via conventional methods. It also offered relatively smooth surfaces to make cleaning and reprocessing easier after every case.


Final Design
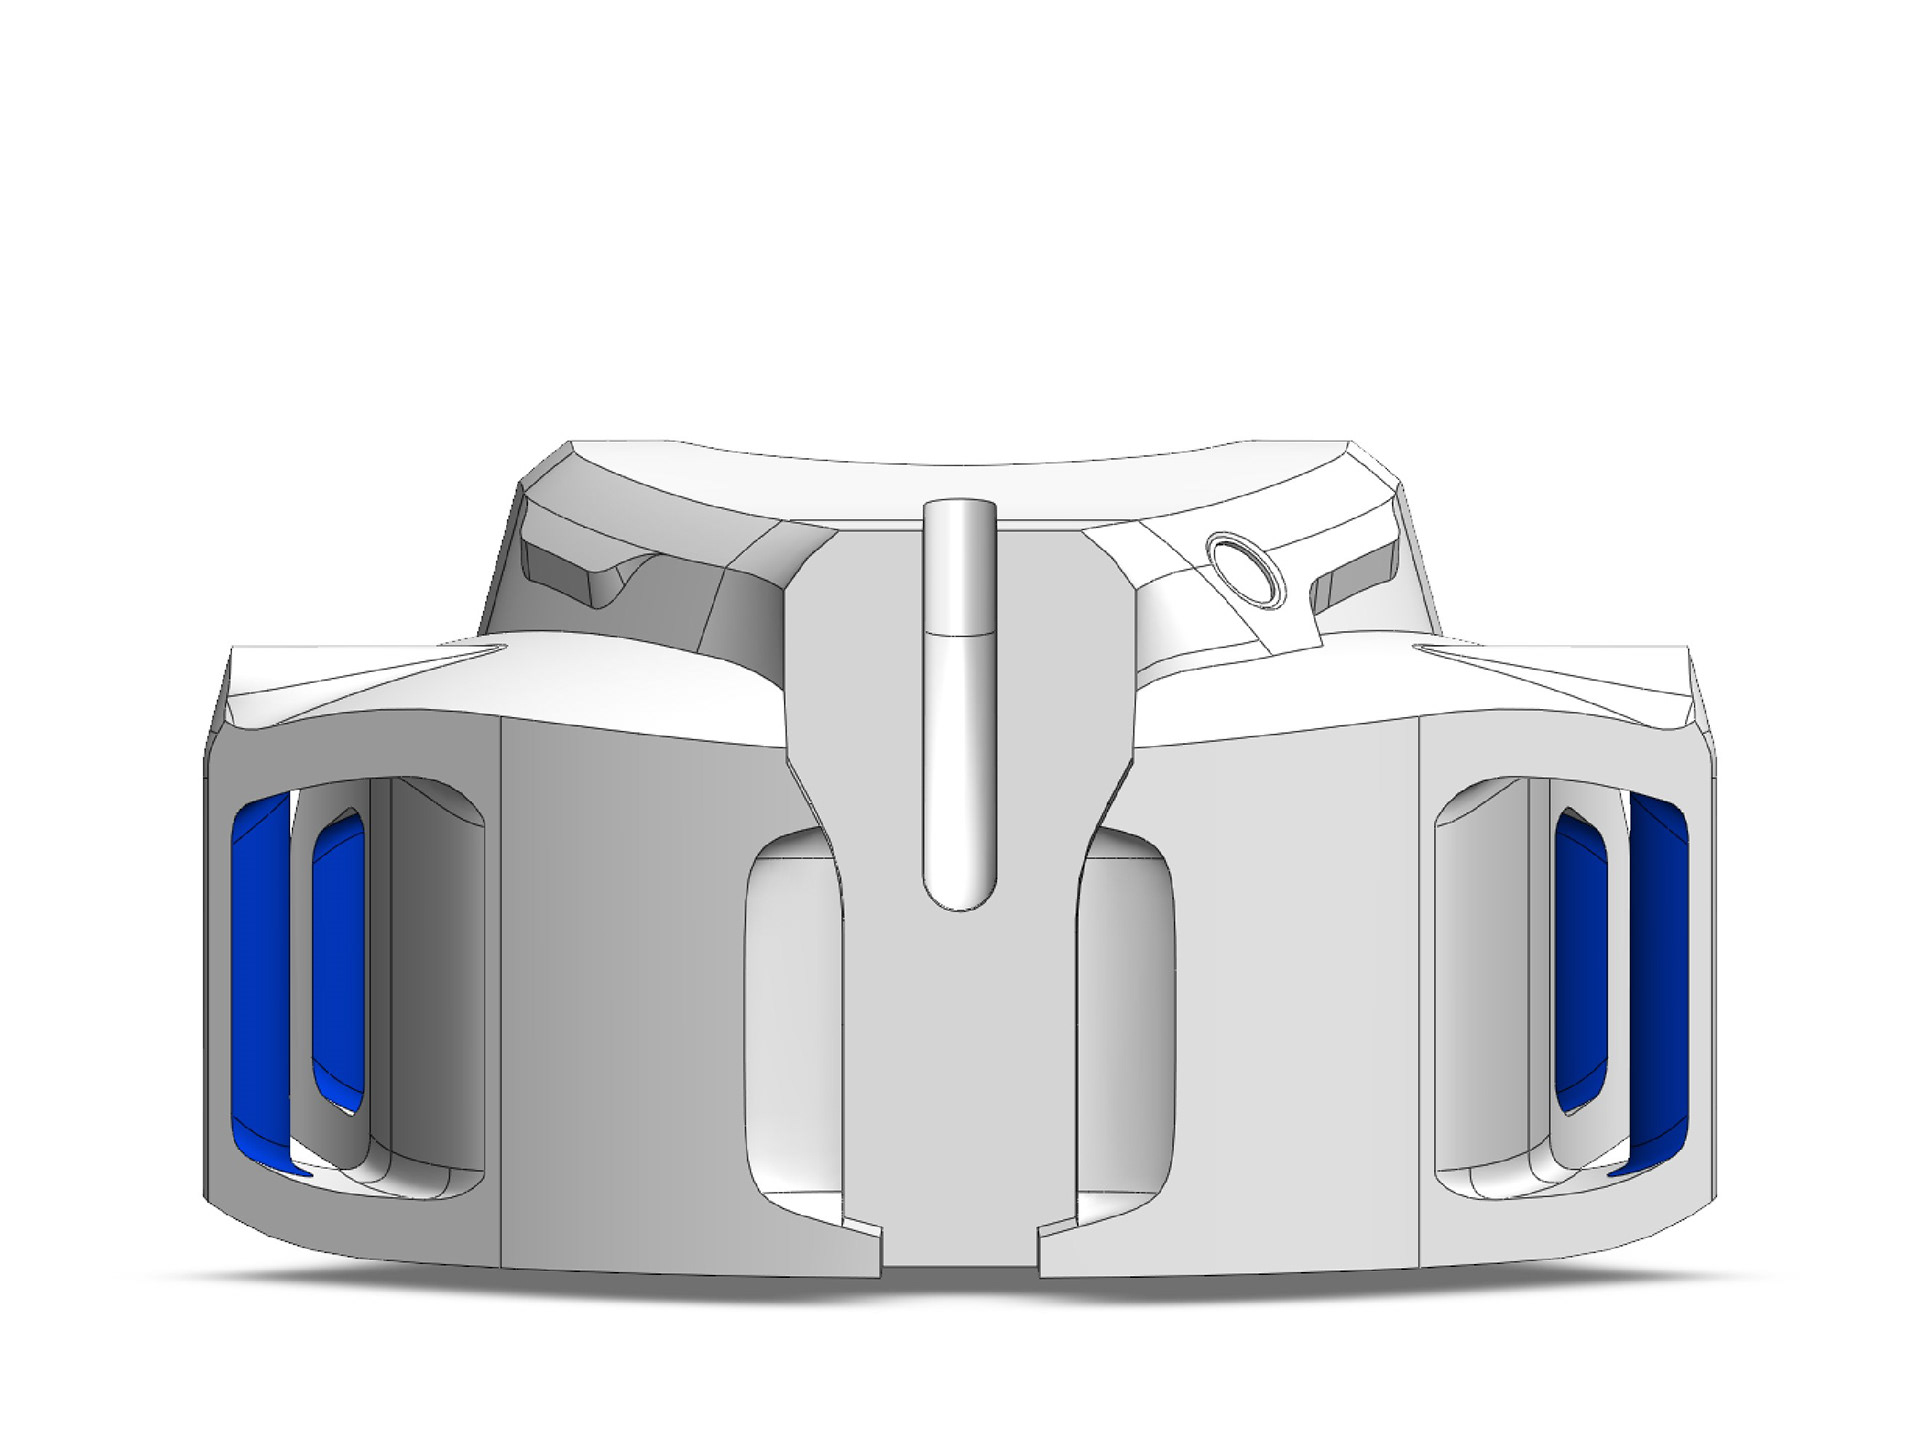
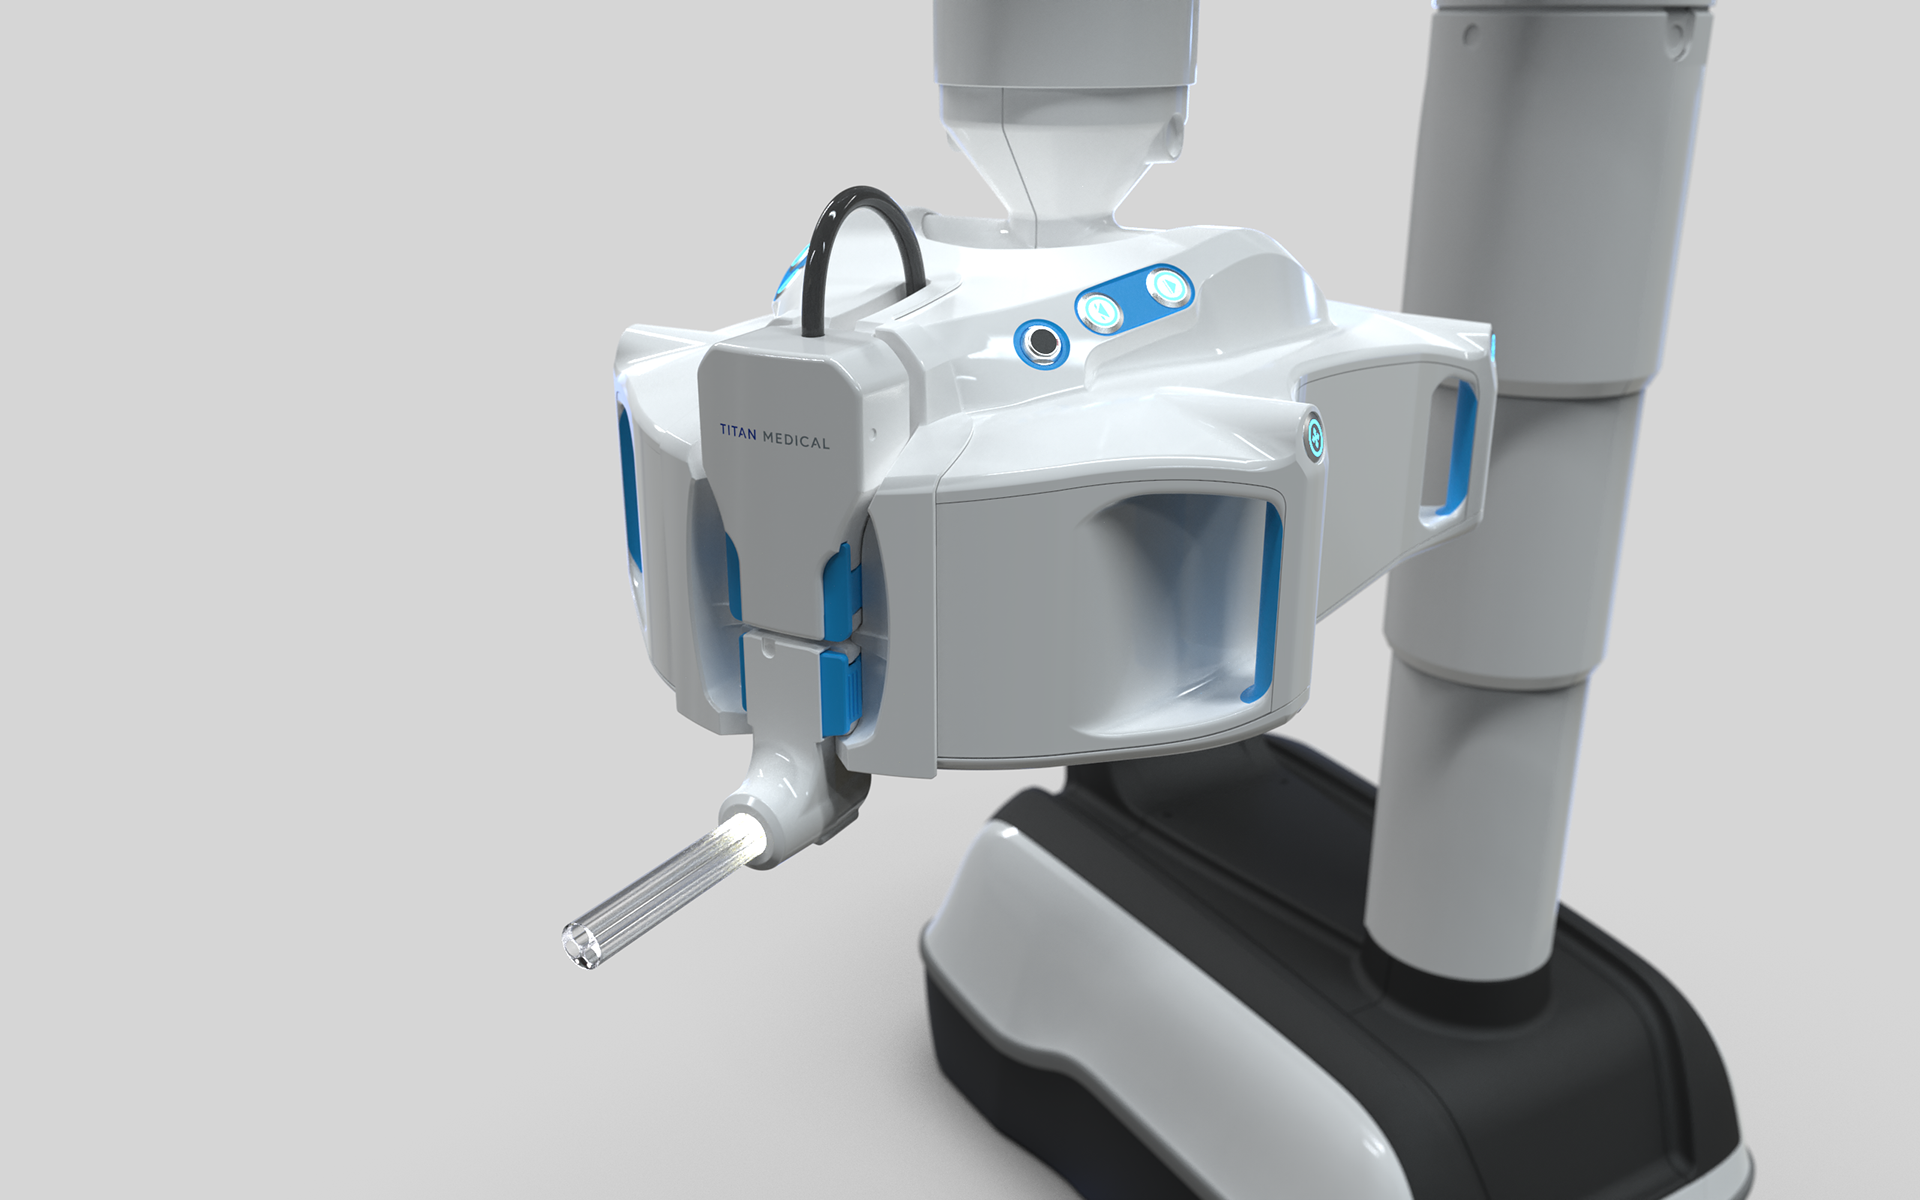
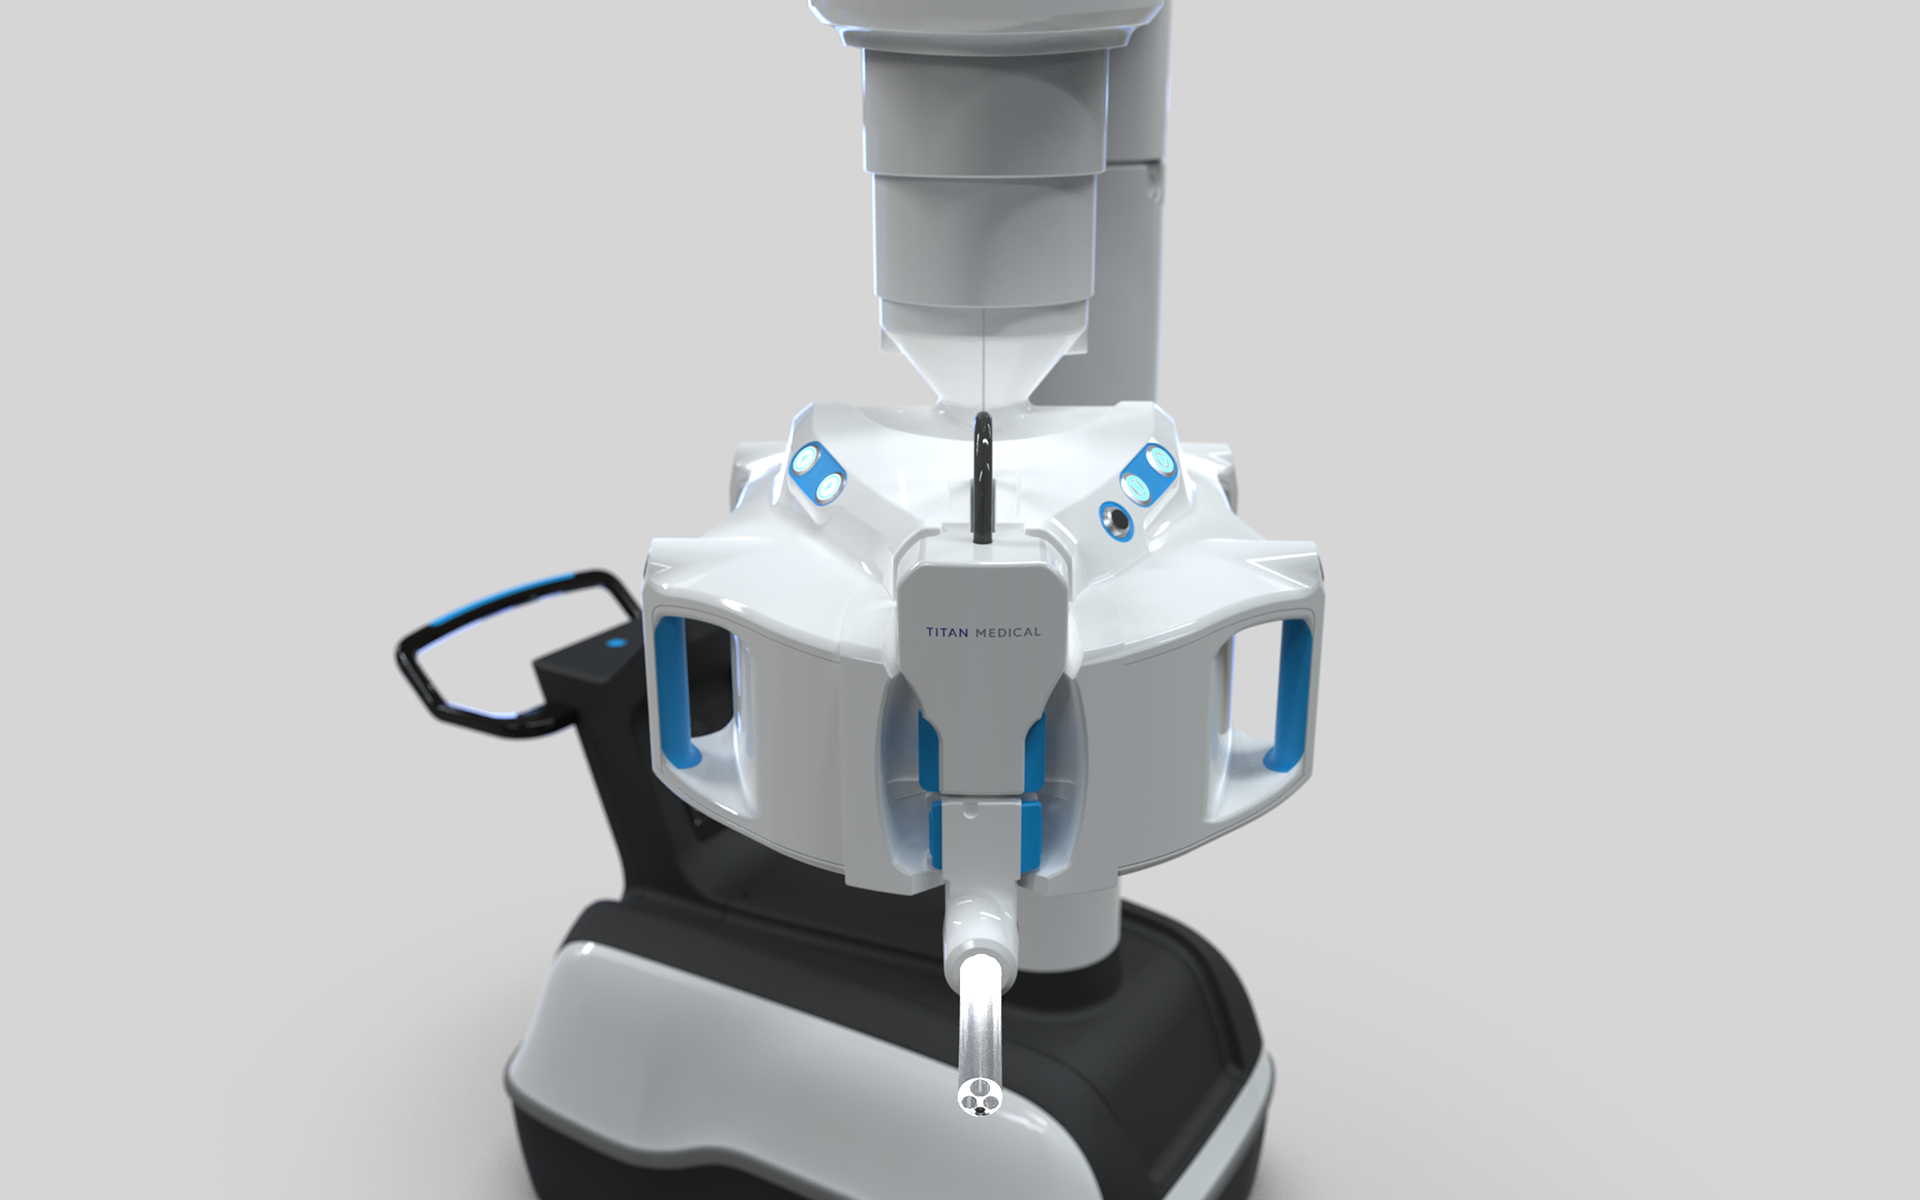
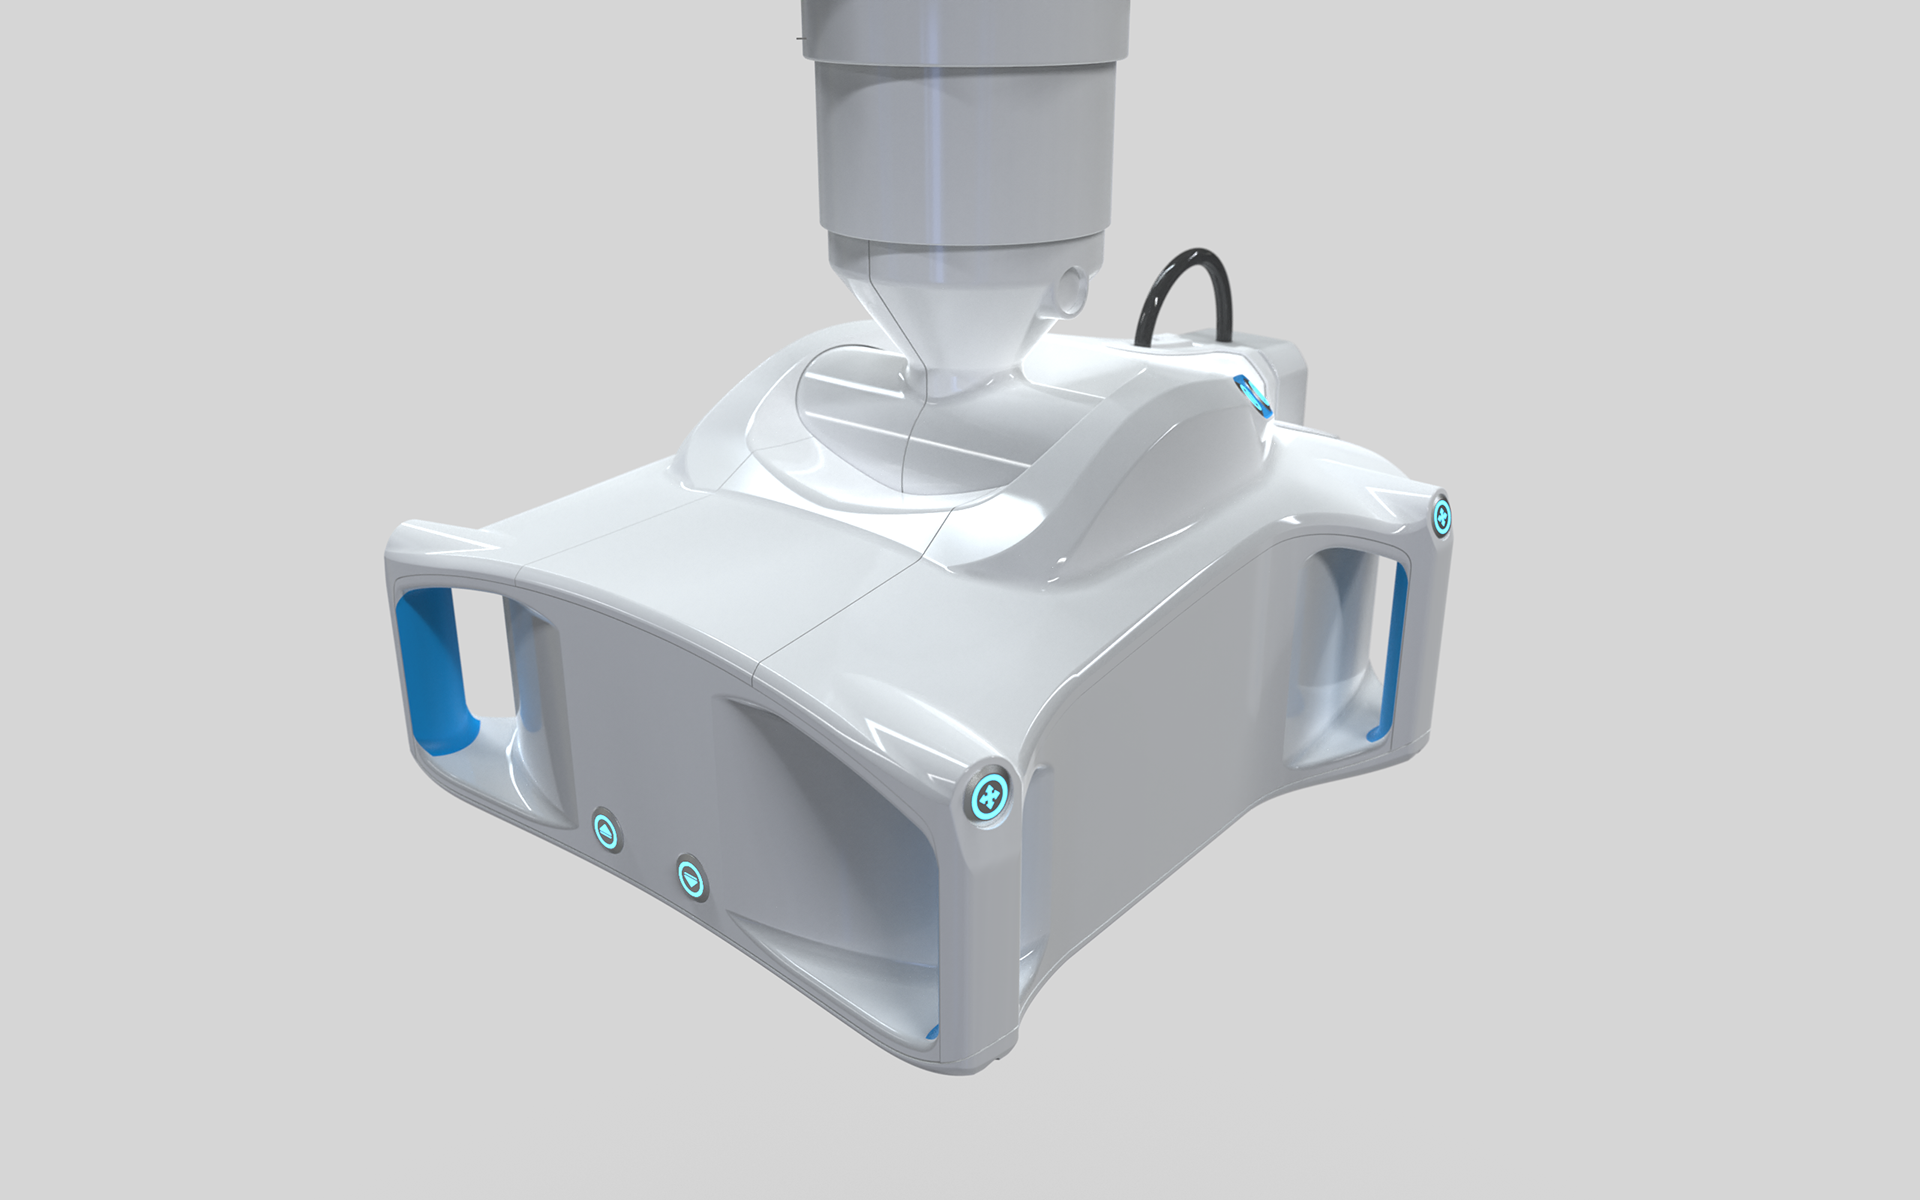
After consideration and assessment, the Titan Medical leadership team decided to pivot back toward a conservative design concept more akin to the original skin design rather than using the chosen direction. I retained the handle locations and volumetric form that made up the bulk of the CU and blended in the EM to the pitch joint.

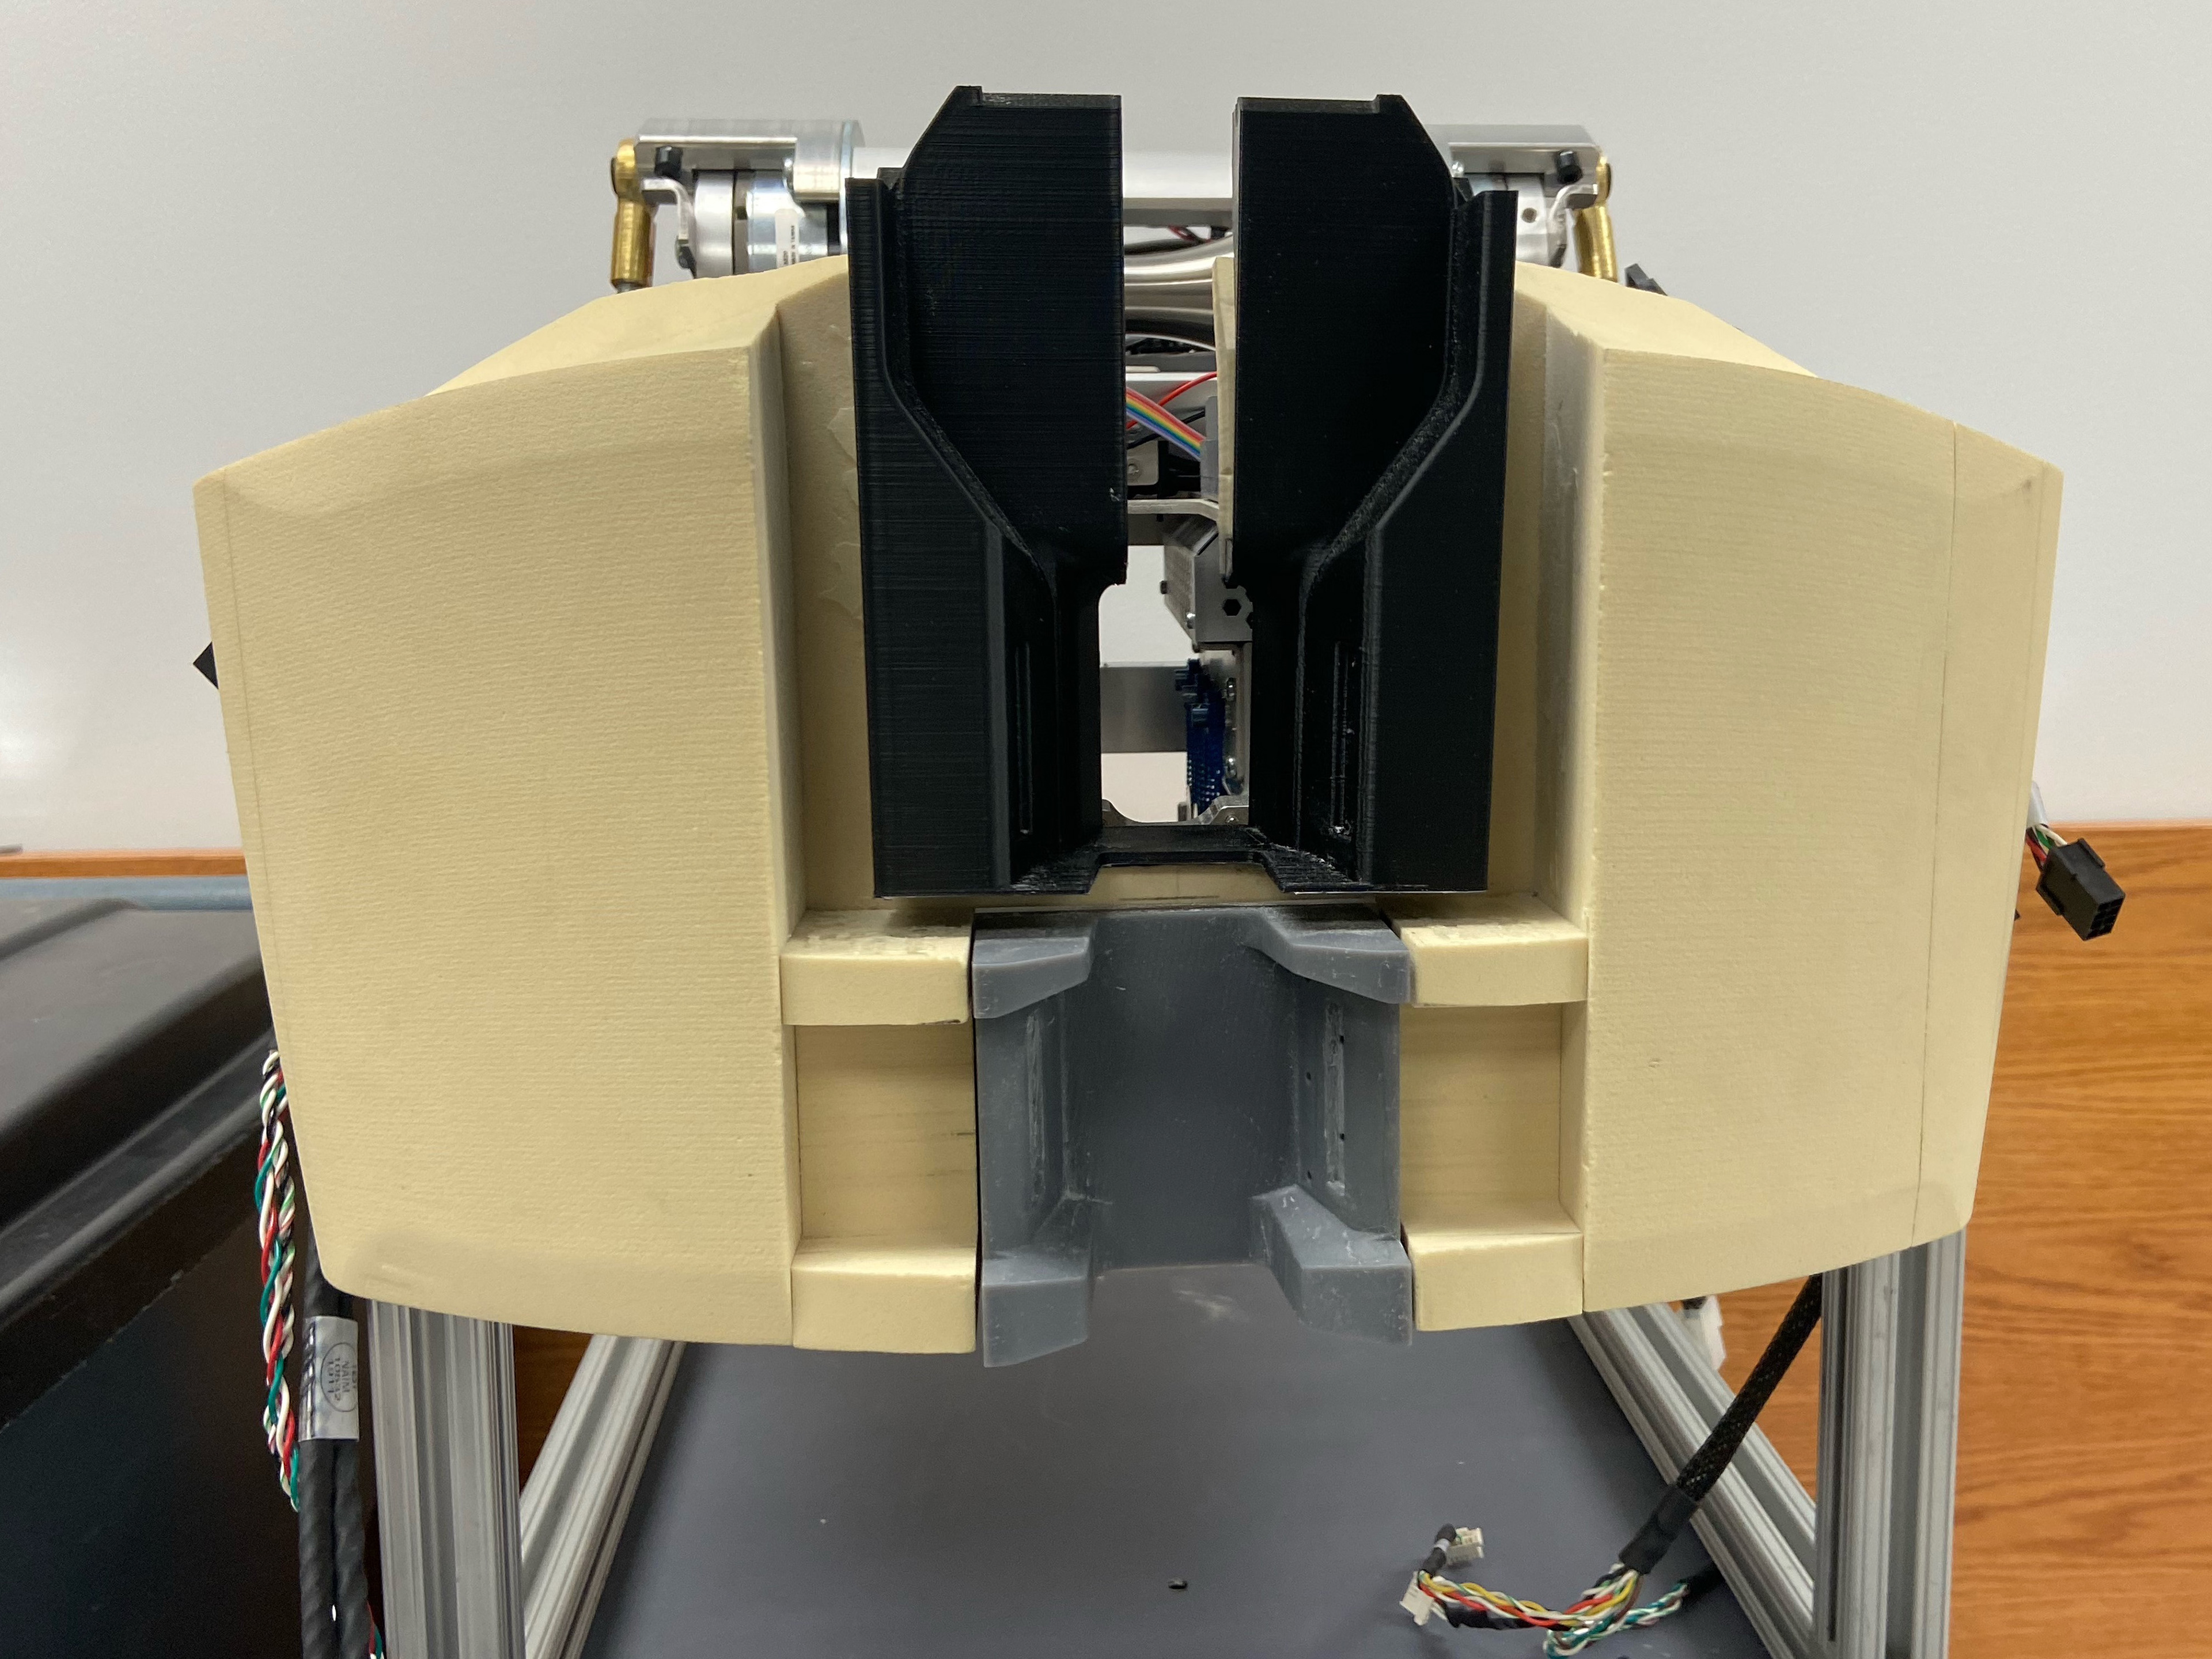
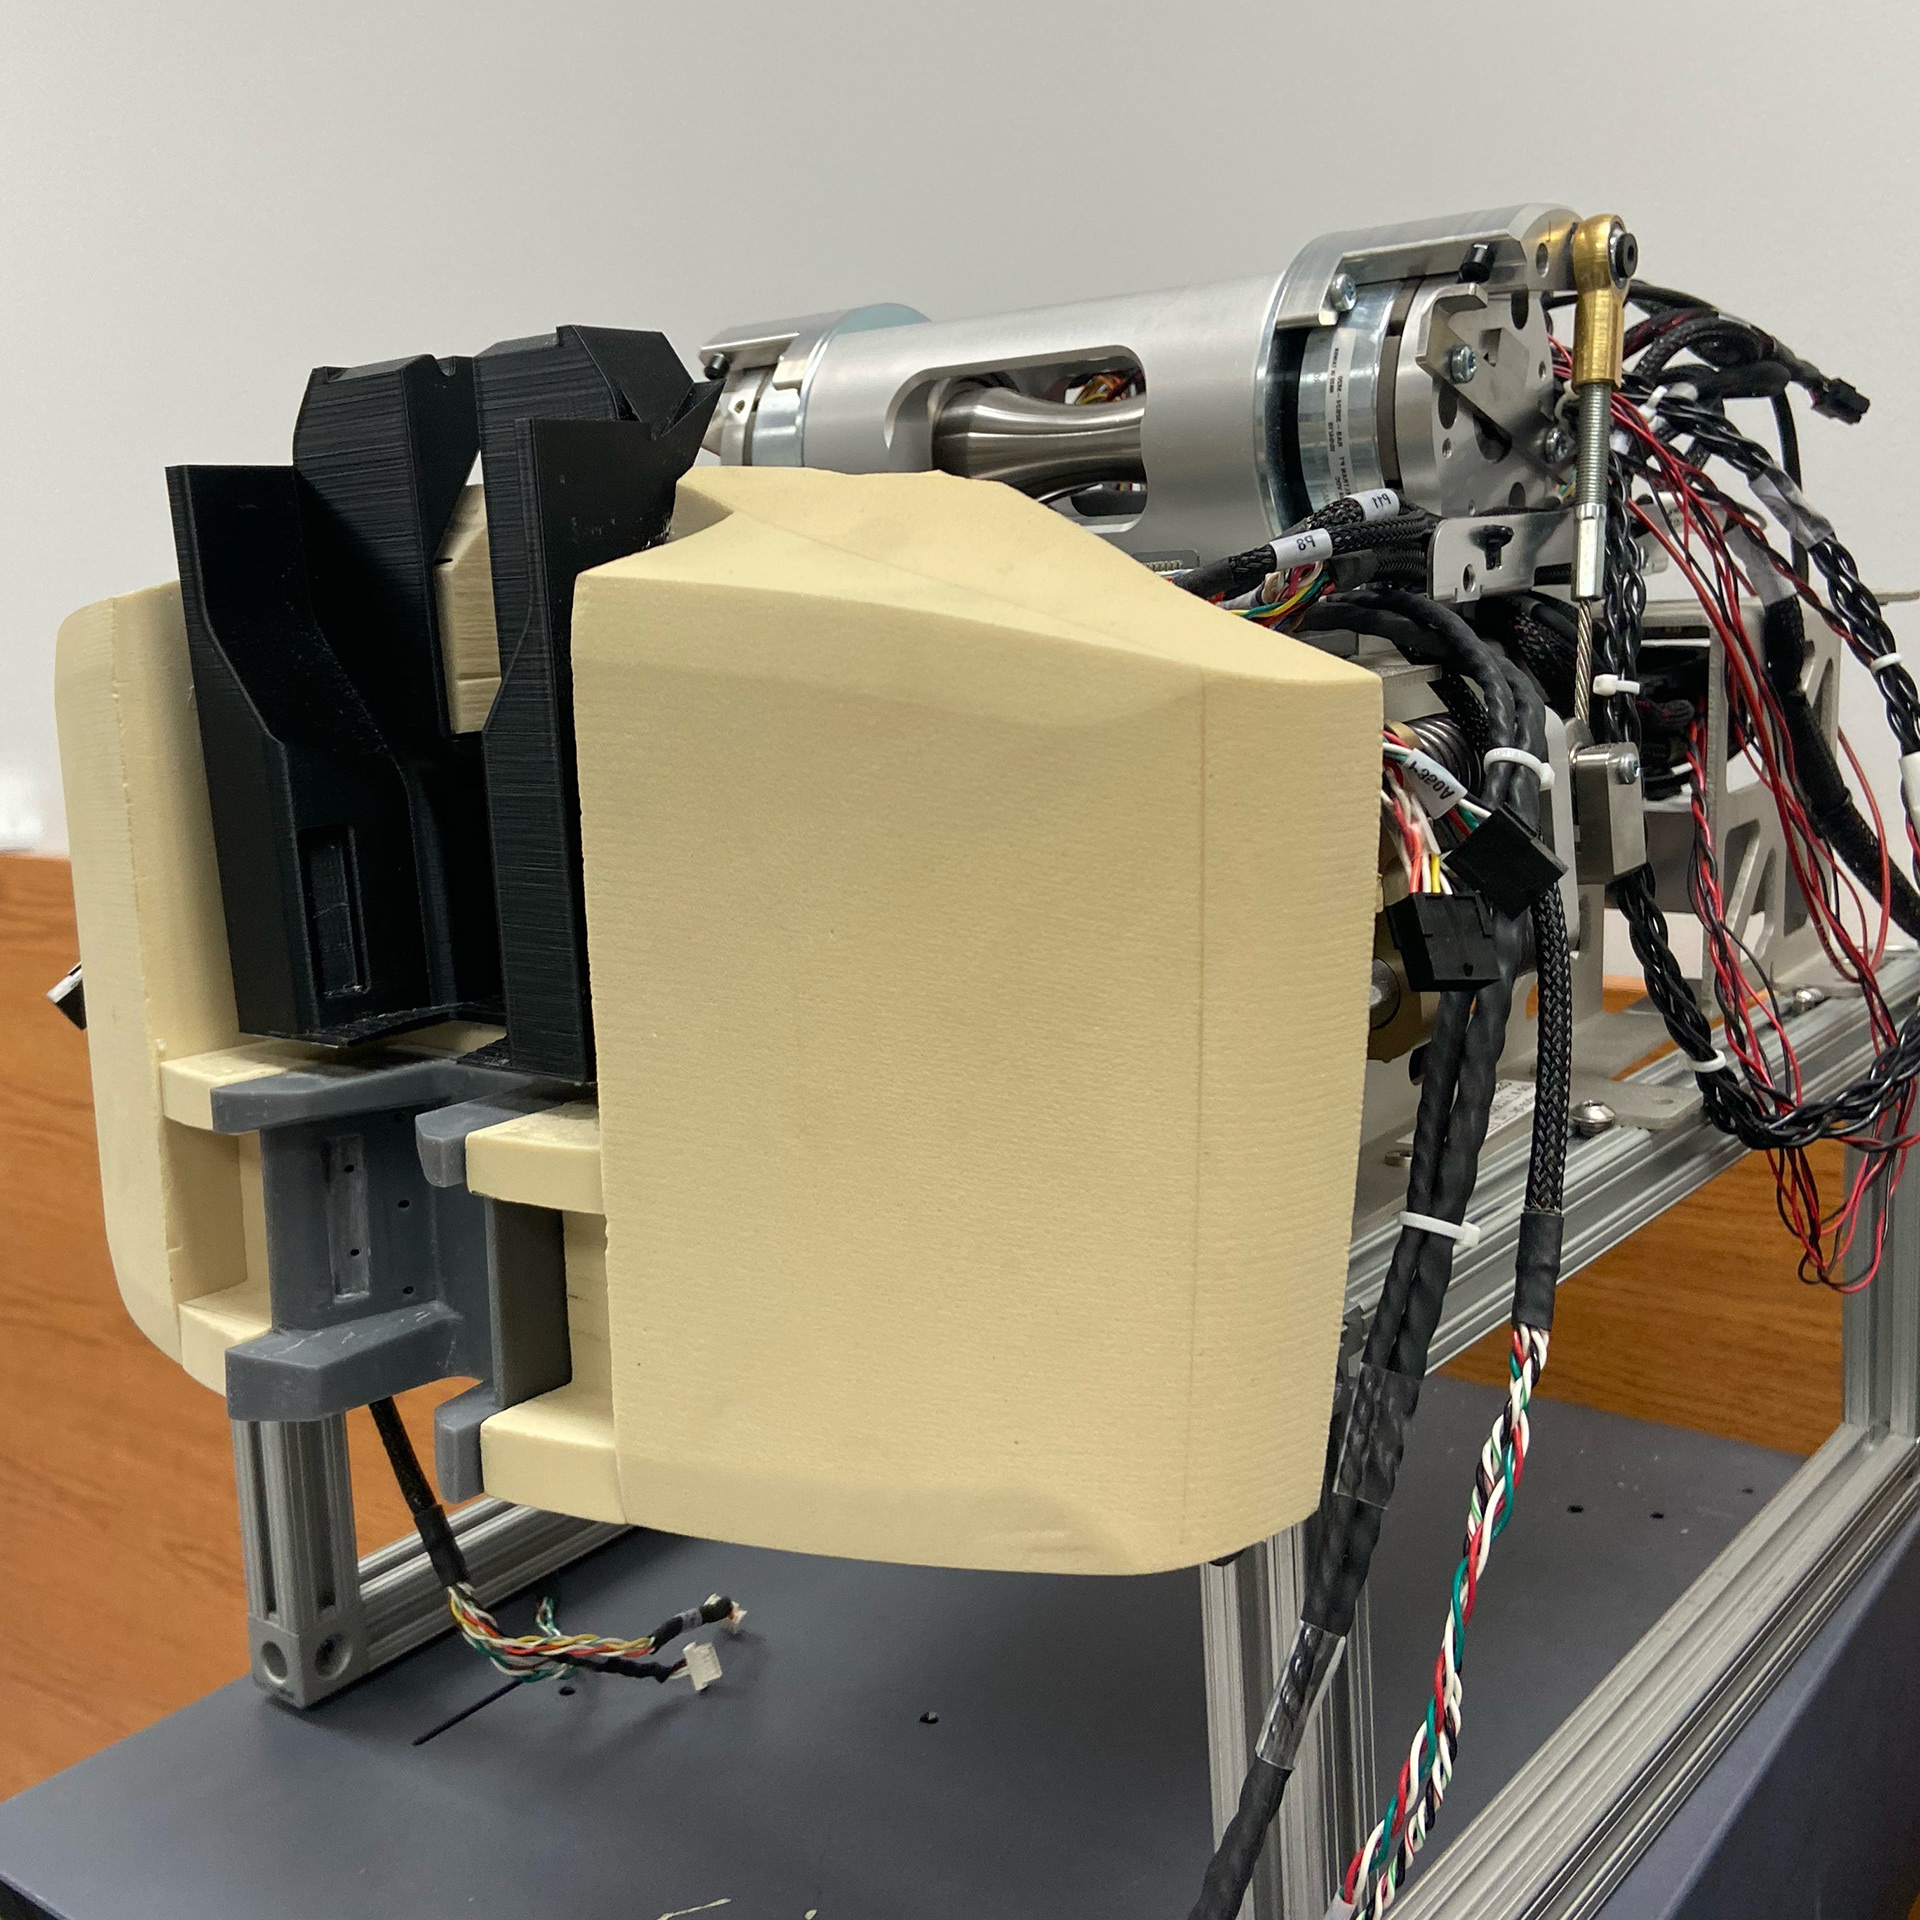
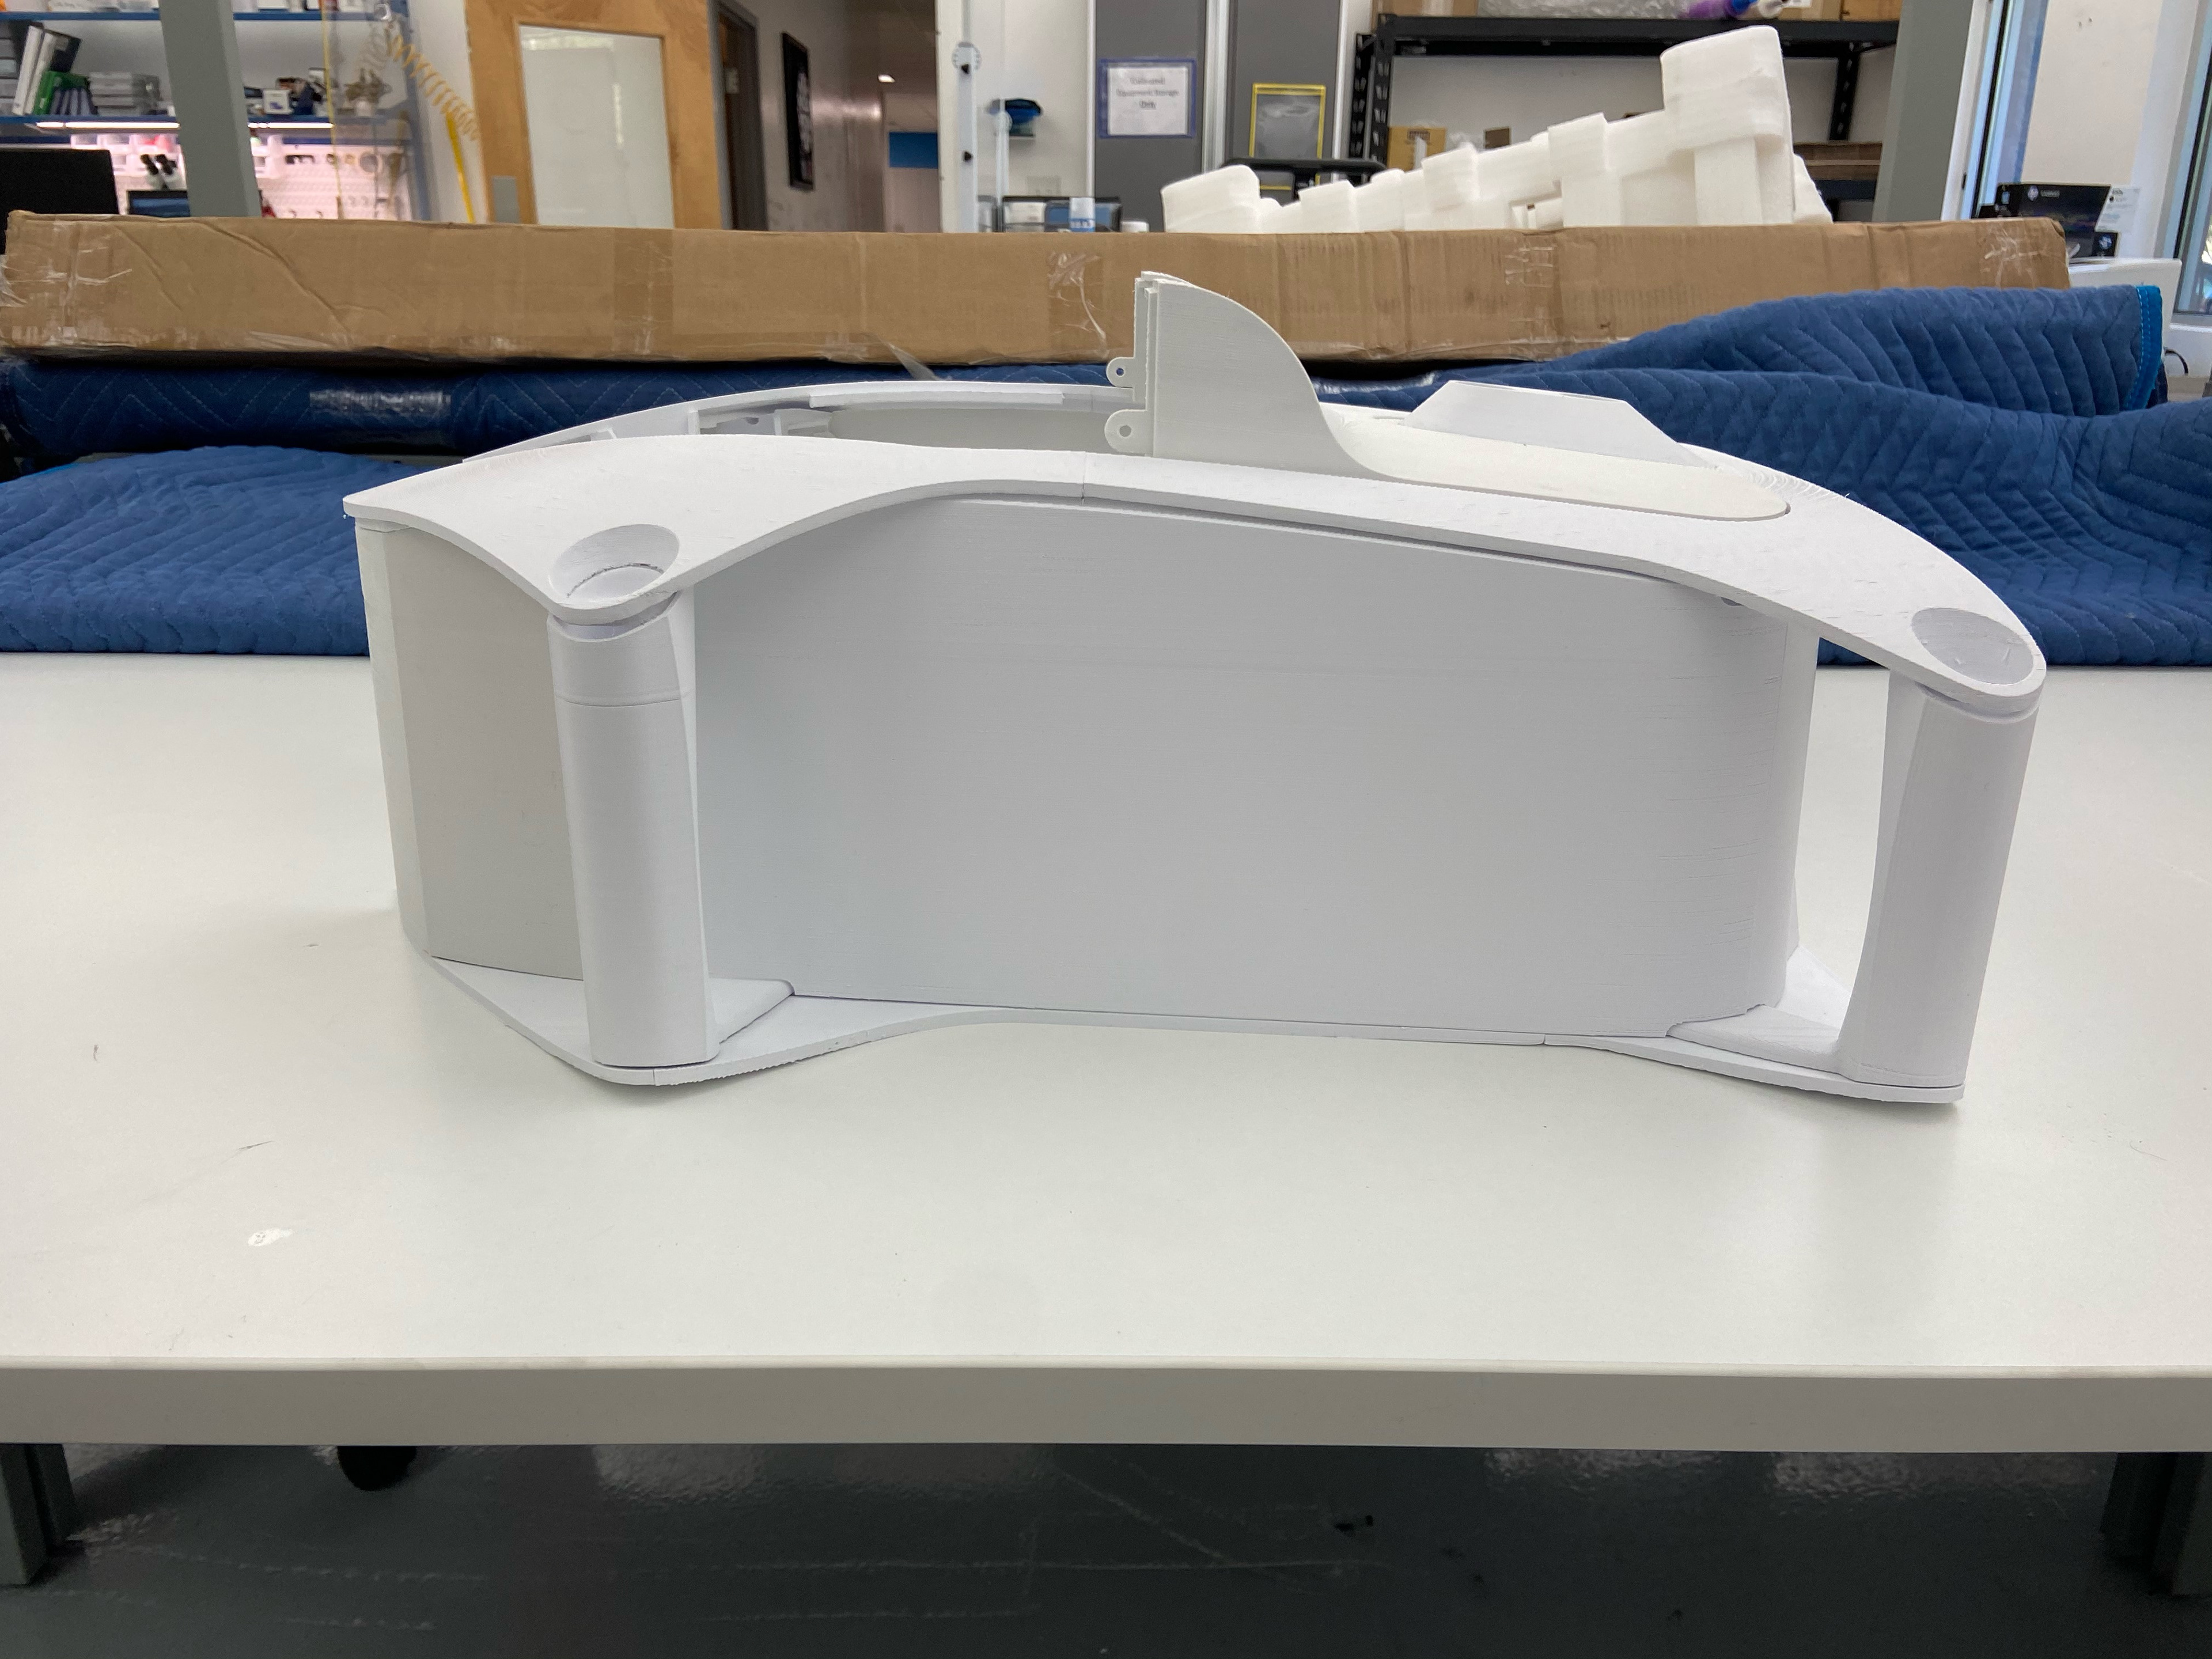
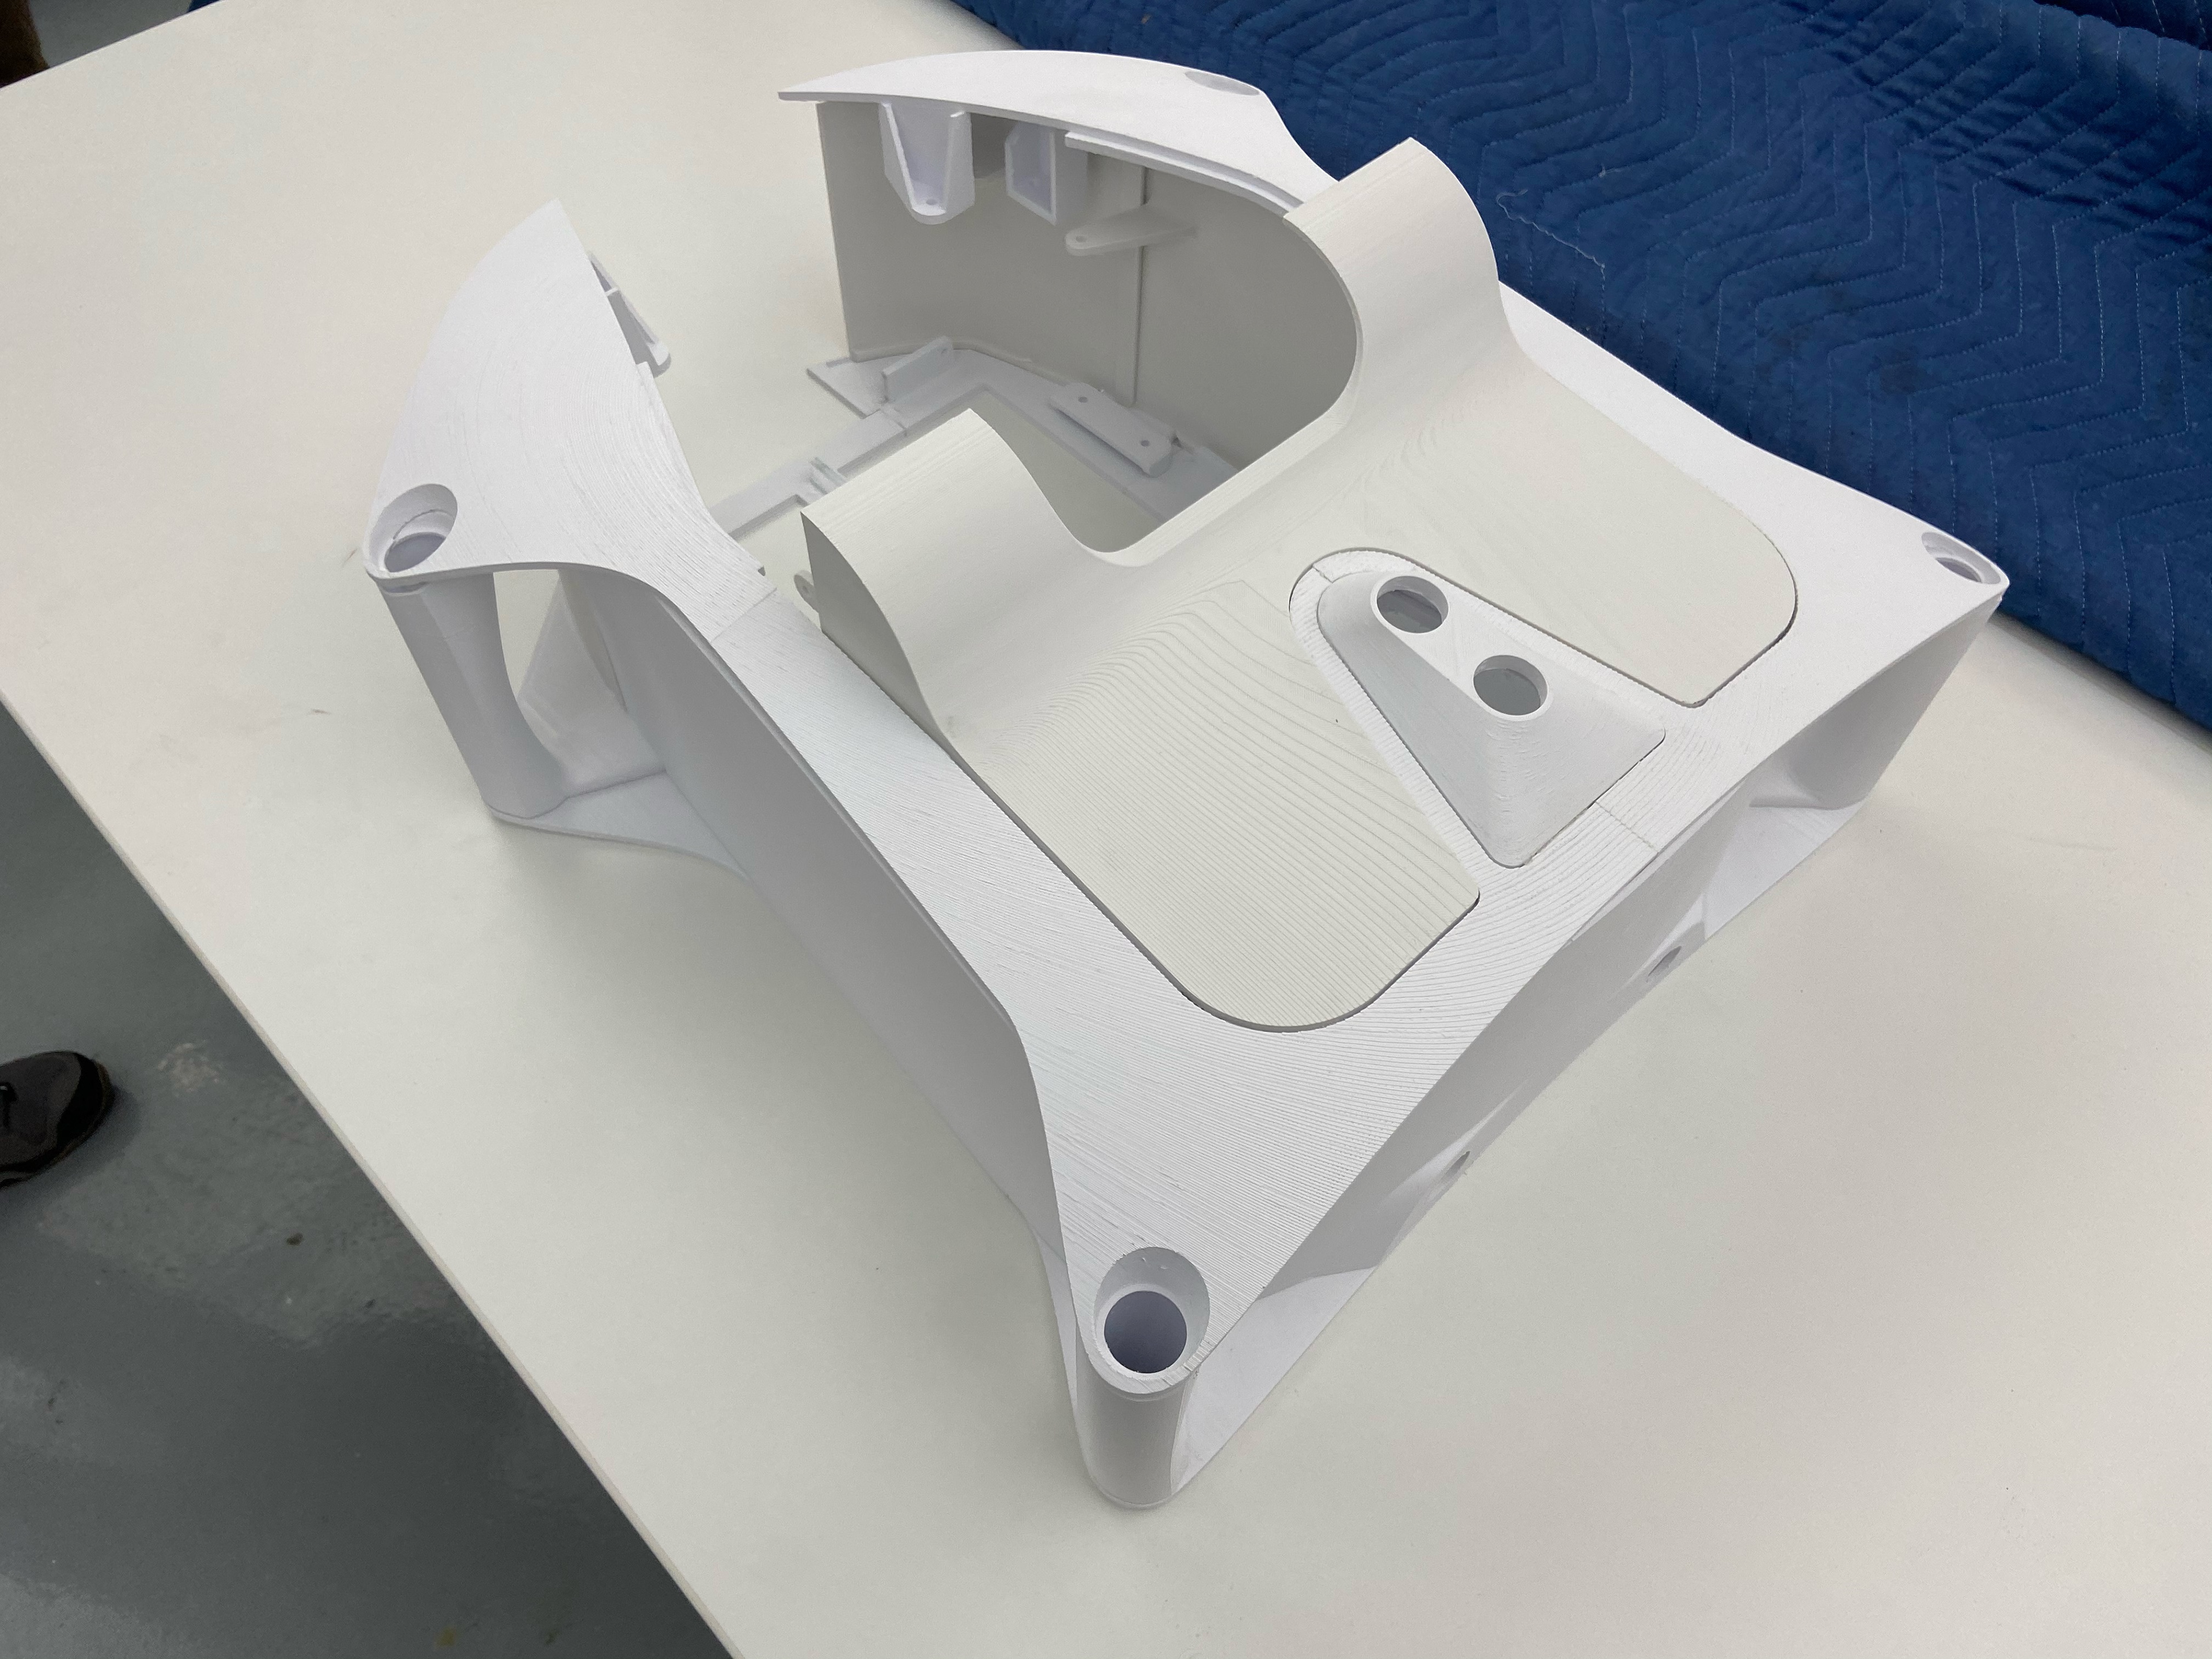
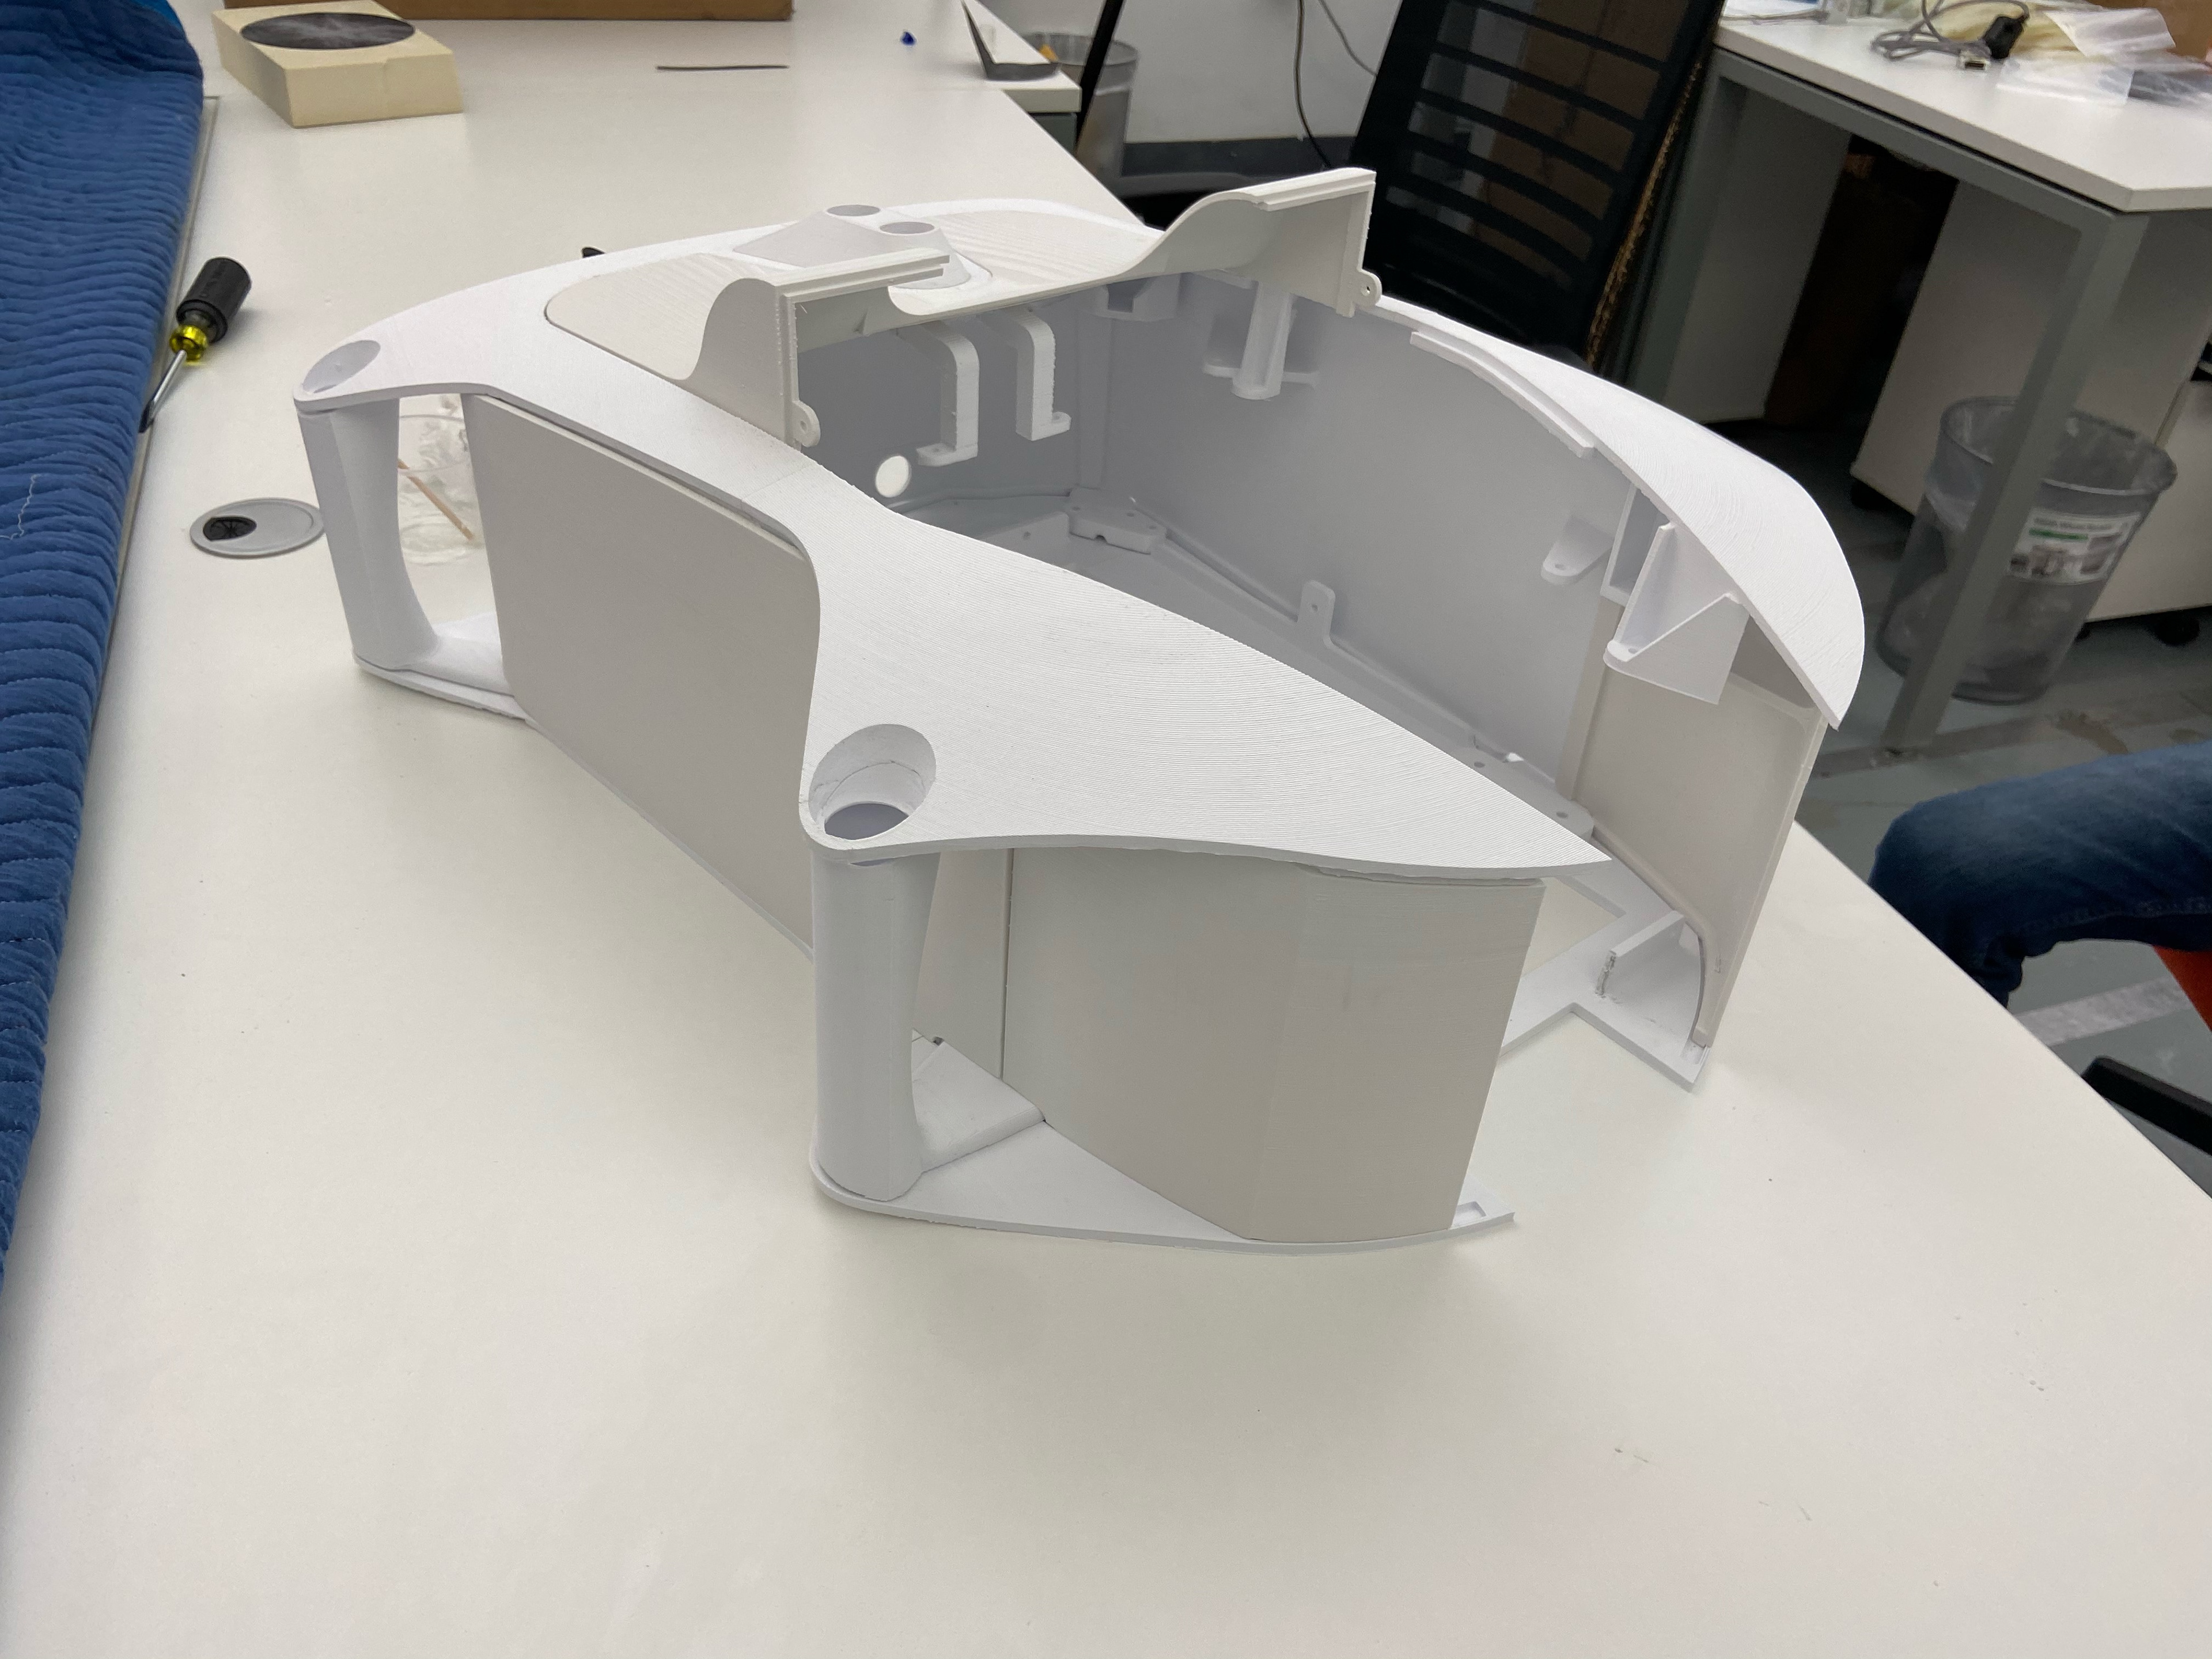
Before moving into the detailed mechanical design we printed a full-scale volume model to assess ergonomics and simulate the sterile barrier to CU and CIT/EM interface.
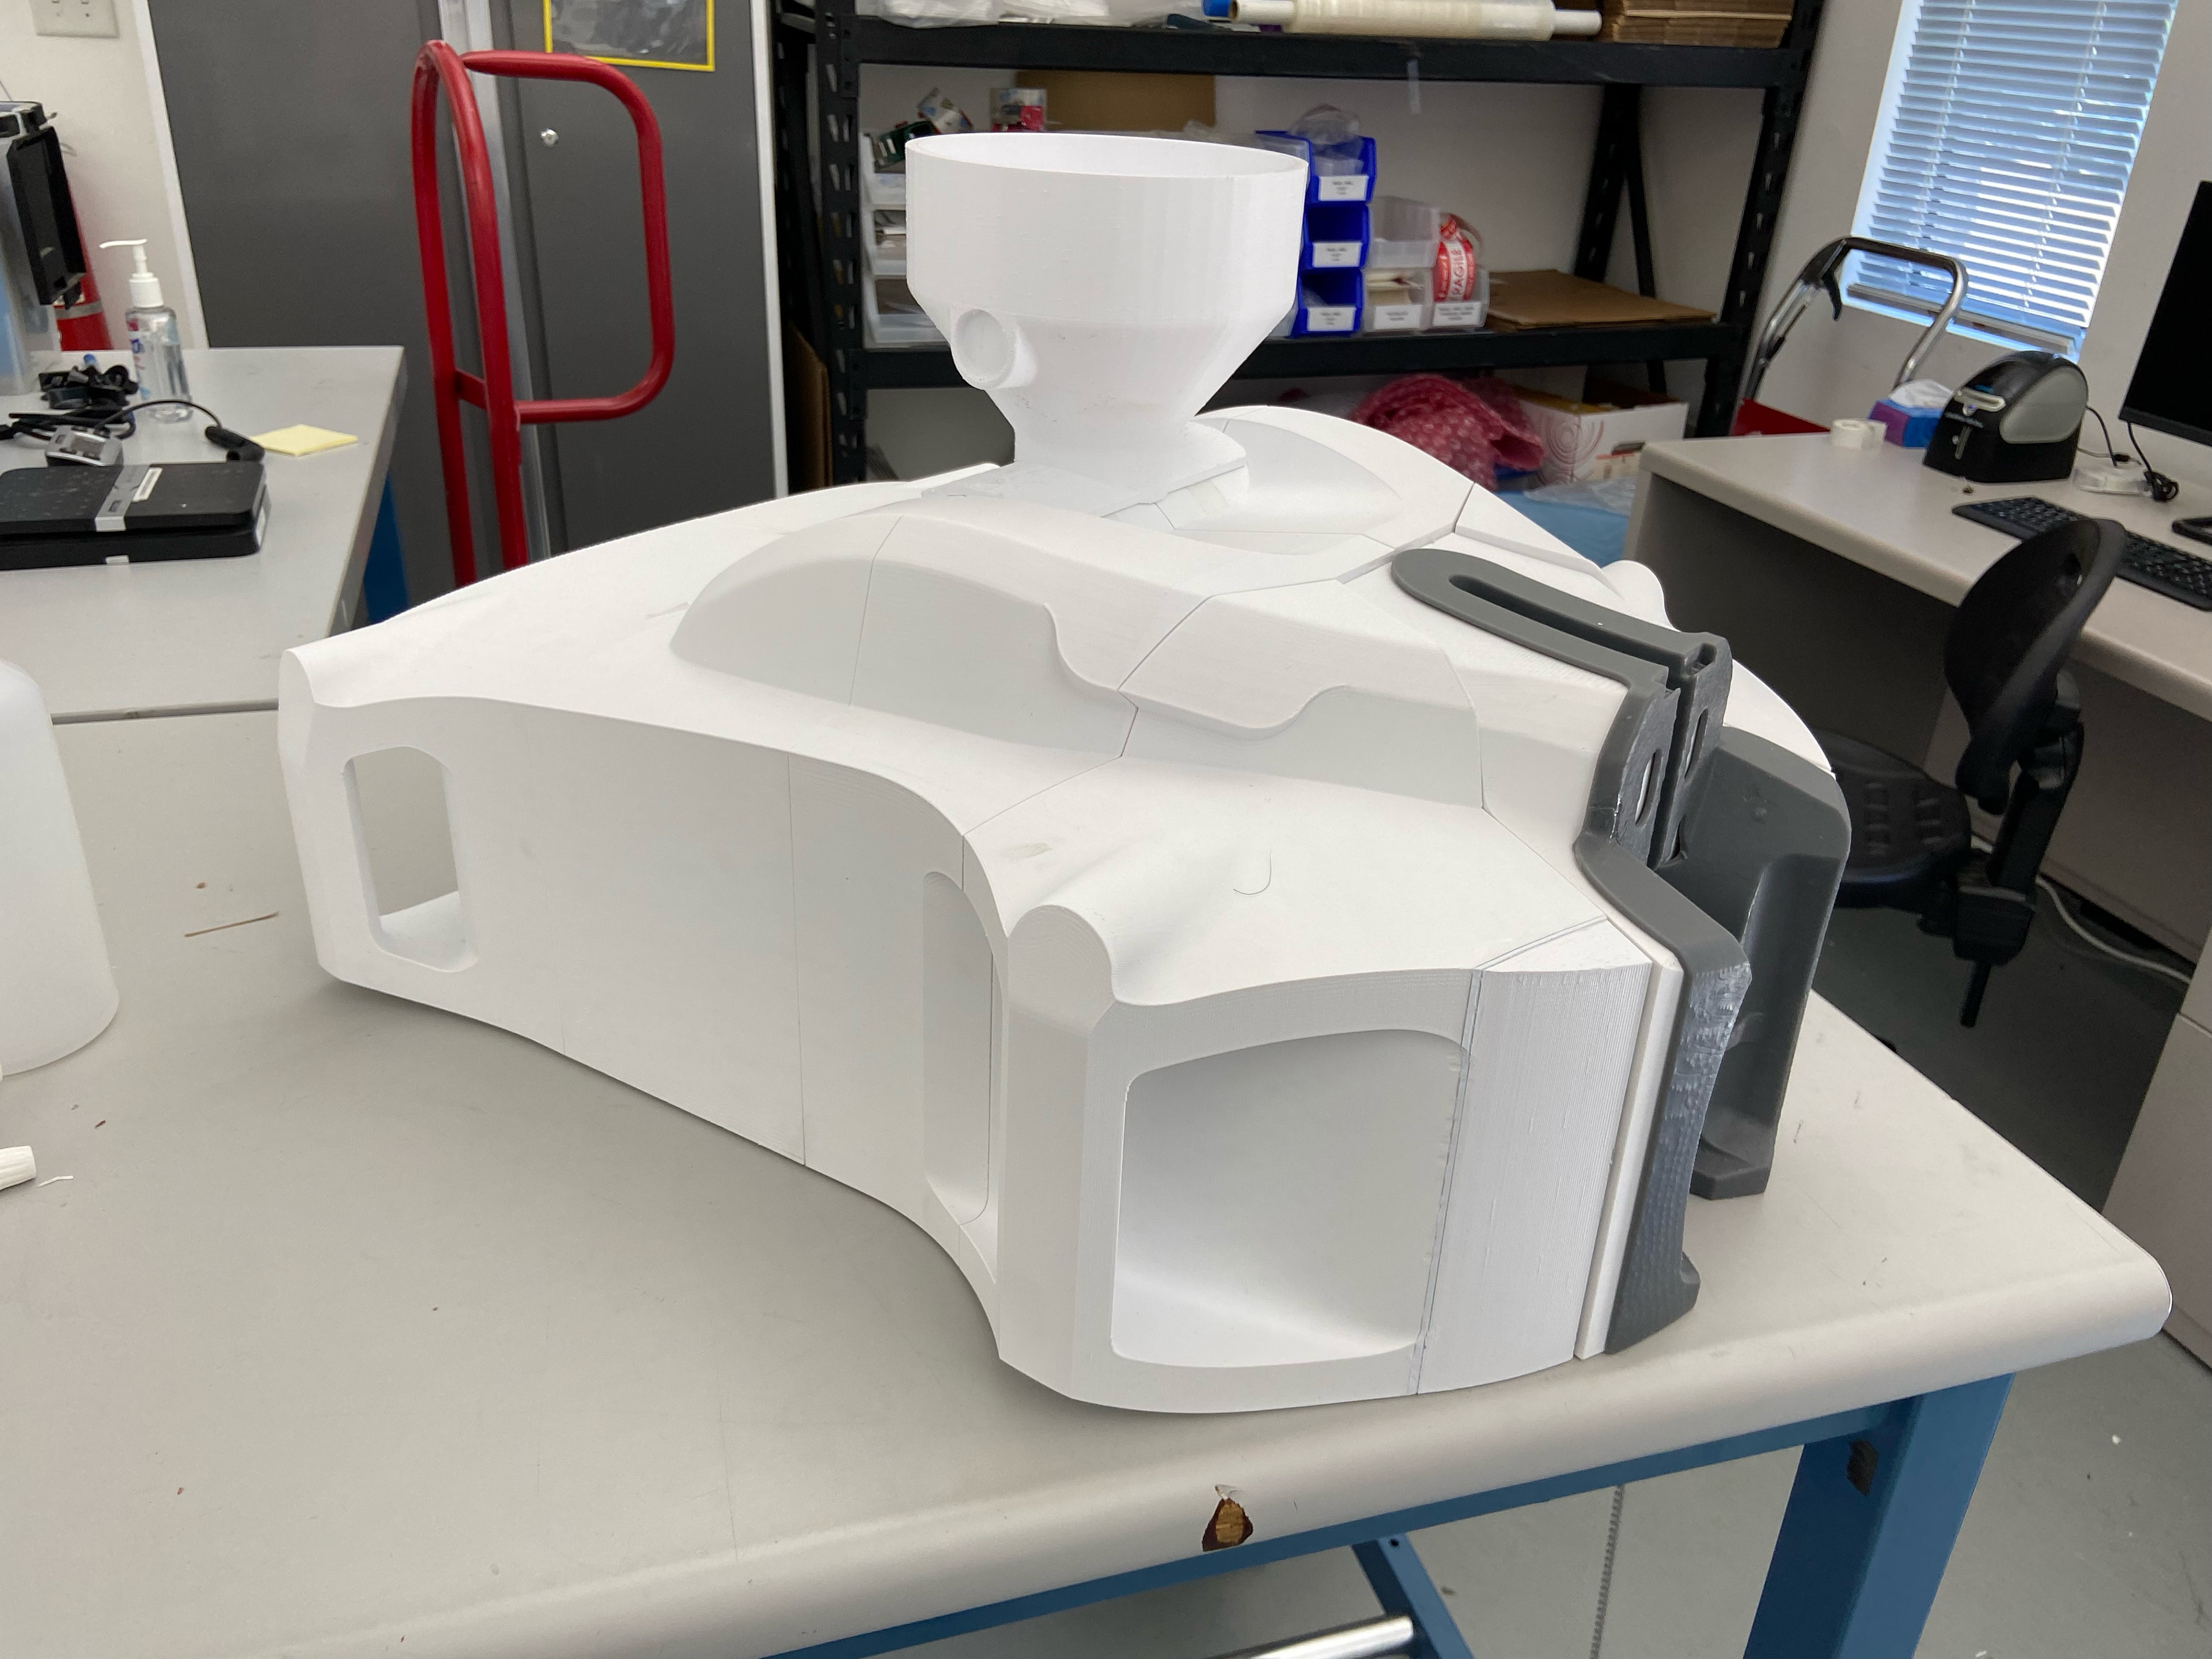
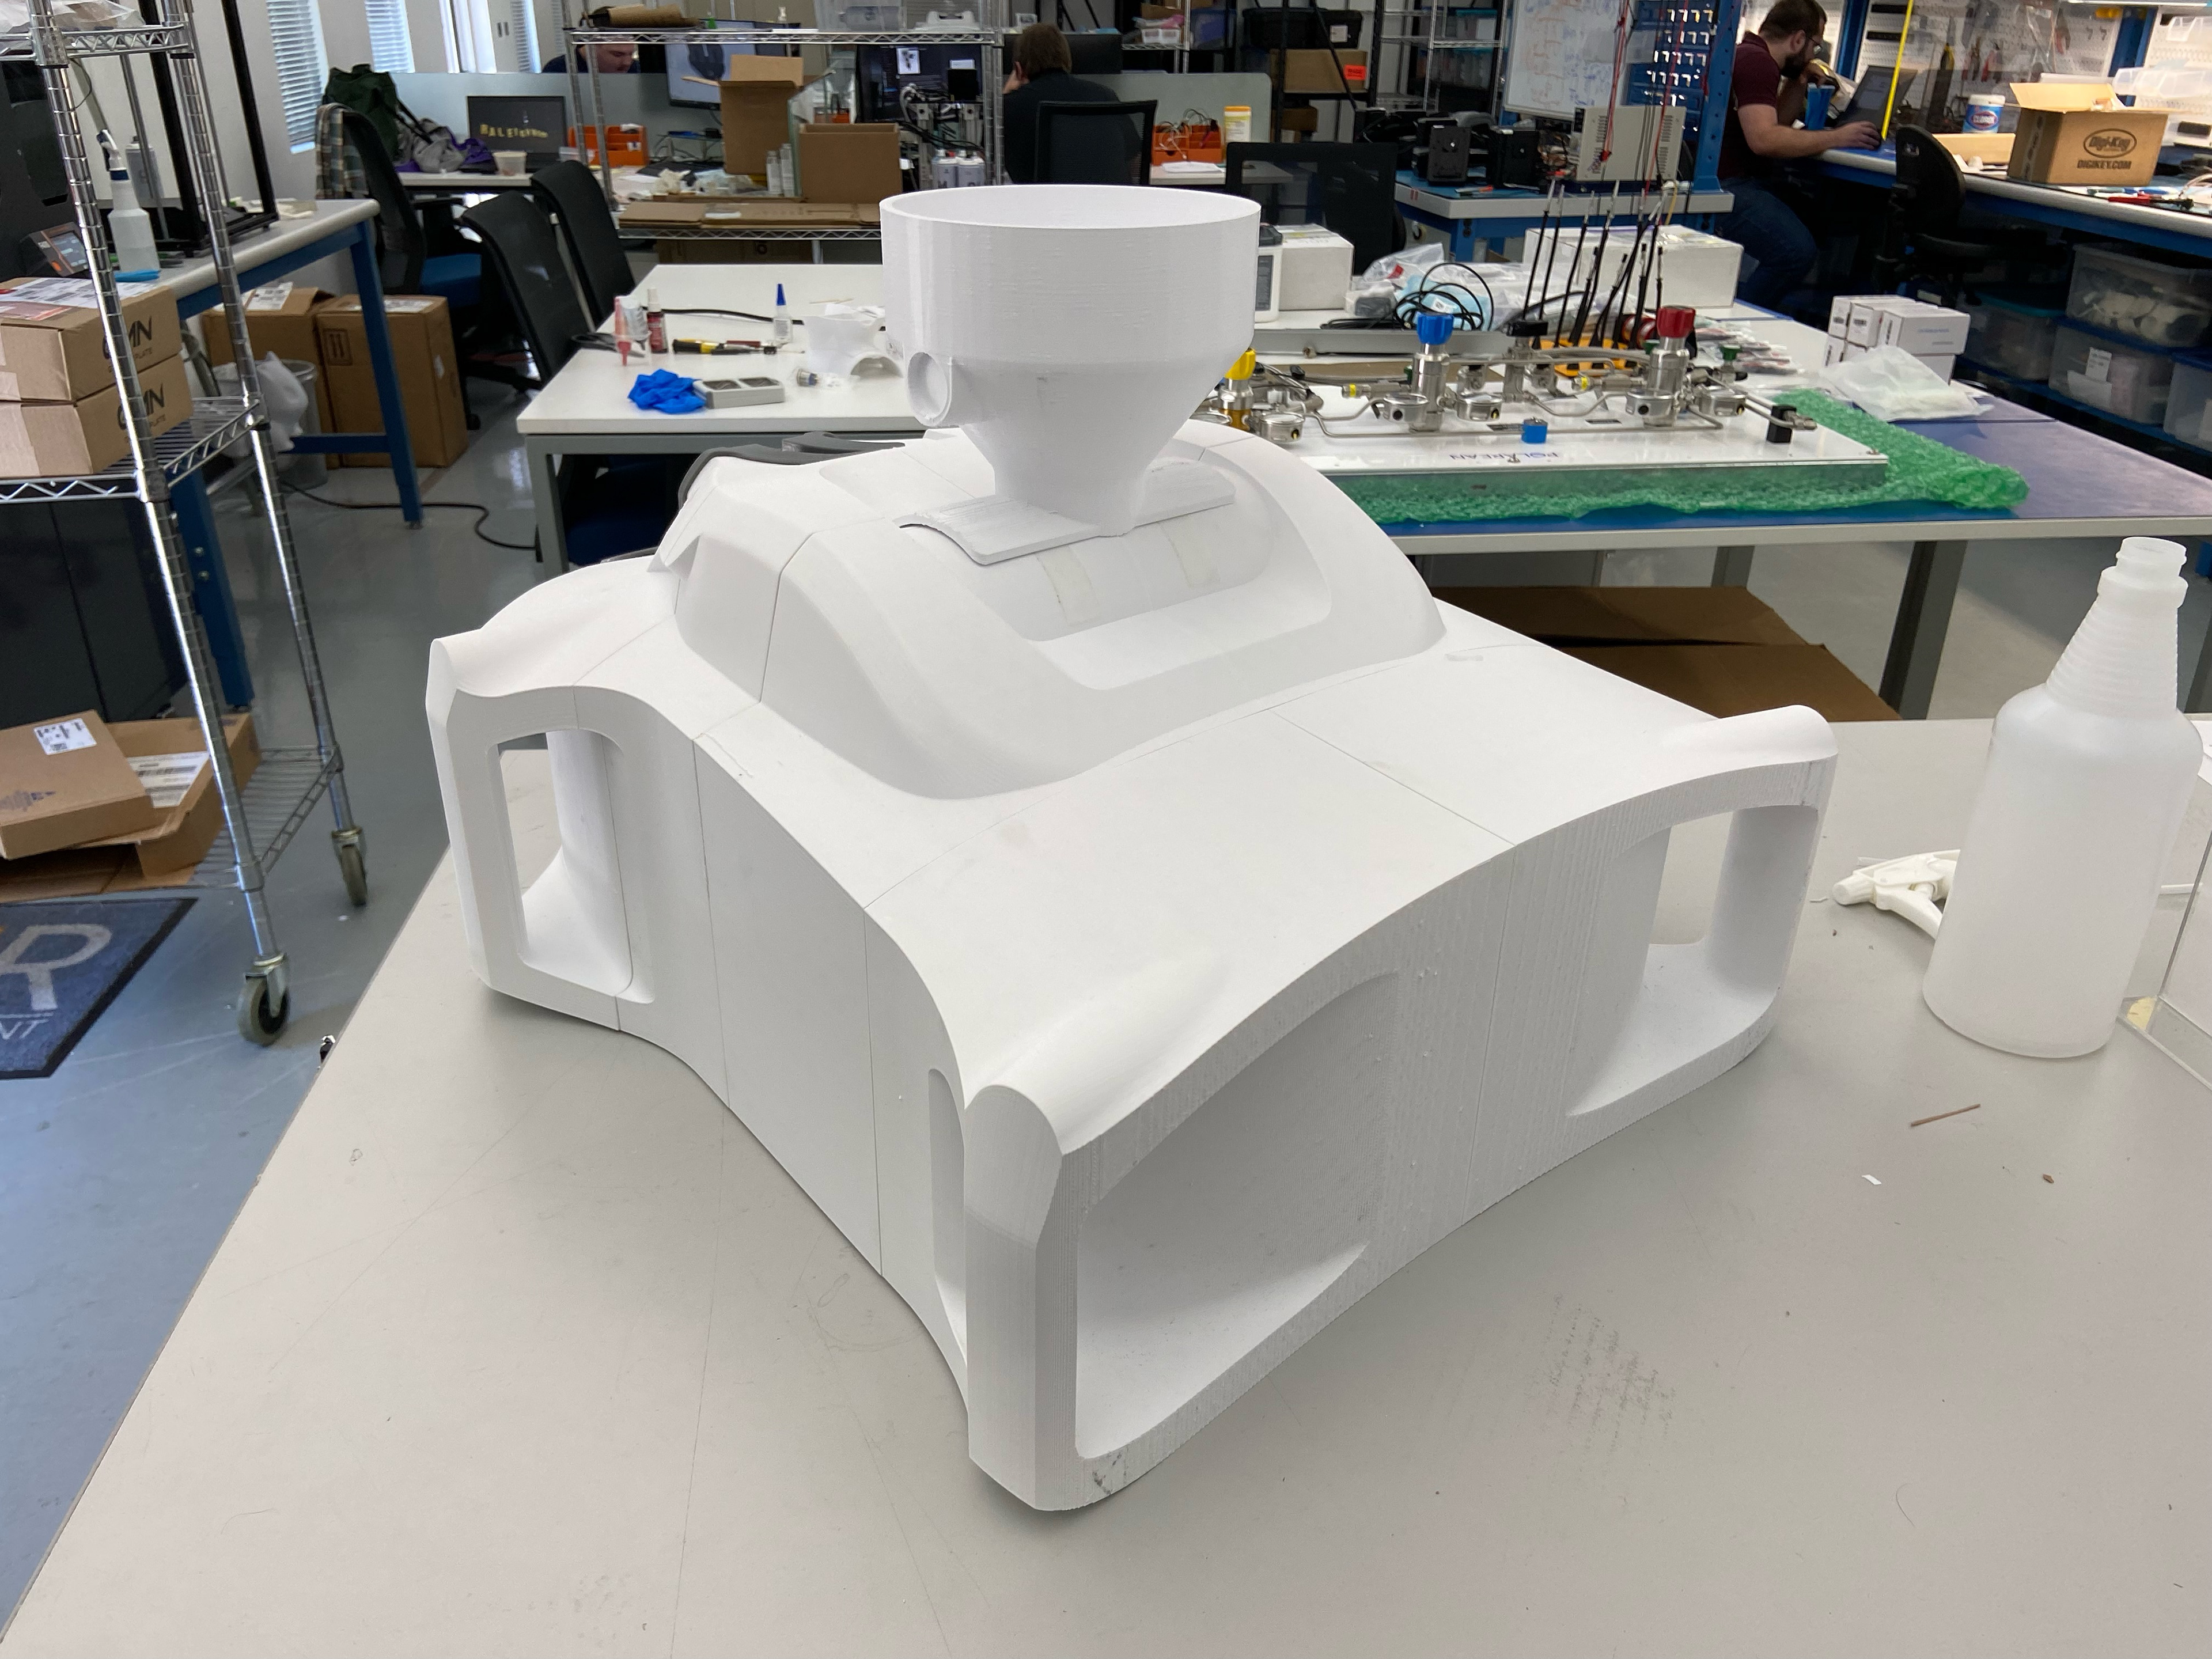
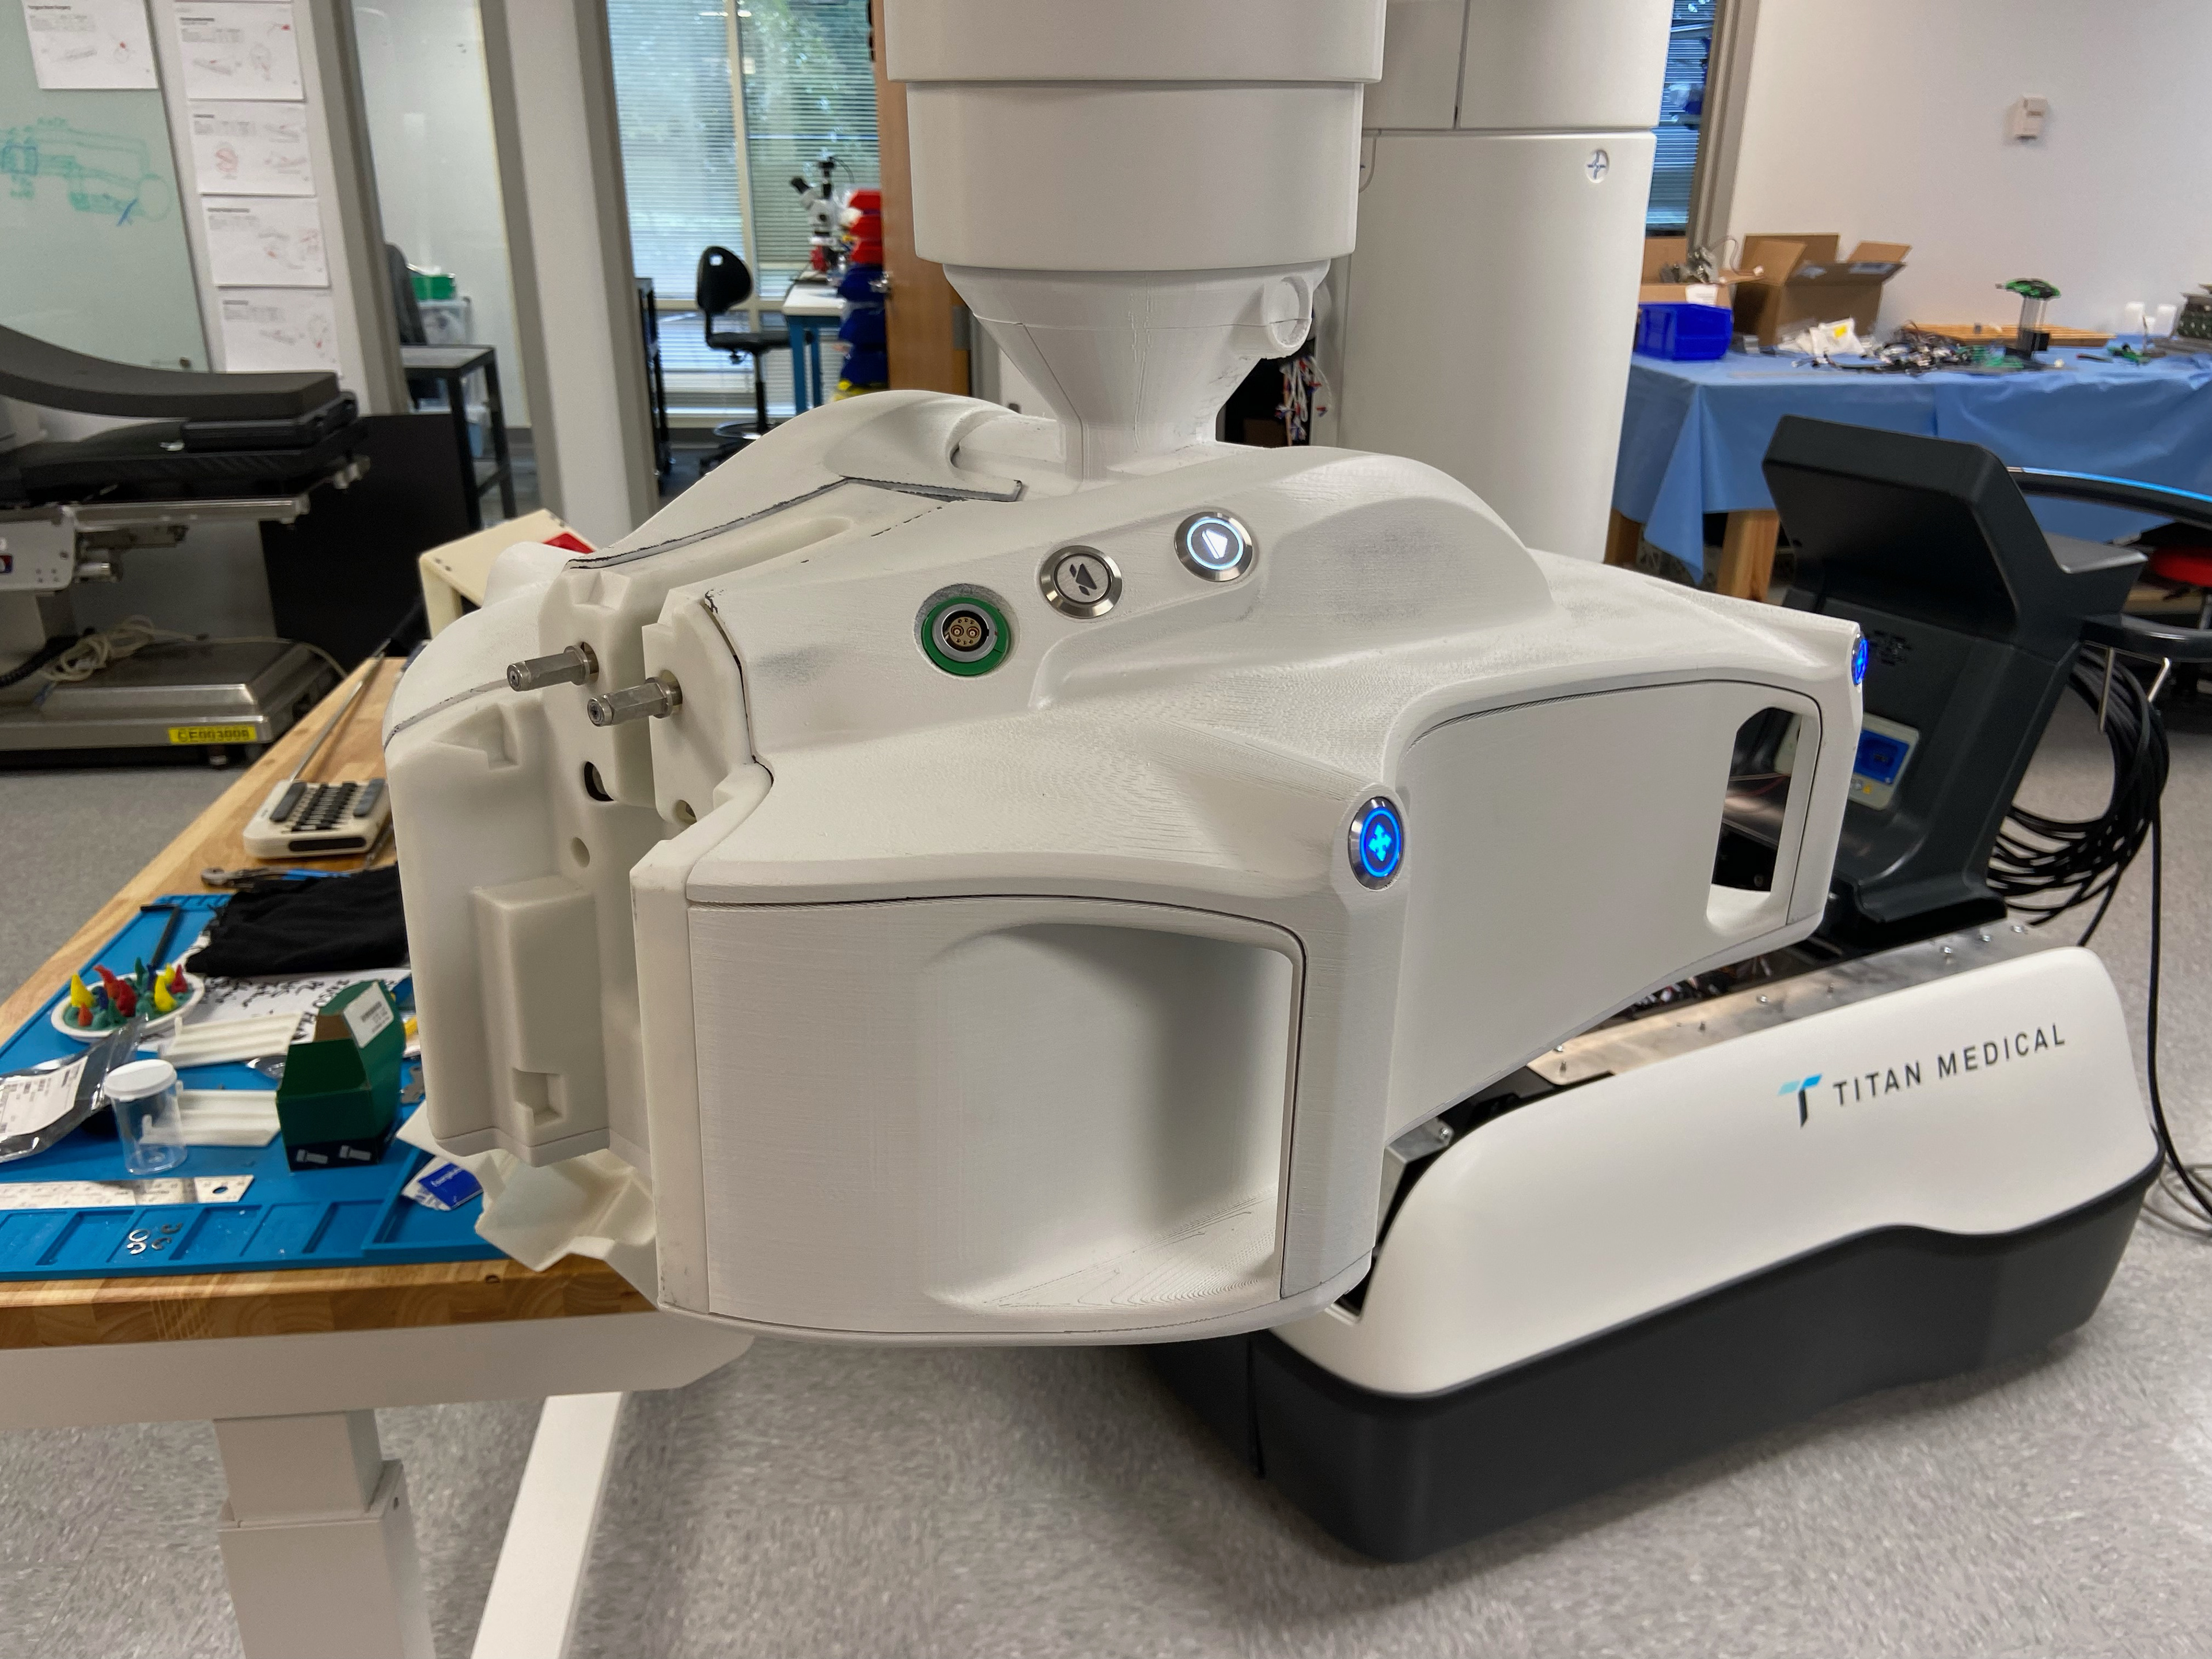
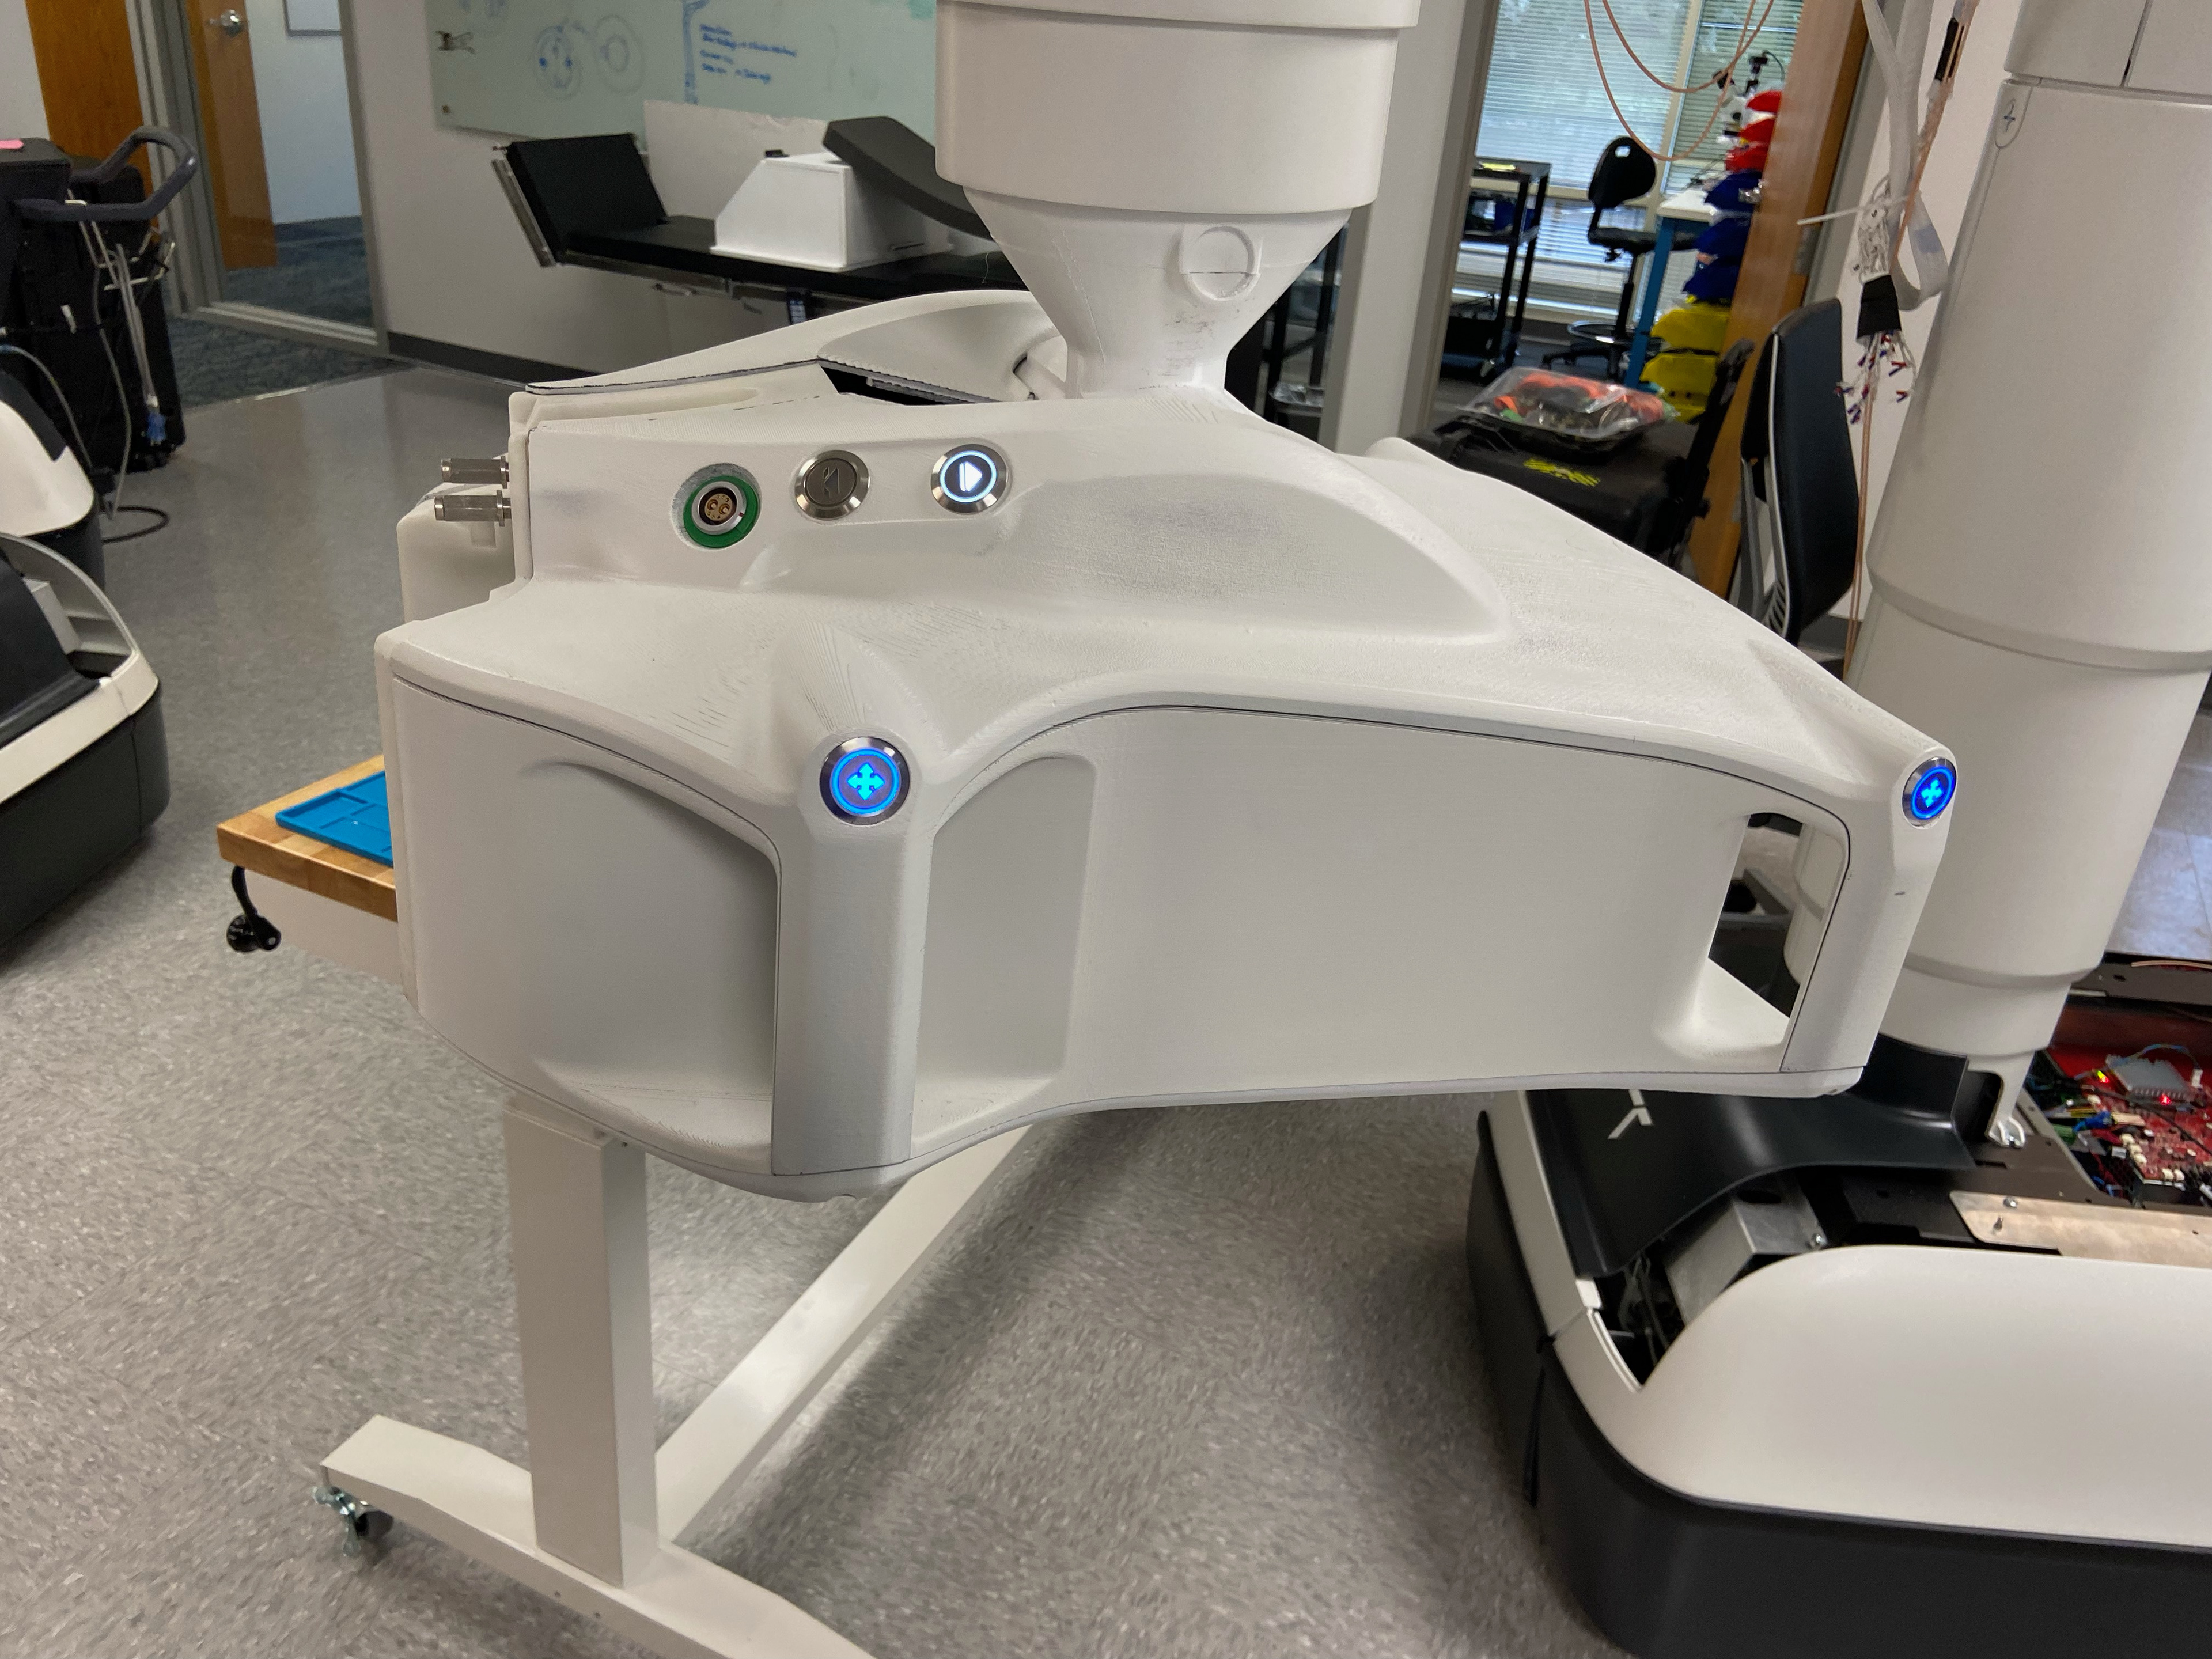
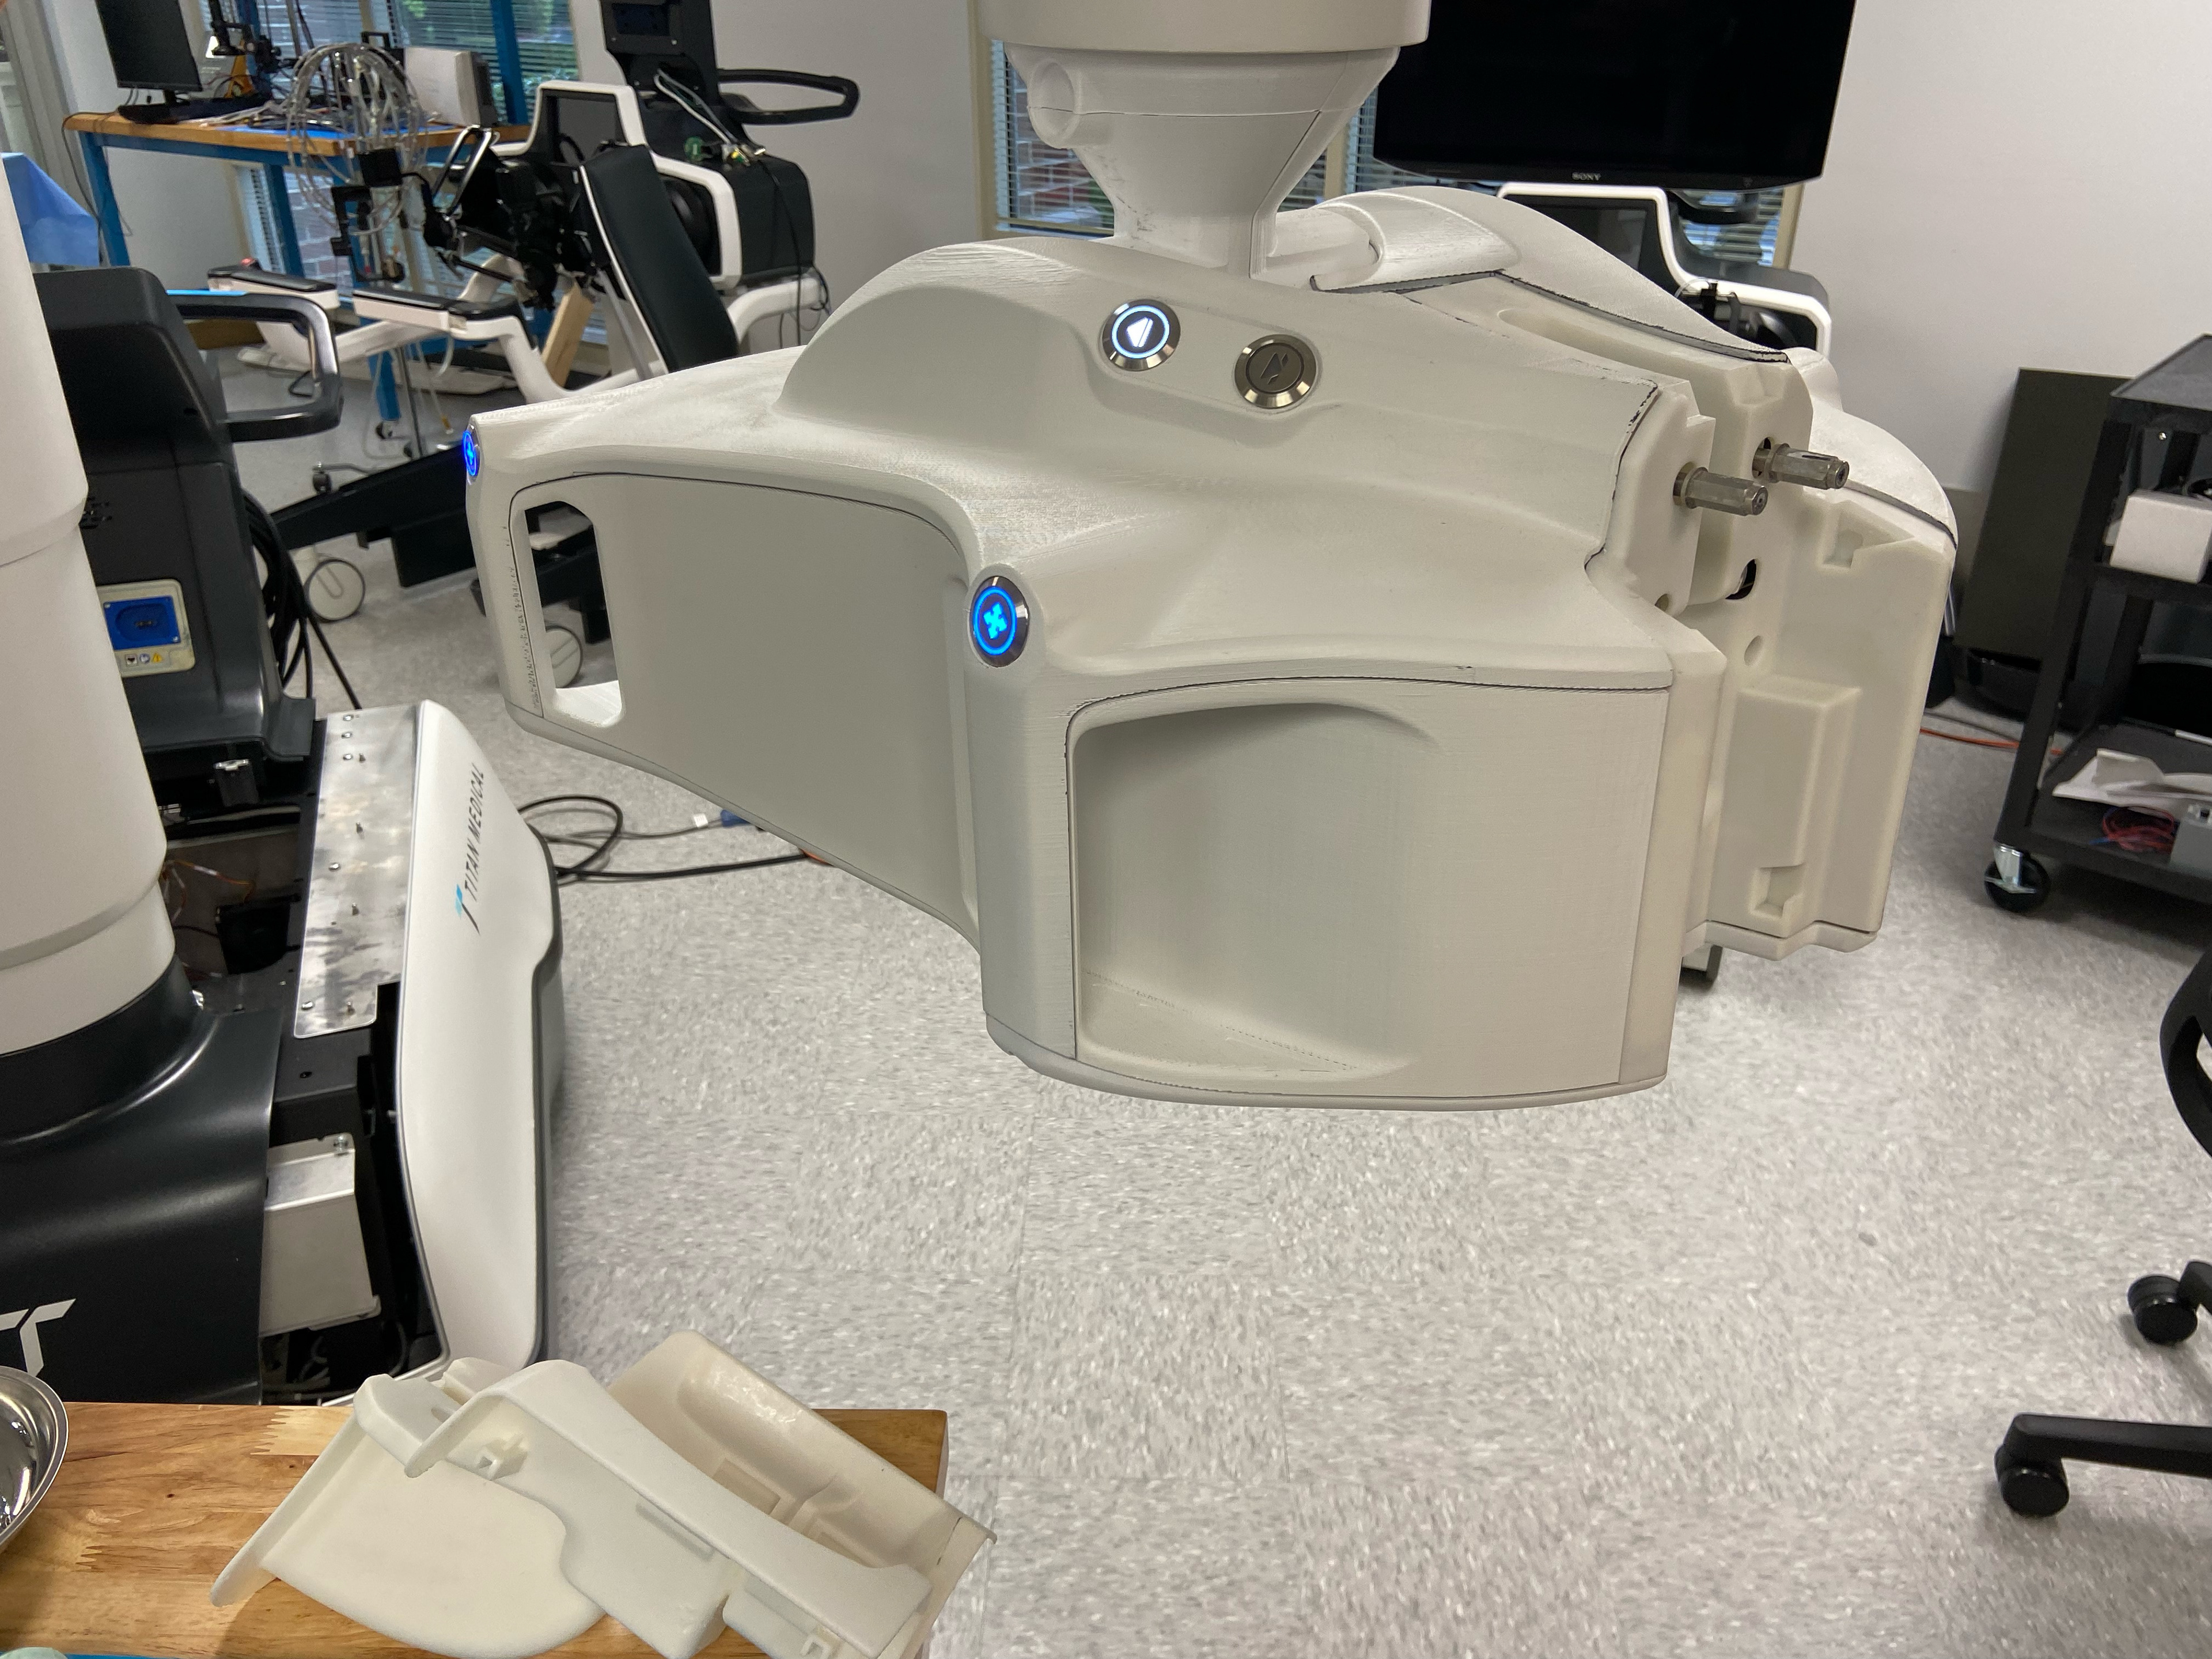
3D printed skin housings mounted to the new CU.
The final housings were 3D printed and painted to match the patient cart base. These housings were used in cadaver and pig labs to test the devices' reliability and function. The final production method was to have large housings cast out of urethane or molded via reaction injection molding.

Reflection
This project strengthened my ability to lead design within a highly regulated medical environment where usability, safety, and engineering constraints intersect. Working closely with surgeons, nurses, and mechanical engineers taught me how to translate workflow pain points into actionable design requirements and validate solutions through rapid mid-fidelity prototypes. I developed a deeper appreciation for contamination control, sterile-field ergonomics, and the realities of integrating new interfaces into complex electromechanical systems. Ultimately, this experience reinforced the value of structured collaboration and iterative testing in delivering solutions that improve both clinical efficiency and user confidence.